
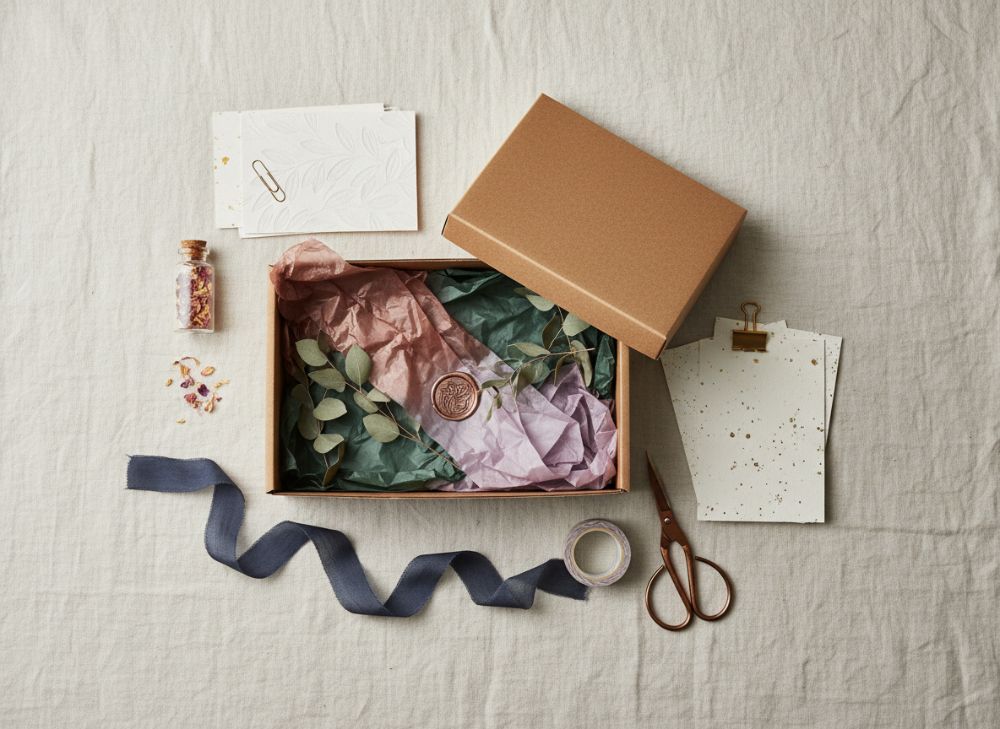
Perfect gift packaging balances presentation, protection, cost and repeatable production. The most effective route is to set the unboxing experience first, then make every visual and structural decision work within clear size, material, assembly and budget constraints.
This ultimate checklist for perfect gift packaging design & production will help you move from an initial concept to a specification a packaging supplier, internal team or co-packer can use. Complete the decisions in order: a beautiful box that is difficult to pack, too large for its contents or prone to damage is not a finished solution.
Before approving artwork or ordering stock, confirm that you can answer these questions:
- What should the recipient feel when opening the pack?
- What are the exact packed dimensions, weight and fragility of the product?
- Which packaging parts are essential: box, insert, sleeve, tissue, tag, sticker or ribbon?
- How will the product be packed and checked in practice?
- What costs are included beyond the printed box itself?
- Which labelling, material, safety or market requirements need checking for your product and sales channels?
Defining Your Gift Box Aesthetic and Mood
Start with a single, practical creative direction. Gift packaging should make the product feel intentional while still clearly belonging to your brand. “Premium” is not a visual style by itself; define what premium means for this particular item.
For example, a high-end skincare gift may call for soft-touch surfaces, restrained colour and careful spacing. A celebratory food hamper may suit brighter colour, illustration and a more expressive opening experience. A sustainable-looking concept may use uncoated board, minimal ink coverage and simple paper-based components, but those choices still need to protect the product adequately.
Write a brief covering:
- Brand cues: logo position, core colours, typography and illustration style.
- Gift occasion: birthday, seasonal promotion, welcome gift, product launch or year-round retail.
- Desired mood: refined, playful, handmade, modern, festive, calm or bold.
- Unboxing sequence: what the customer sees first, what is revealed next and whether a message is included.
- Product hierarchy: the product should remain the focal point, rather than becoming lost among decorations.
- Finish priorities: choose one or two details that matter most, rather than applying every available finish.
Keep the design readable at real size
Artwork that looks balanced on a screen may become crowded on a small box panel. Review the dieline at 100% scale before approval. Check minimum readable type, line thickness, barcode area where applicable, safe margins and the placement of logos near folds or openings.
Also consider the finish in relation to the design. Foil, embossing, debossing, spot varnish and textured stocks can add interest, but detailed artwork may not suit every process. Ask for production guidance before relying on fine lines, tiny reversed text or precise registration between multiple decorative effects.
A useful rule is to give every component a job. If tissue, a sleeve and a ribbon all repeat the same branding without improving protection or the experience, simplify the system.
Finalising Structural Design (Size, Style)
The structure determines how safely the product travels, how it is presented and how quickly it can be packed. Do not choose a box style solely from a product photograph. Measure the final, sellable item including its primary pack, cap, cable, leaflet, accessories and protective wrap.
Record three sets of dimensions:
- Product dimensions: length, width, height and weight of every item.
- Pack-out dimensions: the product with any required inner wrap, insert or cushioning.
- Finished outer dimensions: the internal box size plus the space needed for presentation and safe closure.
Allowing too little room can scuff products or distort the box. Allowing too much room may make the product look underfilled and can increase the need for filler material.
Choose a box format that matches the job
| Box style | Best suited to | Key strengths | Points to check |
|---|---|---|---|
| Tuck-end carton | Light, compact products | Efficient use of material and straightforward opening | Closure security, product movement and panel space |
| Rigid two-piece box | Premium gifts and presentation-led products | Strong reveal and substantial feel | Storage space, unit cost and added protection during dispatch |
| Magnetic closure box | Gift sets and reusable presentation | Convenient opening and strong visual impact | Closure alignment, material use and whether it arrives assembled or flat |
| Drawer box | Products that benefit from a staged reveal | Good for inserts and controlled presentation | Sleeve fit, pull-tab durability and assembly steps |
| Foldable rigid box | Gift packaging needing a rigid appearance with more compact storage | Can reduce storage volume before use | Fold lines, set-up consistency and assembly time |
| Sleeve and inner tray | Existing packs, bundles or limited editions | Adds branding without fully enclosing the product | Scuffing, retention and whether the sleeve slips in handling |
For a broader starting point, compare custom box options against the product’s size, presentation needs and packing method rather than selecting by appearance alone.
Build protection into the structure
Gift packaging is not automatically protective packaging. If the finished item will be moved through multiple handling stages, assess whether it needs an outer transit carton, corner protection, a snug insert or internal wrapping.
Choose an insert based on the item rather than its appearance alone:
- Folded card inserts can separate light products and hold simple shapes.
- Paperboard platforms can create height and improve the reveal.
- Moulded or formed inserts may suit products needing more precise retention.
- Tissue or paper wrap can reduce surface scuffing but does not restrain heavy items.
- Partitions are useful where several products must not touch each other.
Check the opening experience with the actual product inside. The customer should not need to shake the box, pull aggressively or damage the packaging to remove the item.
Choosing Premium Paper Box Materials
Material selection affects print appearance, handling, durability, recyclability considerations and cost. “Paper box” can mean several different constructions, so specify both the board and the finish rather than using broad terms alone.
Common options include:
- Folding boxboard: often suitable for printed cartons and lighter gift packs.
- Corrugated board: useful where added structure or transport protection is needed.
- Rigid board wrapped with printed paper: commonly used for substantial presentation boxes.
- Uncoated paper: offers a natural, tactile surface and can suit understated designs.
- Coated paper or board: can support crisp graphics and certain decorative finishes.
- Textured paper: adds physical character but can affect fine print detail and colour consistency.
Match finish to handling conditions
A finish needs to work after packing, stacking and customer handling, not only at the point of approval. Dark solid colours, for instance, can show scratches and fingerprints more readily than lighter or patterned artwork. Highly reflective finishes can show marks, while textured surfaces can make very fine details less crisp.
Use this material checklist:
- Is the board weight and construction appropriate for the product weight?
- Will the pack stay square when filled and stacked?
- Does the finish resist the expected handling level?
- Are glue areas, fold lines and decorative treatments compatible?
- Can the selected material reproduce the intended colour and small text?
- Can each component be separated easily if recyclability is a design aim?
- Have you checked applicable packaging, labelling and product-specific requirements for the intended UK market?
Avoid making environmental claims from appearance alone. If you plan to use claims such as recyclable, recycled content or plastic-free, confirm that they are accurate for the complete pack, including coatings, adhesives, magnets, liners and decorative additions.
Integrating Branded Label Stickers and Tags
Stickers and tags are flexible additions to gift packaging. They can carry seasonal messaging, product information, sealing functions or a handwritten-style personal note without requiring a new full-box print design.
Use labels where they add a clear benefit:
- Seal tissue paper, wrap or a belly band.
- Differentiate product variants using a shared box.
- Add batch, use-by, ingredient or other variable information where relevant.
- Support campaign messaging without redesigning every packaging panel.
- Add a gift message or thank-you note.
A tag can make a gift feel more personal, especially when tied to a handle, ribbon or neck of a product. However, it introduces another attachment step and can catch or bend during handling. Choose its size, hole position, string length and stock weight with the packed product in hand.
Explore custom printed stickers when a label is intended to be part of the packaging system rather than an afterthought.
Check adhesion and information placement
Sticker performance depends on the surface it is applied to. A label that adheres well to smooth coated board may behave differently on textured, uncoated or dusty surfaces. Test labels on final production-like materials, including curved or folded areas where relevant.
Do not place a sticker across an opening unless it is deliberately designed as a tamper or seal feature. Ensure it can be applied consistently without covering required information, key branding or a barcode where one is used.
Quality Assurance and Sample Testing
A sample is where concept becomes a real packaging decision. Never approve from a flat artwork proof alone when structure, material, colour or finishing is important.
Request and review the appropriate stage of sample before committing to a larger production run. The type of sample available may vary, so clarify what it represents. A plain structural mock-up can verify dimensions and fit, while a decorated sample may help assess colour and finish. Neither necessarily replicates every aspect of final production unless specifically agreed.
Practical sample-testing checklist
Pack the actual finished product, not an approximation, and check:
- Fit: the item sits securely without excessive force or empty space.
- Opening: tabs, drawers, lids and magnetic closures operate as intended.
- Product removal: the item can be lifted out without tearing the insert or damaging itself.
- Visual alignment: key artwork is not awkwardly split by folds, seams or closures.
- Print legibility: small type, reverse text, codes and icons remain clear.
- Finish quality: decorative effects are placed accurately enough for the design.
- Surface wear: assess likely rubbing at corners, edges and contact points.
- Assembly: time each step and identify where errors are likely.
- Transit readiness: check the packed product within its intended shipping arrangement.
Keep an approved reference sample and a written specification. The specification should identify dimensions, materials, print colours, finish, artwork version, tolerances to be agreed, packing configuration and acceptance criteria. This reduces confusion when future batches or components are ordered.
Sourcing Decorative Fillers and Accents
Fillers and accents can make a gift box feel generous, but they should support the product rather than hide a poor-fitting structure. A small amount of neatly arranged tissue may create a better result than a box overfilled with decorative material.
Possible additions include:
- Tissue paper for wrapping and surface protection.
- Shredded paper for light cushioning and volume.
- Crinkle-cut paper for a more textured presentation.
- Ribbon, twine or belly bands for closure and occasion branding.
- Printed cards for instructions, messages or product stories.
- Seals, labels or shaped stickers for a final branded touch.
Balance presentation with pack-out practicality
Decorative additions create operational complexity. Each component needs storage space, clear quantities and a defined order of use. They can also obstruct product information, add weight or make the box difficult to close.
Before selecting filler, establish:
- The approximate volume required per box.
- Whether it sheds, transfers colour or creates dust.
- Whether it is suitable near the product and its primary packaging.
- Whether staff can use a consistent quantity without lengthy measuring.
- Whether it affects the dimensions of the finished, closed pack.
- How the recipient is expected to separate or dispose of the materials.
For coordinated formats and finishing ideas, review gift packaging options alongside the required product protection and assembly process.
Calculating All-In Packaging Costs
The unit price of a box is only one part of the packaging cost. A realistic budget includes every component and task required to turn the product into a finished gift-ready item.
Use this basic calculation:
All-in packaging cost per finished gift = packaging component costs + print and finishing costs + packing materials + assembly labour + sampling and artwork costs allocated per unit + expected waste allowance
Your component list may include:
- Outer box, sleeve or carton.
- Insert, divider or tray.
- Tissue, filler, ribbon, tag, label and information card.
- Protective inner wrapping.
- Outer dispatch packaging where needed.
- Storage and handling requirements.
- Labour for folding, filling, sealing and checking.
Compare options on total cost, not box price
A foldable box might cost less to store but take longer to assemble. A rigid box may reduce packing steps but require more storage space. A single printed box may cost more upfront than a plain box with a sticker, yet reduce manual labelling work.
When comparing quotations or internal estimates, ensure each option is based on the same assumptions:
- Quantity and artwork versions.
- Box style and final dimensions.
- Material and finish.
- Whether boxes are supplied flat or assembled.
- Included inserts and decorative components.
- Sampling, tooling or set-up items where applicable.
- Packing configuration and any outer packaging.
- Expected rejection, rework or material waste allowance.
Do not assume that a lower-cost specification is the better value if it weakens product protection, complicates packing or diminishes the intended gift experience.
Setting Up a Streamlined Assembly Process
The best gift packaging design is one that can be assembled accurately by the people who will pack it. Design the production process before final approval, especially where there are several components.
Map the work as a simple sequence:
- Prepare and inspect the box.
- Form the box or open the pre-assembled structure.
- Place the insert or protective layer.
- Add tissue, filler or wrap where required.
- Position the product and accessories.
- Add the information card, tag or promotional insert.
- Close, seal or sleeve the pack.
- Carry out a final visual and fit check.
- Place the finished gift into its outer protective packaging if needed.
Reduce opportunities for mistakes
Make the pack-out process visual. A one-page work instruction with photographs or diagrams can show the correct product orientation, amount of filler, label position and final appearance. Keep approved samples at the packing station where possible.
Design choices that simplify assembly include:
- Using one label position rather than several.
- Designing inserts that only fit in the correct orientation.
- Limiting loose components.
- Printing instructions directly onto an internal panel where appropriate.
- Selecting closures that do not require fiddly manual alignment.
- Avoiding designs that need excessive folding, tying or measuring.
Run a small internal pack-out trial before larger production. It can reveal practical problems, such as a ribbon that slows every order, an insert that catches on the lid or an information card that moves during closure.
Common Gift Packaging Mistakes to Avoid
Several avoidable issues recur in gift packaging projects:
- Choosing dimensions before measuring the final packed product.
- Approving digital artwork without seeing a structural sample.
- Using too much filler to compensate for an oversized box.
- Adding finishes without testing their suitability for the artwork and handling.
- Forgetting that every label, tag and ribbon adds assembly time.
- Treating gift presentation as adequate protection for dispatch.
- Making material or environmental claims without checking the complete construction.
- Ordering components separately without confirming that their sizes, colours and application methods work together.
- Omitting a written specification and approved reference sample.
FAQ
How much empty space should a gift box have?
There is no universal measurement. Leave enough room for the product, any insert and a deliberate presentation layer, but not so much that the item shifts or looks undersized. Test the actual product in a sample box to determine the right allowance.
Should a gift box be supplied flat or assembled?
Flat-packed boxes can reduce storage volume and may suit simple assembly processes. Pre-assembled formats can improve consistency and save packing time. Compare the storage, labour, lead-time and handling implications for your specific operation.
Are labels better than printing directly onto the box?
Labels are useful for variable information, limited-edition messaging and smaller quantities. Direct printing can create a more integrated appearance and may reduce a manual application step. The better option depends on volumes, number of product variants, surface material and required finish.
What should be included in a gift packaging specification?
Include internal and external dimensions, box style, board or paper details, print artwork version, colours, finishes, inserts, labels, packing sequence and reference sample requirements. Also document any product-specific information or market checks that must be completed.
A well-designed gift pack is one that looks considered at first sight and remains dependable through packing, handling and delivery to the recipient. Once your checklist is complete, use it as the basis for comparing custom packaging solutions from XGolden Print or any other proposed specification, keeping fit, usability and total cost at the centre of the decision.
