
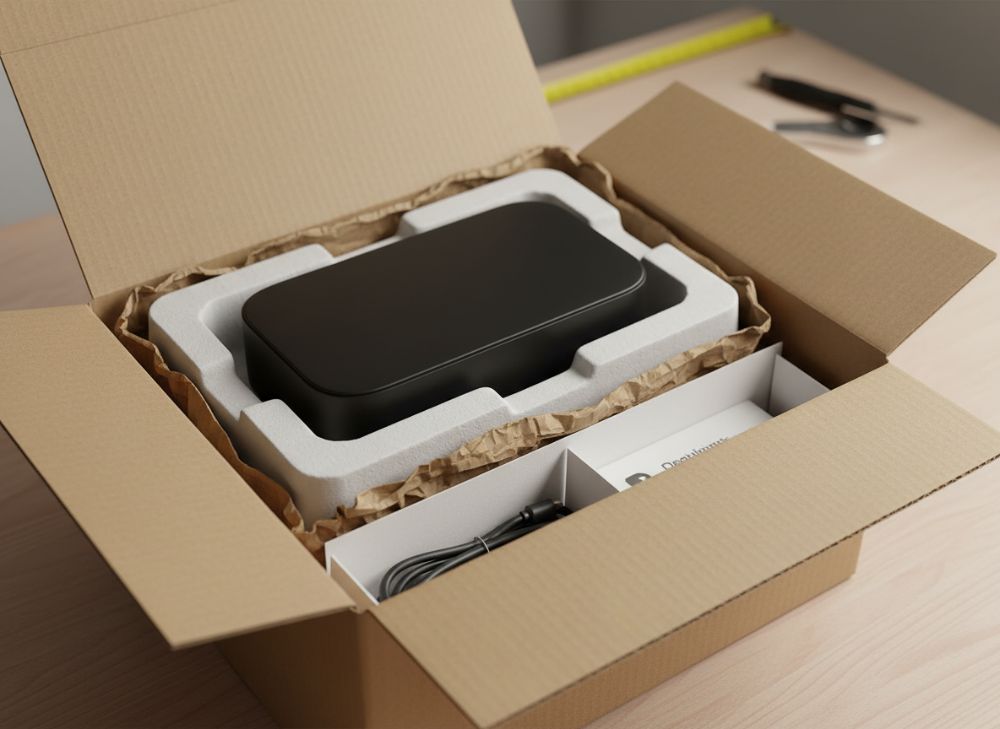
Custom paper box inserts and fillers do more than make a parcel look complete. They hold products in position, reduce movement in transit, separate delicate components and create a considered unboxing experience. The right choice depends on the product’s weight, shape, fragility, packing method and the presentation your brand needs to achieve.
For most projects, start with protection rather than decoration. Define how the product must sit inside the box, identify empty spaces that need controlling and then select an insert or filler that can be packed consistently. Print, colour and gift details should support that functional design, not compensate for a poor fit.
Protecting Your Product: Function Over Form
An insert is a shaped component placed inside the box to locate, divide or support an item. A filler occupies void space around the product, helping to limit movement and soften contact within the pack. Many successful packs use both: a fitted insert for positioning and a light filler layer for presentation or additional void fill.
Protection starts by considering the complete journey, not only the product on a display shelf. A pack may be stacked, handled repeatedly and opened by the recipient. An item that appears secure in a sample box can still shift if there is too much clearance, if the insert is too shallow or if accessories have no dedicated space.
Before choosing an insert, document:
- Product dimensions, including lids, handles, cords, caps and uneven edges.
- Product weight, as heavier items need more robust support than lightweight products.
- Fragile areas, such as glass, corners, printed surfaces, raised details or moving parts.
- Number of components, including instructions, cables, samples and protective wraps.
- Box style and internal dimensions, rather than relying on external box measurements.
- Packing orientation, especially where a product needs to remain upright.
- Opening experience, including which item the customer should see first.
A good insert should prevent lateral movement without making removal frustrating. It also needs to suit the box’s depth: a product can look well framed yet be vulnerable if it protrudes above the insert or sits too low to be accessed easily.
Common mistakes include allowing for the product but forgetting its protective sleeve, designing a cavity with no finger notch, or creating tight tolerances that become difficult to pack when natural material variation occurs. Request physical samples and check the assembled pack with the actual product, not a drawing alone.
Materials for Inserts: Foam, Cardboard, Moulded Pulp
The material affects protection, appearance, packing speed and end-of-use considerations. There is no universally best option. The suitable material follows the product’s needs and the desired pack format.
| Material | Best suited to | Key strengths | Points to check |
|---|---|---|---|
| Foam | Delicate, irregular or heavier items | Cushioned support; can be shaped around complex forms | Material type, finish, product contact, removal and end-of-use expectations |
| Cardboard | Retail packs, gifts, lightweight to moderately weighted products | Printable, structured and adaptable to many layouts | Board grade, fold direction, tabs and support for heavier goods |
| Moulded pulp | Products requiring formed protection and a tactile paper-based look | Contoured support; can suit products with rounded shapes | Surface texture, dimensional tolerance, colour options and minimum order requirements |
| Paperboard tray | Multi-part kits, cosmetics, small accessories and presentation packs | Clear compartmentalisation; can be covered or printed | Assembly method, exposed edges and product clearance |
Foam inserts
Foam is often selected where cushioning and close product support are the priority. It can work well for products with awkward shapes or delicate finishes, particularly when a rigid paperboard insert would leave unsupported spaces.
However, foam is not automatically the right answer for every premium pack. It may not align with a paper-led packaging brief, and its look can vary substantially by material, density, cut style and surface finish. Confirm that it is suitable for the intended product contact and market requirements, particularly for products with sensitive surfaces, food contact applications or regulated uses.
A foam insert should have enough material around vulnerable points without gripping the product so tightly that it is difficult to remove. Consider whether a paperboard cover layer, printed card surround or pull ribbon is needed to improve the presentation.
Cardboard inserts
Die-cut cardboard inserts are versatile because they can be folded, locked and printed. They suit products that need a defined position rather than substantial shock absorption, including boxed gifts, stationery, apparel accessories, jars, bottles and multi-piece sets.
They can be made from unprinted board for a simple natural appearance or finished with printed surfaces that extend the outer pack design. Their limitations are equally important: very thin board can buckle under weight, while a highly complex folded structure may slow hand packing and introduce assembly errors.
Moulded pulp inserts
Moulded pulp provides a shaped, fibre-based alternative for products that benefit from cradled support. Its formed texture can complement products with an understated, natural or practical visual identity. It is commonly considered for products where the insert needs to follow a rounded profile or separate components reliably.
The surface is generally less smooth and less suited to fine printed detail than a printed card insert. Colour, fit and finish options should be discussed early, as the production route differs from a standard flat die-cut card component. Confirm the intended material composition and end-of-use guidance with the supplier rather than making broad recyclability claims.
Designing Die-Cut Cardboard Inserts for Fit
A die-cut cardboard insert must be designed around the real product and the real internal box space. Small changes in board thickness, fold placement or product shape can change the fit significantly.
The most effective design process is to work from an internal layout rather than from a decorative concept. Establish the product’s resting position, the direction in which it is inserted and the amount of support needed at its base and sides.
Essential fit details
A practical die-cut insert commonly includes some combination of:
- A product aperture or cavity to hold the main item.
- Side walls or folded rails to control sideways movement.
- A base platform to lift the item from the bottom of the box.
- Tabs and locking slots to maintain the insert’s structure.
- Dividers for separating multiple items.
- Finger cut-outs, thumb notches or pull ribbons for accessible removal.
- Clearance zones for labels, caps, handles and other protrusions.
Do not assume a product should fit as tightly as possible. An overly tight aperture can damage a carton, scratch a finish or make the item awkward to remove. Conversely, generous gaps can allow movement. The objective is controlled support, with enough tolerance for normal variation in the product and packing process.
Account for board thickness and folding
The board itself occupies space. A folded insert has layers, creases and panels that affect the available cavity dimensions. A structure designed only as a flat outline may not fit once assembled.
Ask the packaging designer or supplier to confirm:
- The internal dimensions of the finished box.
- The chosen board grade and its approximate caliper.
- The folded dimensions of the insert.
- Where the product touches the insert.
- Whether any protective wrapping changes the product size.
- The preferred packing sequence.
A prototype is particularly valuable for multi-product gift sets, glassware, bottles and products with non-uniform shapes. Test not only how it looks, but whether someone can assemble the insert, load the product and close the box without forcing any component.
Visual Appeal: Colour and Print on Inserts
An insert can turn the inside of a box into a purposeful branded space. It may introduce a contrasting colour, display care instructions, guide the order of use or reveal a message beneath the product. These details are most effective when they remain readable and do not interfere with the insert’s structural role.
Print is especially useful on flat card inserts, wraps, trays and top cards. Consider using it for:
- A concise welcome or thank-you message.
- Product-use or care guidance.
- A simple brand pattern or colour field.
- Instructions for lifting or removing the product.
- Component names in a kit or set.
- A discreet prompt to retain, recycle or dispose of the pack appropriately, where verified.
Avoid placing fine text across fold lines, locking tabs or areas hidden by the product. Large solid colour areas can also show scuffing more readily during assembly, so review a physical production-style sample where appearance is critical.
Colour should be consistent with the outer packaging but does not need to duplicate it. A restrained unprinted insert can make a printed outer box feel more refined, while a bold interior may add impact to a simple exterior. The decision should reflect the intended opening moment and the practical realities of packing.
For coordinated outer cartons, see the available options for custom printed boxes. The box and insert should be specified together so that the internal layout, board choices and closure all work as one system.
Gift Packaging Inserts: Adding a Surprise Element
In gift packaging, the insert directs attention. It can create a reveal, hold a product at the right height and make multiple items feel like one complete set. The surprise element should be easy to discover, rather than dependent on complicated construction.
A gift insert may use a raised platform, an underlay card, a concealed message, a ribbon lift or a top sheet placed over the product. These features can add ceremony without requiring excessive material.
Useful approaches include:
- Layered reveals: a message card or tissue layer above the product.
- Compartments: separate spaces for a main gift, accessory and note.
- Lift-out trays: a tray that reveals a secondary item beneath it.
- Printed underside panels: a message only visible once the product is removed.
- Colour contrast: an interior shade that frames the item when the lid opens.
Keep the user experience in mind. If the recipient cannot tell where to lift, pull or open, an elegant insert may become a source of frustration. Clear finger access and a sensible opening order matter more than novelty alone.
Gift packs also benefit from a disciplined approach to components. Every additional card, ribbon, sleeve or compartment should have a purpose: product protection, information, presentation or ease of removal. Explore structures designed for gift packaging when the internal presentation is central to the product offer.
Cost Analysis of Different Insert Types
The cost of an insert is not limited to its unit price. It includes design complexity, material use, printing, tooling, assembly time, packing labour, storage space and the risk of wasted components from a difficult design.
A simple flat cardboard pad may have modest material and assembly requirements but provide limited product control. A complex multi-panel insert can improve presentation and separation but may require more board, more tooling detail and more handling. Foam and moulded pulp can offer highly shaped support, but their suitability should be assessed against the project’s quantities, product geometry and desired end-of-use approach.
Cost drivers to compare
When comparing quotations or concepts, review the same criteria for each option:
| Cost factor | Why it matters |
|---|---|
| Material format | Flat board, foam and moulded components have different sourcing and conversion requirements |
| Structural complexity | More folds, slots and pieces can increase production and packing work |
| Printing and finishes | Additional colours, coverage and finishing processes affect the specification |
| Tooling | Bespoke cutting or forming tools may be needed for custom shapes |
| Assembly state | Flat-packed components can save space but require folding; pre-assembled parts simplify packing but use more storage volume |
| Pack-out time | A design that is slow to load can increase operational effort |
| Damage prevention | A lower-cost insert may be poor value if it does not support the product adequately |
The least expensive component is not necessarily the most economical packaging solution. Compare the total packed format and the effort needed to use it reliably. If a product has a high perceived value or a delicate finish, a more structured insert may be justified; if the product is robust and lightweight, a simpler divider and paper filler may be enough.
Request that suppliers identify what is included in the specification: material, print, cutting, assembly condition and any additional components. This makes like-for-like comparison easier and reduces ambiguity later.
Automated Assembly vs. Hand-Packing
How the packaging will be assembled should influence the insert design from the beginning. An attractive structure can become impractical if it needs several precise folds, difficult locking tabs or separate pieces that are easily mixed up.
When hand-packing is suitable
Hand-packing is often appropriate for lower-volume runs, changing product bundles, premium gift sets and packs requiring a careful visual arrangement. It allows more flexibility where products vary slightly or include elements such as tissue paper, ribbons and message cards.
For manual assembly, make the structure intuitive. Use clear folds, avoid tiny tabs, minimise the number of loose components and give packers an obvious sequence. A flat-packed insert can be efficient if it opens and locks quickly without adhesive.
When automated assembly may be considered
Automated or semi-automated packing can support repeatable formats with stable product dimensions and a consistent packing sequence. Inserts designed for this approach need reliable tolerances, straightforward feeding and a geometry suited to the intended machinery and process.
Not every die-cut insert is compatible with automation. Deep folds, flexible materials, intricate tabs and components that require hand adjustment can create problems. If automation is a possibility, share this requirement before the structure is finalised. Confirm compatibility through appropriate trials with the equipment and pack format being used; it should not be assumed from a drawing.
A sensible compromise is often a simple insert that arrives flat, is quickly erected and supports a controlled hand-packing routine. This can preserve flexibility while maintaining a polished appearance.
The Best Fillers (Shred, Crinkle Paper) and Their Purpose
Paper fillers are mainly used to fill empty space, reduce visible voids and enhance presentation. They are not a replacement for a correctly sized box or a fitted insert where a product needs positional support.
Shredded paper creates a softer, more relaxed appearance and can be placed around a product to reduce rattling. It is useful for gift boxes, hampers, robust items and packs where the product can sit within a protective wrap.
Crinkle paper has a folded, textured profile that creates volume. It can frame a product, fill gaps and provide a more deliberate display effect than loose flat paper. Its texture helps it stay in place around products, although the correct quantity depends on the item’s size, weight and the available void.
Other paper-based options include tissue paper for wrapping surfaces, honeycomb-style paper for certain protective applications and plain paper pads for stabilising broader gaps. Each performs differently, so choose according to the job rather than appearance alone.
Choosing the right filler
Use the following questions to make a practical choice:
- Does the product already have a fitted insert, or must the filler do some stabilising work?
- Is the item fragile, heavy, coated or easily scratched?
- Does the filler touch the product directly, or is there an inner wrap?
- Will the recipient need to remove a large amount of filler to find small components?
- Is the filler primarily decorative, protective or both?
- Does the filler complement the opening experience without obscuring essential information?
Avoid overfilling. Too much shred or crinkle paper can make the box difficult to close, create an untidy first impression or cause smaller items to disappear within the pack. Too little leaves movement and can make a generously sized box feel underfilled. Trial the intended quantity in the finished box with all components in place.
Where filler is decorative, colour can reinforce the brand palette. Where it is primarily practical, unprinted natural-looking paper may be the more suitable choice. Confirm the material details and appropriate disposal guidance for the exact filler selected before making any environmental statement on the pack.
A practical specification checklist
Before approving custom inserts or fillers, make sure your brief covers:
- Finished internal box dimensions and box style.
- Product samples or accurate product dimensions.
- Product weight and fragile areas.
- The required product orientation.
- Every component that needs a dedicated space.
- Insert material and required finish.
- Print location, artwork and readable text areas.
- Finger access, pull tabs or removal method.
- Whether the insert is supplied flat or assembled.
- Hand-packing or automated assembly requirements.
- Filler type, colour and target fill level.
- Physical sample approval using the actual product.
- Any market-specific material, labelling or compliance requirements that need verification.
The essential role of custom paper box inserts and fillers is to make the package work as well as it looks. Start with a secure product fit, select a material suited to the product and packing method, then use print and filler to improve the opening experience. For brand labels that complement interior cards, wraps or sealed tissue, consider custom printed stickers.
For a tailored project, prepare your product dimensions, box size, component list and preferred unboxing outcome before discussing a structure with a packaging supplier. XGolden Print can support custom packaging box and printing requirements, while the final specification should always be validated with physical product samples.
