
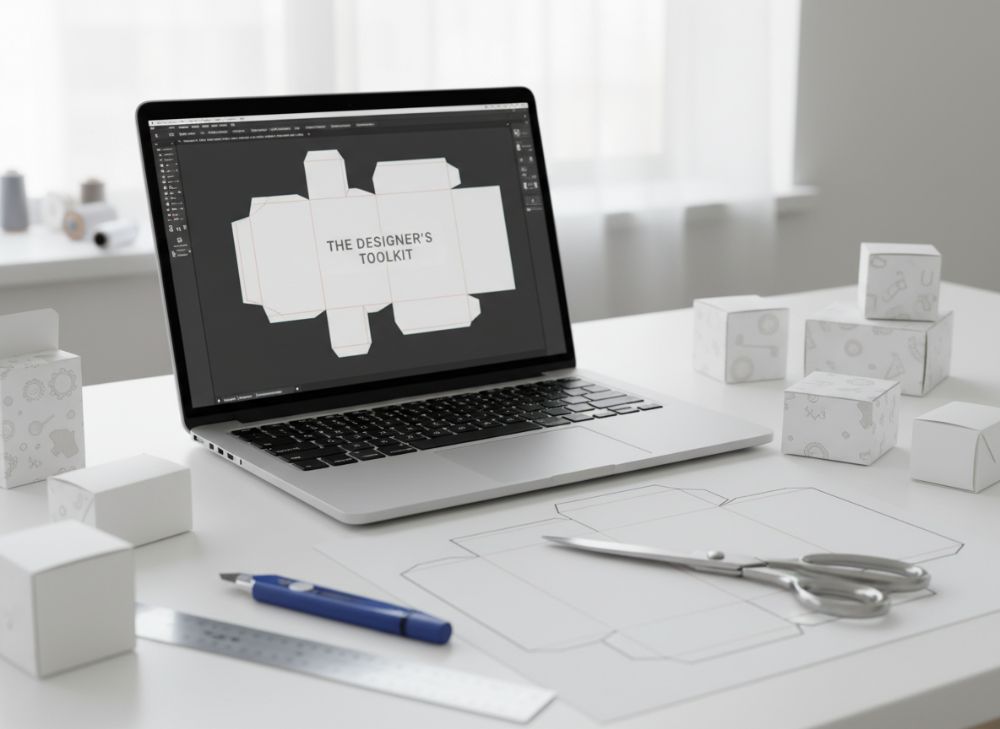
The designer’s toolkit for custom paper box layouts should combine three capabilities: accurate dieline production, reliable artwork preparation and a clear way to review the finished pack before print. For most teams, a vector design application, a PDF workflow and a 3D visualisation tool form the practical core.
The best software is not always the package with the most features. It is the one that works with your printer’s supplied template, preserves dimensions and colours correctly, and makes revisions easy to trace. This guide explains what each tool should do and how to prepare files for custom boxes without avoidable production delays.
| Task | Most suitable software type | What to check before choosing |
|---|---|---|
| Creating or editing dielines | Vector illustration software | Precise dimensions, layers, spot colours and PDF export |
| Designing graphics and type | Vector and page-layout software | Font handling, linked assets and colour controls |
| Editing product imagery | Raster image-editing software | Resolution, colour profile and image-link management |
| Reviewing pack appearance | 3D mock-up or packaging visualisation software | Ability to apply artwork to the correct box structure |
| Managing amendments | Cloud storage, DAM or version-control process | Naming conventions, access permissions and approval records |
Using Adobe Illustrator for Die-Line Creation
Adobe Illustrator is widely used for custom paper box layouts because it is built around editable vector paths. Unlike pixels, vectors can be scaled without becoming soft, and they allow designers to set accurate panel edges, folds, cut lines and safety areas.
A dieline is the technical drawing that defines how a flat sheet becomes a box. It may include:
- Cut lines for the outer shape
- Crease or fold lines for panels, flaps and tabs
- Perforation lines where a section is intended to tear or detach
- Glue areas that should remain clear of critical artwork
- Bleed boundaries beyond the final cut edge
- Safe areas for text, logos and key product information
When creating artwork in Illustrator, keep the printer-supplied dieline separate from the visible design. A sensible layer structure is:
- Technical dieline layer, locked once positioned
- Background artwork and images
- Product copy and typography
- Logos, symbols and legal or product information
- Print-finish call-outs, where requested
- Notes for internal review, removed before final export unless requested
Do not redraw or rescale a supplied dieline simply to make it look tidier. Even a small change to a crease position or glue flap can affect how the packaging is made and assembled. If the pack size or structure needs changing, request an updated template rather than editing the engineering layer yourself.
Illustrator also handles spot-colour swatches, overprint settings and clipping masks, which are useful when preparing production-ready PDF files. However, software settings alone do not prove that a file is ready to print. Always check the required PDF standard, bleed amount, colour setup and finishing notation with the packaging supplier.
Essential dieline checks before exporting
Before approving a custom box layout, inspect the file at both full size and reduced screen view:
- All important text sits within the stated safe area.
- Background colours and images extend through the bleed area.
- Barcodes, QR codes and fine rules are clear of folds, seams and corners.
- Artwork does not run unintentionally into glue flaps.
- The dieline has not been moved, rotated or proportionally scaled.
- Technical lines are set up exactly as requested by the printer.
- Hidden layers, unused swatches and outdated artwork have been removed or clearly marked.
3D Mockup Tools for Packaging Visualization
A flat layout can be technically correct while still producing an awkward visual result on a folded box. 3D mock-up tools help designers assess how panels meet at corners, where a logo lands on a front face and whether copy remains readable once the pack is assembled.
Packaging visualisation software varies from specialist structural-design platforms to general 3D applications and browser-based mock-up tools. The right option depends on the stage of the project.
- Simple presentation mock-ups are useful for sharing a likely appearance internally. They are quick but may not reflect the exact structure, substrates or finishes.
- Dieline-linked 3D tools use the actual box structure, making them better for checking panel alignment and artwork placement.
- Advanced packaging visualisation platforms can support more detailed material and finish simulations, but still require confirmation through physical samples or an agreed proofing process.
A 3D render should be treated as a design-review aid, not as a contractual colour or finish proof. Screens differ, digital lighting can exaggerate texture, and metallic, fluorescent, tactile or reflective finishes are especially difficult to represent accurately on screen.
What to review in a box mock-up
Use the mock-up to answer practical questions:
- Is the main brand mark visible from the intended front and side views?
- Does the opening flap interrupt a logo, product name or pattern?
- Do continuous patterns join convincingly at edges and corners?
- Is the hierarchy of product information clear on the smallest visible panel?
- Are there exposed white edges, accidental gaps or clashing seams?
- Will a decorative feature be obscured by a closure, tuck flap or label?
For premium gift packaging, 3D review is particularly valuable because ribbon slots, sleeves, inserts and opening experiences can alter how the design is perceived. It should complement—not replace—the structural template and final pre-production approval process.
Colour Management and Profile Settings
Colour management provides a controlled route from a designer’s screen to a print-ready file. Its purpose is to reduce avoidable variation caused by inconsistent settings, not to promise that every printed result will look identical to an uncalibrated monitor.
Start by asking the printer which colour mode, ICC profile and spot-colour approach it requires for the intended print process and material. Do not apply a generic profile simply because it is the default in your software.
Key principles include:
- Build print artwork in the requested colour space. RGB artwork intended for screens may convert unpredictably if left unmanaged until the final stage.
- Use named spot colours where a specific spot ink is requested. Do not substitute a manually mixed CMYK approximation unless that is explicitly agreed.
- Embed or assign profiles consistently. A document with mixed colour policies is harder to diagnose at pre-press.
- Review rich black carefully. Large black backgrounds and small black type often need different treatment; follow the printer’s specification.
- Avoid relying on screen appearance alone. A calibrated display is useful, but substrate, ink coverage, coating and finishing all influence the printed result.
Different paperboards can affect the perceived depth, brightness and saturation of colour. Uncoated stocks may absorb ink differently from coated surfaces, while dark or textured materials can limit the appearance of small coloured details. Discuss the intended stock before locking a colour-critical design.
Common colour-management mistakes
A frequent mistake is converting every supplied asset to CMYK at the outset without checking the intended print workflow. Another is mixing several CMYK profiles across linked images and expecting a uniform result. Designers can also accidentally leave a brand colour as a process build where a spot colour was specified.
Create one documented colour plan for the project. It should state the working colour space, named spot colours, any intentional overprints, and the profile or export preset supplied by the printer. Save that information with the final artwork files so it survives staff changes and future reprints.
Preparing Layers for Different Print Finishes
Print finishes often need their own clearly named artwork layers or spot-colour separations. A finish layer tells the production team where a process should apply; it is not merely a visual effect added in design software.
Depending on the chosen finish, separate artwork may be required for:
- Foil areas
- Embossing or debossing
- Spot varnish or raised varnish
- White ink beneath artwork on coloured or metallic stock
- Special inks
- Cut-outs, windows or lamination exclusions
Use a solid, high-contrast spot swatch for each technical finish layer and name it clearly, for example “FOIL – GOLD” or “SPOT UV”. Keep it on top of the artwork, set it to overprint only if instructed, and avoid transparency effects unless the printer confirms they can be reproduced as intended.
Do not assume that a gradient, shadow or semi-transparent effect can be used for a finishing process. Many finishes require solid, defined shapes and may have minimum line widths, gaps or registration tolerances. Those limits vary by process and supplier, so request the applicable guidance before finalising fine details.
Build a clear finishes brief
Alongside the artwork, prepare a concise finishing brief that identifies:
- The finish name and its intended location
- Whether the finish must align with printed artwork
- Which side of the pack receives the treatment
- Any areas that must remain uncoated or unlaminated
- The latest artwork version and approval status
This reduces the risk of a finish layer being mistaken for visible print artwork. It also makes internal sign-off easier when several stakeholders are reviewing a premium carton or promotional pack.
Working with Printer Templates and Specifications
A printer template is the starting point for accurate custom paper box artwork. It should contain the approved structure, dimensions, cut and fold lines, bleed boundary, glue areas and any production notes relevant to the design.
Before starting, confirm these points with the packaging supplier:
| Specification to confirm | Why it matters |
|---|---|
| Final box structure and assembled dimensions | Determines panel sizes, capacity and artwork placement |
| Dieline version | Prevents artwork being built on an outdated layout |
| Bleed and safe-area requirements | Protects against white edges and cropped content |
| Accepted file formats and PDF settings | Supports a smoother pre-press check |
| Colour mode, profiles and spot colours | Helps preserve intended colour handling |
| Image resolution guidance | Reduces the risk of soft or pixelated imagery |
| Font and transparency requirements | Avoids substitution or output issues |
| Finishes, tolerances and technical layers | Ensures special treatments are clearly communicated |
| Barcode or variable-data requirements | Keeps scannable or changing content in the correct format |
Use the template at 100% scale. If you need to create several product variants, duplicate the approved master file rather than copying objects into an unrelated document. That preserves the technical setup and makes variants easier to compare.
A useful approach is to create a non-editable PDF reference of the original template before design starts. The working file remains editable, while the reference makes it easier to spot accidental structural changes.
For projects involving custom boxes, send the printer a low-resolution review PDF early in the process if the design includes unusual panel flows, finish layers or complex imagery. This is not a substitute for final files, but it can reveal interpretation questions before the artwork is fully locked.
Version Control for Packaging Revisions
Packaging projects rarely stay unchanged from first concept to final artwork. Product claims, ingredients, sizes, barcode data, logos and seasonal messages can all change. Without version control, an approved panel from one file can accidentally be combined with outdated content from another.
Use a naming system that makes every file identifiable without opening it. For example:
Brand_Product_BoxType_Size_V03_YYYY-MM-DD
Avoid vague filenames such as FINAL, FINAL2 or USE THIS ONE. A file marked “final” may no longer be current after a minor correction.
A practical approval workflow
- Keep one controlled master artwork file for each pack variant.
- Record a revision number whenever content, structure or finish changes.
- Maintain a short change log stating what changed and who approved it.
- Export review PDFs with the version number visible.
- Archive superseded files in a clearly labelled folder rather than overwriting them.
- Lock final approved files against casual edits where your workflow permits.
- Confirm that the PDF sent for production matches the approved version number.
For larger ranges, a digital asset management system can centralise approved logos, product images and label copy. Smaller teams can achieve many of the same benefits with a disciplined folder structure, access permissions and a shared approval record.
Typography Best Practices for Boxes
Typography on boxes has to work within physical constraints. It must remain readable on small panels, near folds, around corners and against the chosen substrate or finish. Decorative typography can support a brand, but it should not reduce the clarity of essential product information.
Choose type sizes and weights with the final printed size in mind. Text that appears comfortable on a large monitor may be difficult to read on a compact carton. Fine serif details, thin reversed type and narrow letter spacing deserve particular scrutiny.
Good packaging typography practice includes:
- Keep essential text away from fold lines, cut edges and glue areas.
- Use sufficient contrast between type and its background.
- Avoid placing small copy over busy photography or intricate patterns.
- Check line breaks individually on narrow side panels.
- Use real text rather than rasterised type wherever possible.
- Supply or outline fonts only according to the printer’s file requirements.
- Review punctuation, product names, weights, variants and contact details during final proofing.
Do not distort type to fill a panel. Stretching letterforms can look unprofessional and can affect legibility. If space is tight, reconsider the hierarchy: simplify the message, select a more suitable width, or redesign the panel composition.
Designing type around structural features
Box structures create natural interruptions. A tuck flap may divide a product name; a seam can interrupt a sentence; an opening edge can expose a pattern mismatch. Treat folds and joins as active parts of the layout, not empty space around it.
Mark the front-facing panel first, then establish a clear reading order around the pack. This is especially useful when a box will be viewed from a shelf, photographed for e-commerce or presented as a gift.
Integrating Label Sticker Design Files
Labels and stickers should be designed as part of the wider packaging system, not as a separate afterthought. Their typography, colours, imagery and finishes should relate to the box while remaining functional for the surface and placement where they will be used.
When integrating custom label and sticker designs with box artwork, establish a shared set of brand assets:
- Approved logo versions
- Colour swatches and spot-colour names
- Typefaces and hierarchy rules
- Product variant naming
- Ingredient, usage or handling copy where relevant
- Image assets and crop rules
- Finishing call-outs
Keep labels and boxes in separate production files unless the printer specifically asks for a combined document. They often have different templates, substrates, cutting requirements and finishing options. A combined visual presentation PDF can be helpful for brand review, but it should not replace individual print-ready files.
Check label placement against the actual box structure. A label that looks centred on a flat front panel may cross a fold, cover an opening feature or interfere with a textured finish once applied. Where labels carry variable details such as batch information or changing product data, agree the content format and available print area before finalising the layout.
A practical software and workflow checklist
Before choosing software or releasing artwork, make sure your workflow can answer “yes” to these questions:
- Can the design application preserve the printer’s dieline at exact scale?
- Can it create separate layers and named spot colours for technical features?
- Can it export the PDF format requested by the printer?
- Can the team inspect the artwork in 3D or with a folded mock-up where panel alignment matters?
- Is there a controlled method for tracking copy, design and structural revisions?
- Are colour settings documented rather than left to software defaults?
- Has each finish been supplied as clear, separate technical artwork where required?
- Has final artwork been checked against the latest approved template and specification?
A capable toolkit does not remove the need for communication with the printer; it makes that communication more precise. Start with the correct dieline, build a clean layered file, review the pack in context and preserve a dependable approval trail. When you are ready to turn approved artwork into packaging, explore XGolden Print’s custom box options and share the relevant template, PDF specification and finishing requirements with your project team.
