
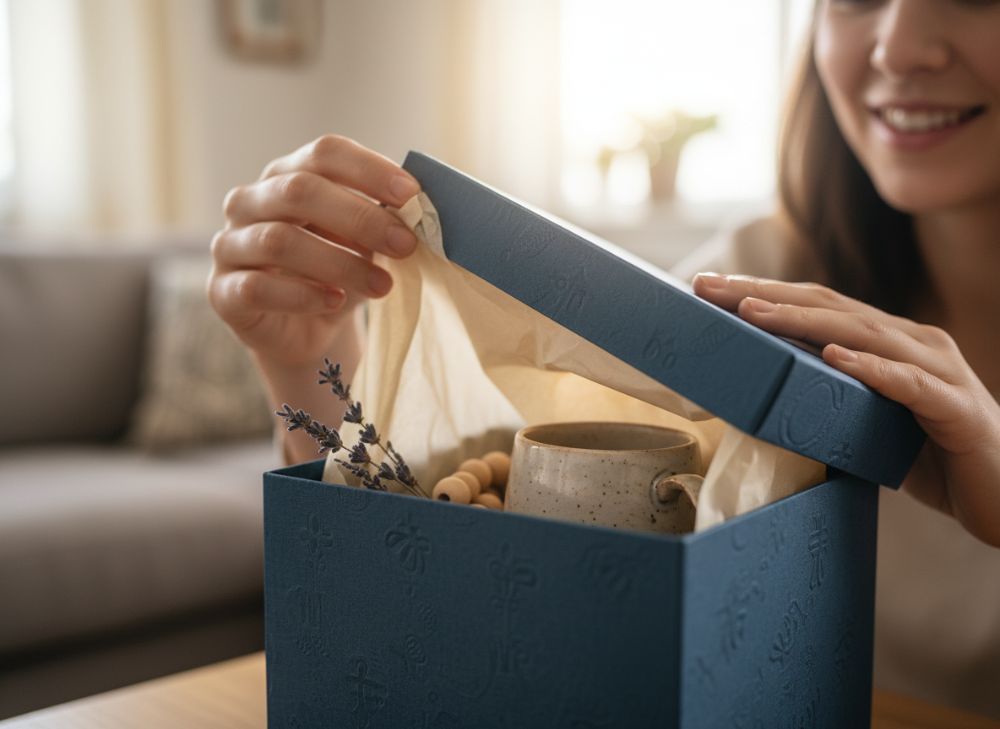
A memorable unboxing experience is not about adding the most layers or choosing the most expensive box. It is about making every touchpoint feel intentional: the outer parcel, the opening action, the presentation of the product and the final message the recipient sees.
The art of the unboxing experience comes down to a clear priority order. Protect the item first, make opening straightforward, then use colour, texture, print and personal details to reinforce the gift or brand. The best gift packaging feels cohesive rather than overdesigned.
Emotional Connection: Why Unboxing Matters
Gift packaging sets expectations before the recipient sees the product. A neat closure, a pleasing texture or a short personal message can make an ordinary item feel more considered. For retailers and e-commerce brands, this moment also helps connect the physical product with the personality of the brand.
Emotional impact usually comes from a few well-chosen decisions:
- Anticipation: A lid, wrap or seal creates a small sense of reveal.
- Care: A product held securely in tissue or a fitted insert appears deliberately presented.
- Recognition: Consistent colours, logos and messaging make the sender easier to remember.
- Personal relevance: A name, occasion-specific label or handwritten-style note makes the gift feel less generic.
- Ease: Packaging should open without tearing the product wrap, scattering loose filler or requiring excessive effort.
The recipient’s first impression is often shaped by the exterior, but the inside carries the greater emotional weight. A plain outer carton can work well if the interior is arranged cleanly and the reveal feels purposeful. Conversely, a heavily printed box can disappoint if its contents are loose, damaged or difficult to remove.
When specifying custom packaging boxes, begin by defining the intended reaction. Do you want the package to feel playful, refined, seasonal, natural or celebratory? That single answer should guide the board, print, closure, filler and finishing choices.
Layering Elements: Tissue Paper and Fillers
Layering helps create a reveal while stopping products from shifting during handling. The right approach depends on the product’s weight, fragility, shape and perceived value. Tissue paper and fillers should support the item, not conceal it so thoroughly that unboxing becomes frustrating.
Tissue paper for soft presentation
Tissue paper is useful for wrapping products, lining a box or covering items before the recipient opens the main presentation. It offers a softer visual contrast against paperboard packaging and can introduce a secondary brand colour or subtle print.
Use tissue paper when you need to:
- Separate multiple products or components.
- Prevent surface-to-surface rubbing for suitable items.
- Create a neat first layer over the contents.
- Add a branded pattern, message or colour without changing the main box design.
Choose a tissue weight appropriate to the job. Very lightweight tissue can tear too easily around angular products, while heavier paper can look stiff when the desired effect is soft and delicate. Request samples where possible, particularly if the product has sharp corners, dark finishes or surfaces that may be prone to marking.
Fillers for stability and volume
Fillers occupy empty space and reduce movement. Common options include shredded paper, crinkle-cut paper, paper pads, moulded inserts and folded tissue. Each gives a different appearance and level of support.
| Filler option | Best suited to | Visual effect | Key point to check |
|---|---|---|---|
| Crinkle-cut paper | Small, robust products and gift sets | Relaxed, abundant | Ensure pieces do not obstruct small components |
| Shredded paper | Light items with irregular shapes | Casual and colourful | Can look untidy if overfilled |
| Folded tissue | Cosmetics, accessories and compact gifts | Clean and understated | Provides limited protection for heavier products |
| Paper padding | Products needing more restraint | Practical, structured | Confirm the product will not move in transit |
| Fitted insert | Fragile or premium-shaped products | Precise and premium | Requires accurate product dimensions and tolerances |
A common mistake is treating filler as decoration only. If a product can move inside the box, assess the fit before deciding on a presentation layer. For fragile items, a protective insert and a decorative tissue layer may be better than relying on loose fill alone.
Also consider the recipient’s tidy-up experience. Excessive loose filler can make a box feel wasteful and can obscure the item. Use enough material to secure the contents and complete the presentation, but no more.
Personalisation: Adding Custom Notes or Label Stickers
Personalisation turns a standard packaging format into something appropriate for a particular recipient, order or campaign. It does not need to mean variable printing on every box. Often, a custom note or label sticker provides a flexible, cost-conscious alternative.
A simple packing sequence may include:
- A standard branded box.
- Tissue or an insert in a core brand colour.
- A campaign-specific sticker on the tissue seal or exterior.
- A note card with a recipient name, short message or care instruction.
This approach allows the box itself to be used across product lines or seasons while details can change in smaller production runs.
Custom label stickers are especially useful for sealing tissue paper, closing a mailer, identifying a variant or adding a limited-edition message. Consider the surface they will be applied to: uncoated board, textured paper, tissue and varnished packaging may each affect how securely a sticker adheres. Check its size, adhesive suitability, finish and legibility at the intended viewing distance.
Keep personalisation useful and concise. A note can acknowledge the occasion, explain how to use the product, thank the recipient or invite them to retain the packaging. Avoid adding several competing messages on cards, box panels, seals and labels. One focal message is usually more effective.
If customer data is printed on packaging inserts or labels, make sure your internal processes and wording are appropriate for the intended use and market requirements.
Designing Thematic Gift Boxes for Holidays
Seasonal packaging can make a product feel immediately gift-ready, but it needs to be planned carefully. A fully seasonal box is visually strong for a short campaign; a flexible base design can be more practical when stock must work over a longer period.
Choose a seasonal route that matches demand
There are three broad ways to approach holiday gift packaging:
| Approach | How it works | Suitable when | Main limitation |
|---|---|---|---|
| Fully seasonal box | Seasonal artwork printed directly on the box | A defined event range or high seasonal volume | Remaining stock may be difficult to use afterwards |
| Adaptable core box | Permanent brand design with seasonal sleeve, sticker or insert | Gifts are sold throughout the year | Seasonal effect may be less immersive |
| Occasion-neutral premium box | Elegant design without explicit event references | Products are bought for many occasions | Requires strong presentation details to feel special |
For UK gift ranges, themes such as winter celebrations, spring gifting, birthdays, weddings, new arrivals and thank-you gifts can be more versatile than using a single date-specific message. A colour palette, illustrated motif or patterned tissue can signal an occasion without limiting the packaging to one week of the year.
Make sure the theme suits the product and brand. For example, a food gift may benefit from clear product information and a gift tag area, while beauty, jewellery or stationery may place greater emphasis on tactile finishes and a carefully staged reveal.
Before committing to print, review the entire unboxing sequence together: outer box, interior, tissue, insert, note and any label. A design that looks good as a flat artwork can become visually crowded once every packaging component is assembled.
For more format ideas, explore gift packaging options and compare which structures best suit the product dimensions and opening style.
How to Keep Gift Packaging Costs Low
Cost-effective gift packaging is about reducing unnecessary complexity without making the package look cheap or under-protected. The most economical specification is not always the simplest-looking one; it is the one that matches the product, quantity, assembly process and desired reuse level.
Focus spending where the recipient notices it
Prioritise investment in:
- A box that fits the product properly.
- A print design with clear hierarchy and readable text.
- One tactile or visual feature that supports the brand.
- Internal protection suited to the product’s needs.
- An opening method that works consistently for the user.
Look for savings in areas that add little value, such as multiple decorative layers, oversized boxes, several special finishes on the same design or filler that is added only to occupy volume.
Practical ways to control the specification
- Use standard-friendly dimensions: Bespoke formats are useful when needed, but avoid creating several box sizes where one format can accommodate compatible products.
- Limit colour complexity: A restrained palette can look deliberate and reduce artwork complications.
- Use one hero finish: Choose one feature, such as embossing, foil detail, textured stock or a distinctive closure, rather than combining several.
- Design for efficient packing: If a box needs extensive folding, tying or arranging, factor labour time into the overall cost.
- Create modular campaigns: Keep the main box consistent and use stickers, cards or sleeves to distinguish seasonal editions.
- Avoid empty space: Correct sizing can reduce both filler use and the chance of movement inside the pack.
When comparing quotes or packaging proposals, check that like is being compared with like. Confirm the board type, dimensions, print coverage, finishing, inserts, assembly requirements, artwork preparation, quantities and any sampling arrangements. A low initial figure may not include every component required to achieve the intended unboxing result.
Creating Shareable Moments for Social Media
A shareable packaging moment is one that is naturally easy to photograph or film. It does not need a large logo on every surface. In fact, a single recognisable detail often creates a stronger image than repeated branding.
Build visual interest around one or two “reveal points”, such as:
- A patterned tissue sheet sealed with a branded sticker.
- An interior message beneath the lid.
- A colour contrast between the outer and inner box.
- A neatly framed product insert.
- A gift card positioned as the first thing the recipient sees.
- A distinctive opening mechanism, provided it remains practical.
Think about the order in which the content will be shown on camera. The lid opens, tissue is lifted, the product is revealed and any accompanying card is read. Each stage should appear clean, not crowded. Avoid placing vital brand elements where they will be covered by filler or removed before the product is revealed.
Lighting and photography conditions cannot be controlled once a package leaves your business, so favour clear shapes, readable type and colour combinations with enough contrast. Highly reflective finishes can look striking in person but may create glare in images. Similarly, very pale typography on a light background may lose impact on a phone screen.
Do not assume recipients will share every attractive package. The objective should be a genuinely satisfying experience first, with social sharing as a possible outcome rather than the sole design criterion.
The Power of Branded Tape and Exterior Stickers
The exterior is the first physical contact with a gift package. Branded tape and exterior stickers provide a way to make a plain shipping or presentation box feel more recognisable, while also acting as a closure or campaign marker.
Branded tape works best when it has a defined job:
- Sealing a suitable outer carton.
- Creating a recognisable band around a plain box.
- Highlighting a limited collection or gift message.
- Directing the recipient towards an opening point.
Exterior stickers can serve a similar role with more flexibility. They can identify product variants, add a gift message or close a folding flap. However, they should not be used as the only structural closure unless the adhesive and packaging surface have been tested for the actual handling conditions.
Keep exterior branding balanced. A gift box with too many messages, logos and seals can look more like a dispatch package than a considered present. Choose a primary focal point: perhaps a logo seal on the lid, a branded tape strip or a single illustrated sticker.
Check practical compatibility before production:
- Will the tape or sticker adhere to the chosen board finish?
- Will it tear delicate tissue when opened?
- Does the placement interfere with a lid, tuck flap or ribbon?
- Will the artwork remain legible if the tape overlaps?
- Is the seal intended to be opened once, or should the box remain reusable?
Turning a Simple Paper Box into a Luxury Gift
Luxury is communicated through restraint, fit and consistency rather than decoration alone. A straightforward paper box can feel premium when its material, construction and presentation details work together.
Start with proportion. The product should sit securely with enough clearance for wrapping or an insert, but not so much empty space that it appears undersized. Cleanly aligned edges, a well-positioned lid and an orderly interior often matter more than elaborate artwork.
Then choose a small number of elevated details:
- A rigid or well-structured box format appropriate to the product.
- A textured, smooth or uncoated paper surface that suits the brand character.
- A single subtle print finish or carefully placed foil accent.
- Tissue paper in a complementary colour.
- A fitted insert or folded presentation card.
- A concise message inside the lid or on a separate card.
Colour is another effective tool. Dark tones can feel formal and dramatic, while warm neutrals may suggest craftsmanship and calm. White or pale packaging can feel refined but needs careful handling to retain a clean appearance. The key is not the colour itself, but whether it supports the product and remains consistent across every component.
A luxury effect can be weakened by mismatched details: a formal box paired with brightly coloured loose filler, a premium foil logo alongside low-resolution artwork, or a carefully finished lid with a poorly fitting insert. Review physical samples as a complete set whenever possible, rather than approving components separately.
For brands developing a more considered packaging system, XGolden Print’s packaging background may be useful context. The company has 27 years of experience in custom packaging and printing, but the final specification should always be based on your product, artwork, quantity and practical packing requirements.
A Practical Gift Packaging Checklist
Before approving a gift packaging design, check the following:
- Does the box protect the product during normal handling?
- Is the product easy to remove without damaging the packaging?
- Does the opening sequence have one clear focal point?
- Are tissue, fillers, inserts and labels compatible with the box size?
- Is the design recognisable without overwhelming the recipient?
- Can seasonal elements be changed without replacing all packaging stock?
- Are print, finishes and labels legible on the selected materials?
- Have assembly time and packing steps been considered?
- Have you confirmed any relevant labelling, safety, material and market requirements for the product category?
- Has the complete pack been reviewed with the actual product inside?
A well-designed unboxing experience is a sequence of small, considered decisions. Begin with a box that fits and protects the product, add layers only where they improve presentation, then use branding and personalisation to make the gift feel distinctive. When you are ready to develop the format, compare box structures, materials and interior options against a physical product sample before finalising artwork.
