
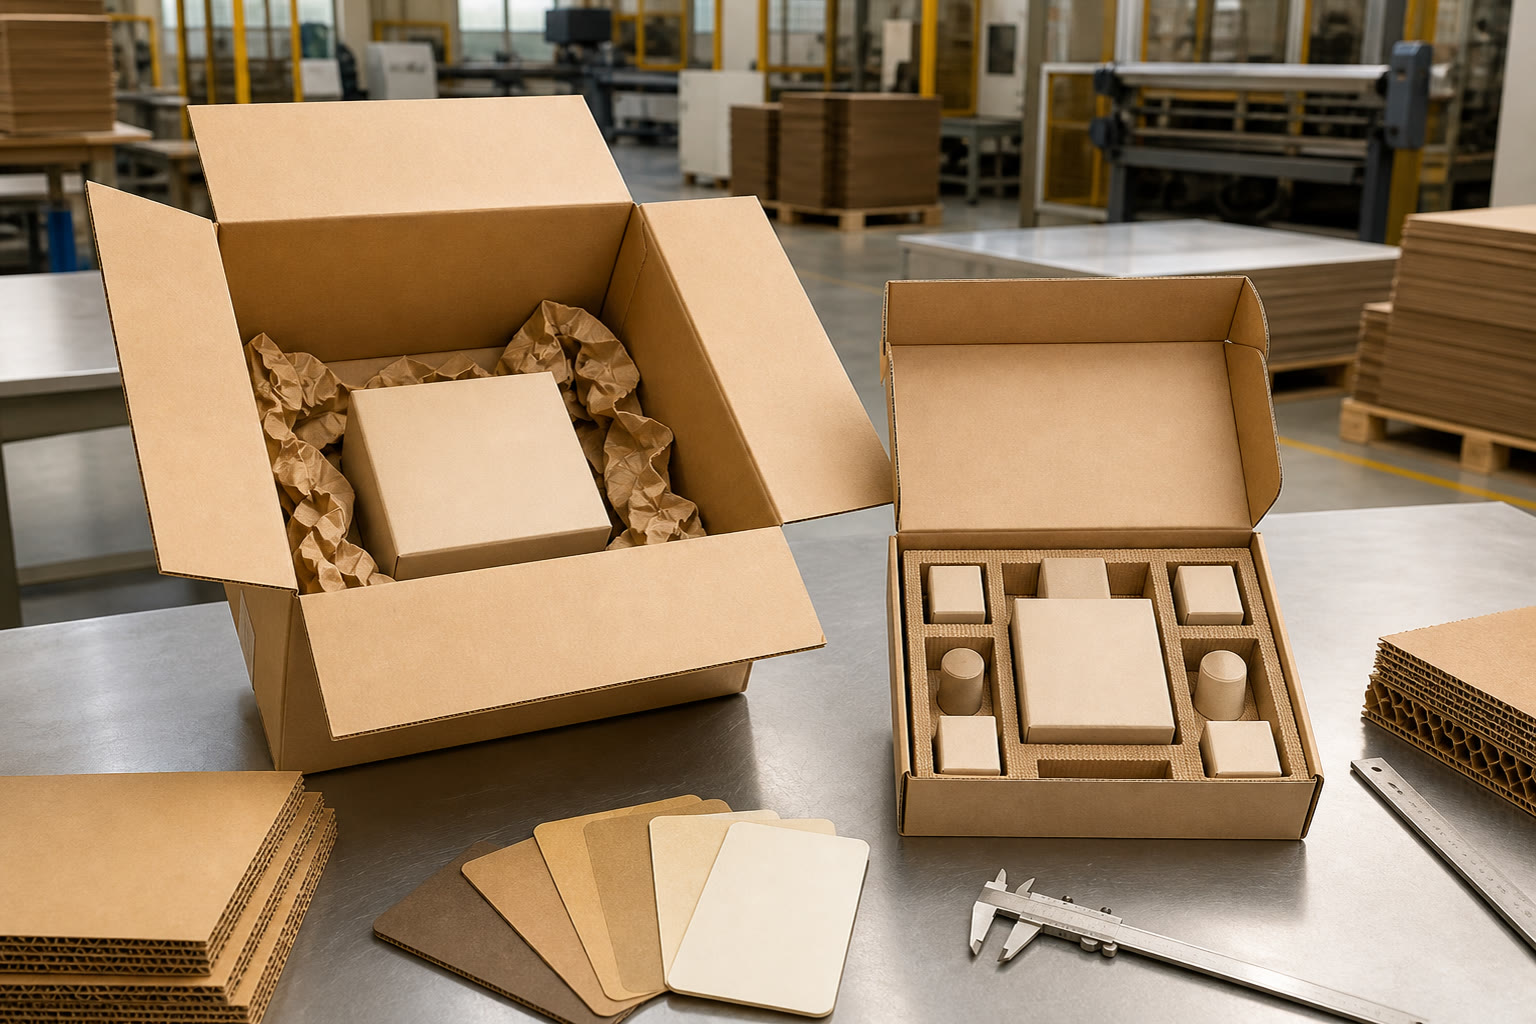
Reducing packaging void space means designing the box, insert and packing process around the product’s packed dimensions—not simply choosing the smallest possible carton. The goal is to limit movement while leaving enough clearance and cushioning to protect vulnerable areas through picking, stacking and delivery.
A good system uses the right outer dimensions, retention features that hold the item in position, and a realistic assessment of handling risks. Removing excess air can lower material use, improve presentation and make fulfilment more consistent, but an over-tight pack can transfer impacts directly into the product. The best result is a controlled fit, rather than the absolute minimum box size.
Measure the complete packed product
Start with the product in the condition in which it will actually enter the box. This sounds obvious, but measuring a bare product is one of the main reasons that a packaging specification ends up with too much or too little space.
Measure the maximum external length, width and height of the complete packable unit, including:
- Retail cartons, bottles, jars or inner packs
- Lids, caps, pumps, handles and other projections
- Wrapped cables, accessories and instruction leaflets
- Tamper seals, labels and sleeves
- Any protective bag, tissue or dust cover that must remain around the product
- Multiple items when they are bundled or sold as a set
Take measurements at the widest and tallest points, rather than relying on nominal product dimensions. A flexible pouch, for example, may change shape when filled, while a garment may require more room after folding than its flat dimensions suggest.
Allow for function, not just fit
The internal dimensions of a box need to accommodate more than the item itself. Build in an allowance for the chosen retention method and for practical packing. For example, a carton holding a rigid cosmetic bottle in a folded-board insert needs room for the insert walls and locking tabs as well as the bottle.
There is no universal clearance figure that works for every product. Clearance should be determined by:
- Product fragility — A robust clothing item can tolerate a closer fit than a glass candle vessel.
- Product weight — Heavier products need stronger retention and may need more protective separation from the outer walls.
- Surface sensitivity — Printed, polished, plated or soft-touch surfaces can be damaged by rubbing even if they do not break.
- Expected handling — Parcel delivery, retail replenishment and pallet distribution expose packs to different forces.
- Packing method — Hand packing may need easier access and more forgiving tolerances than an automated line.
Record both the product dimensions and the proposed internal pack arrangement. A simple layout drawing that identifies the product orientation, insert, empty areas and closure direction can prevent costly assumptions later.
Identify movement and impact risks
Void space is only a problem when it allows harmful movement or leaves the product too close to an impact point. Before changing the box size, identify how the packed product could move and what might be damaged.
Ask these practical questions:
- Can the product slide from side to side, end to end or vertically?
- Could it rotate and expose a vulnerable corner, neck, lid or display face?
- Does the product touch the outer box wall?
- Will two products collide with each other?
- Is the item likely to settle, compress or shift during transport?
- Does opening the pack reveal the product neatly, or does it appear loose?
- Can a packer insert the item without forcing it or damaging the printed box?
Match protection to the likely hazard
Different risks call for different packaging features. A thin fold-over carton may be sufficient for a lightweight, non-fragile retail item, but it is not a substitute for impact protection around a heavy or breakable product.
| Risk in the packed system | Common cause | Suitable ways to control it |
|---|---|---|
| Side-to-side movement | Oversized internal width or length | Die-cut insert, divider, folded-board collar or a smaller footprint |
| Vertical movement | Excess headspace or shallow retention | Top pad, locking tab, raised platform or correctly sized lid depth |
| Product-to-product contact | Multiple loose items in one box | Dividers, individual cavities, trays or wrapped inner units |
| Corner and edge impacts | Product positioned against carton walls | Protective buffer zone, suspension-style retention or formed insert |
| Surface scuffing | Rubbing against board, accessories or another product | Tissue, sleeves, separate compartments or a non-abrasive interface |
| Insert collapse | Heavy product or weak retention geometry | Stronger material, shorter unsupported spans and load-bearing folds |
| Product ejection on opening | Loose fit or poorly placed opening feature | Retention tabs, a tray, better product orientation or adjusted opening design |
Do not assume that a product that survives a drop will also arrive in acceptable retail condition. Scratches, crushed corners, displaced labels and a poor unboxing presentation can all be commercially important, even where the product remains usable.
Right-size the outer structure
Once the product and risks are understood, select an outer structure that contains the retention system efficiently. Right-sizing should reduce unnecessary cubic volume while retaining enough board strength, cushioning distance and closure security for the distribution route.
For a single product, the most efficient outer carton is often one that follows the product’s basic footprint and uses an insert only where it adds a clear function. For example, a slim rectangular product may need only a close-fitting sleeve or tuck-end carton, whereas a cylindrical bottle normally benefits from a shaped collar or tray that prevents rolling.
Choose the box style around the pack journey
The right box format depends on the product and how it will be handled after packing.
- Folding cartons are useful for lightweight retail products, where presentation and shelf fit matter. They can incorporate internal folds, tabs and platforms, but require suitable board selection for the product weight.
- Rigid gift boxes offer a more substantial presentation and can work well with fitted trays or lids. Their apparent premium feel does not remove the need to control movement inside.
- Mailer-style boxes can provide a practical format for e-commerce despatch. Internal partitions, scored folds or pads may be needed when products are delicate.
- Corrugated transit cartons are commonly used as an outer shipping layer for retail-packed products. Their dimensions should be set around the quantity, orientation and required separation of the inner packs.
- Sleeves and wraps can reduce empty space around regular-shaped products, but they offer limited protection from direct impact when used alone.
Where a branded retail box travels inside a separate shipping carton, optimise both layers. Making the retail carton extremely tight may create packing difficulties, while making the shipping carton too large can allow several retail packs to strike one another.
Avoid false economies from an undersized box
A smaller box is not automatically a better one. Common signs that an outer structure has been reduced too far include:
- Closure panels bowing or popping open
- Products being difficult to load consistently
- Inserts creasing, crushing or catching on the product
- Visible pressure marks on labels, corners or coatings
- Increased assembly time at fulfilment
- Products touching external walls with no buffer against impacts
Allow for normal production variation in both the product and the packaging components. A design that works only when every item is at its smallest measurement and every fold is perfectly formed is unlikely to be practical at scale.
Replace loose fill with engineered retention
Loose fill can occupy a large amount of space and may produce an inconsistent presentation, especially in branded consumer packaging. Engineered retention holds the product in a defined position, making it easier to reduce packaging void space without allowing the item to move freely.
The best choice depends on product geometry, weight, fragility, pack quantity, desired appearance and how quickly the system must be assembled.
Compare common retention methods
| Retention method | Best suited to | Main advantages | Considerations before choosing |
|---|---|---|---|
| Die-cut folded-board insert | Bottles, jars, boxed sets and regular shapes | Can be printed, integrated with the carton and supplied flat | Must be designed for real product tolerances; tabs can wear or crease if overloaded |
| Cardboard divider | Multiple products in a shipping or gift box | Separates items clearly and can be economical | Does not always prevent vertical movement; confirm the cells fit the largest product |
| Die-cut tray | Premium kits, electronics, cosmetics and gift sets | Holds a set layout and improves presentation | May use more material than a simple collar; assembly needs reviewing |
| Corrugated insert or pad | Heavier items and transit packs | Adds stiffness and impact spacing | Can appear utilitarian in a retail gift pack unless covered or combined with another finish |
| Moulded pulp insert | Products with a stable, repeatable shape | Contoured support and useful impact management | Tooling, surface finish and fit should be assessed for the product and order requirements |
| Paper wrap or tissue | Scuff-sensitive, low-risk or presentation-led items | Flexible, simple and attractive for some product types | It limits rubbing but rarely controls movement on its own |
| Paper-based cushioning | Mixed or irregular e-commerce orders | Adaptable around varying items | Requires a defined packing method to avoid overfilling and inconsistency |
| Foam or similar cushioning | Highly fragile or precision items | Can offer close conforming support | Review material preferences, disposal expectations and whether a paper-based alternative can meet the need |
An engineered insert should retain the product without requiring excessive force. If packers have to bend the product, push hard on a fragile area or repeatedly adjust the insert, the fit is not robust enough.
Use the product itself as part of the structure where appropriate
Some products have a strong outer retail carton, durable corners or a shape that naturally resists movement. In these cases, a simple collar, divider or orientation change may be enough. Others need the insert to carry most of the retention load.
For multi-product gift sets, avoid using one large cavity with tissue between items unless the products are light and non-fragile. Individual cells or a stepped tray generally provide more predictable separation and a cleaner presentation when the box is opened.
Review material and assembly trade-offs
Reducing void space is a design decision, not simply a dimensional one. A complex insert may reduce the outer box volume but increase material use, make assembly slower or introduce more opportunities for incorrect packing. Review the full system before approving a direction.
Balance material efficiency with packing efficiency
Consider the following trade-offs:
- One-piece integrated inserts can reduce the number of separate components, but may make the blank more complex and take longer to fold.
- Separate inserts can be easier to replace or use across several box designs, but add picking and assembly steps.
- Heavier board or corrugated material can improve rigidity, but may not be necessary for a lightweight item and can affect folding behaviour.
- Very close tolerances create a neat fit, but can be unsuitable for handmade, filled or naturally variable products.
- Decorative internal finishes improve presentation, but should not be placed where they may scuff, crack or interfere with retention.
- Flat-packed components can be storage-efficient, but their assembly sequence should be intuitive for the team doing the packing.
A pack design should also consider access. Can the product be removed without tearing the insert? Can a customer lift it out safely? Is there a finger notch, ribbon pull or sensible opening angle where needed? Reducing empty space should not make the product awkward to retrieve.
Think about the full packaging hierarchy
Many products use more than one level of packaging:
- Product-level protection, such as a sleeve, bag or inner wrap
- Branded retail or gift box
- E-commerce mailer or transit carton
- Grouped shipping case or pallet configuration
The void space at one level may be intentional because another layer provides the relevant protection. For instance, a presentation box may use a fitted insert for appearance, while the shipping carton provides the main impact buffer during courier handling. Define which layer is responsible for each function instead of expecting every box to do everything.
If you are specifying branded cartons, reviewing custom packaging boxes alongside the insert and shipping arrangement can help keep the dimensions, opening style and packing workflow aligned.
Validate the packed system before production
A packaging drawing is only a starting point. Validate a physical packed system before committing to a production run, especially if the product is breakable, heavy, high-value, unusually shaped or prone to cosmetic damage.
Use production-representative samples wherever possible. A stand-in object can be useful during early design, but it may not reflect the final product’s weight distribution, surface finish, tolerance or filled condition.
Run a practical validation sequence
A useful pre-production review includes the following steps:
- Assemble the box and insert using the intended materials and folding method.
- Pack several product samples, including units at the larger and smaller ends of normal variation where available.
- Check the fit in every direction: side-to-side, end-to-end, vertical and rotational movement.
- Inspect pressure points on corners, labels, closures, decorative finishes and fragile features.
- Open and reclose the pack to assess whether the product remains retained and whether the unboxing sequence works.
- Replicate realistic handling for the relevant route, including stacking, carrying, vibration and controlled impact checks appropriate to the product and supply chain.
- Inspect both product and packaging after handling for cracking, scuffs, deformation, loose inserts and closure failure.
- Observe packers using the system and record assembly time, common errors and any need for additional instructions.
- Adjust one variable at a time—such as cavity size, tab length, board grade or pad thickness—so that the effect of each change is clear.
For higher-risk products or more demanding distribution routes, agree an appropriate formal test plan with the relevant packaging and logistics stakeholders. The right test method, acceptance criteria and sample quantity depend on the product, route and business requirements; they should not be assumed from a general packaging design.
Common mistakes to avoid
- Measuring only the product body and missing caps, labels or accessories
- Reducing box dimensions before deciding how the item will be retained
- Using tissue or paper as the only protection for a heavy or fragile product
- Designing around a single ideal sample rather than normal dimensional variation
- Ignoring vertical movement under the lid
- Adding an insert that looks premium but does not support the product’s weight
- Treating the retail box and e-commerce shipping box as the same packaging problem
- Approving a sample without checking how quickly and consistently it can be packed
A practical decision checklist
Before finalising a right-sized pack, confirm that you can answer “yes” to these questions:
- Is the complete product, including accessories and wraps, accurately measured?
- Does the product have limited movement in all relevant directions?
- Is there appropriate separation from the outer walls for the likely handling conditions?
- Does the insert support the product rather than merely surround it?
- Can the box be assembled and packed consistently?
- Can the product be removed without damage or excessive force?
- Have variable product sizes and weights been considered?
- Has the packed system been physically reviewed after realistic handling?
- Is each packaging layer assigned a clear role in presentation, retention and transit protection?
FAQ
How much void space should be left in a package?
There is no fixed percentage that is suitable for every package. Leave only the space needed for protective material, product tolerances, straightforward packing and safe opening. Fragile or heavy products may need more protective separation than light, durable products, even where the box itself is closely sized.
Can a smaller box increase product damage?
Yes. If a smaller box removes the protective buffer, compresses the product, weakens the closure or makes the pack difficult to assemble, it can increase damage risk. The aim is controlled movement and suitable support, not the tightest possible fit.
Are cardboard inserts better than loose fill?
Cardboard inserts are often better for repeatable products because they provide a defined position, presentation and packing routine. Loose fill can be more adaptable for irregular or mixed orders. The choice should be based on product fragility, shape, pack quantity and how consistent the fulfilment process needs to be.
Should an insert be included in the box dimensions?
Yes. Specify the internal dimensions around the product and the fully assembled insert. Account for material thickness, folds, locking features and any clearance required to load and remove the product.
A well-designed pack removes wasted volume by controlling the product’s position, not by squeezing out every millimetre. Begin with accurate measurements, select retention that matches the actual risks, and validate the assembled package with real products before production. XGolden Print can support custom box discussions when you are ready to turn a tested pack layout into a printed packaging specification.
