
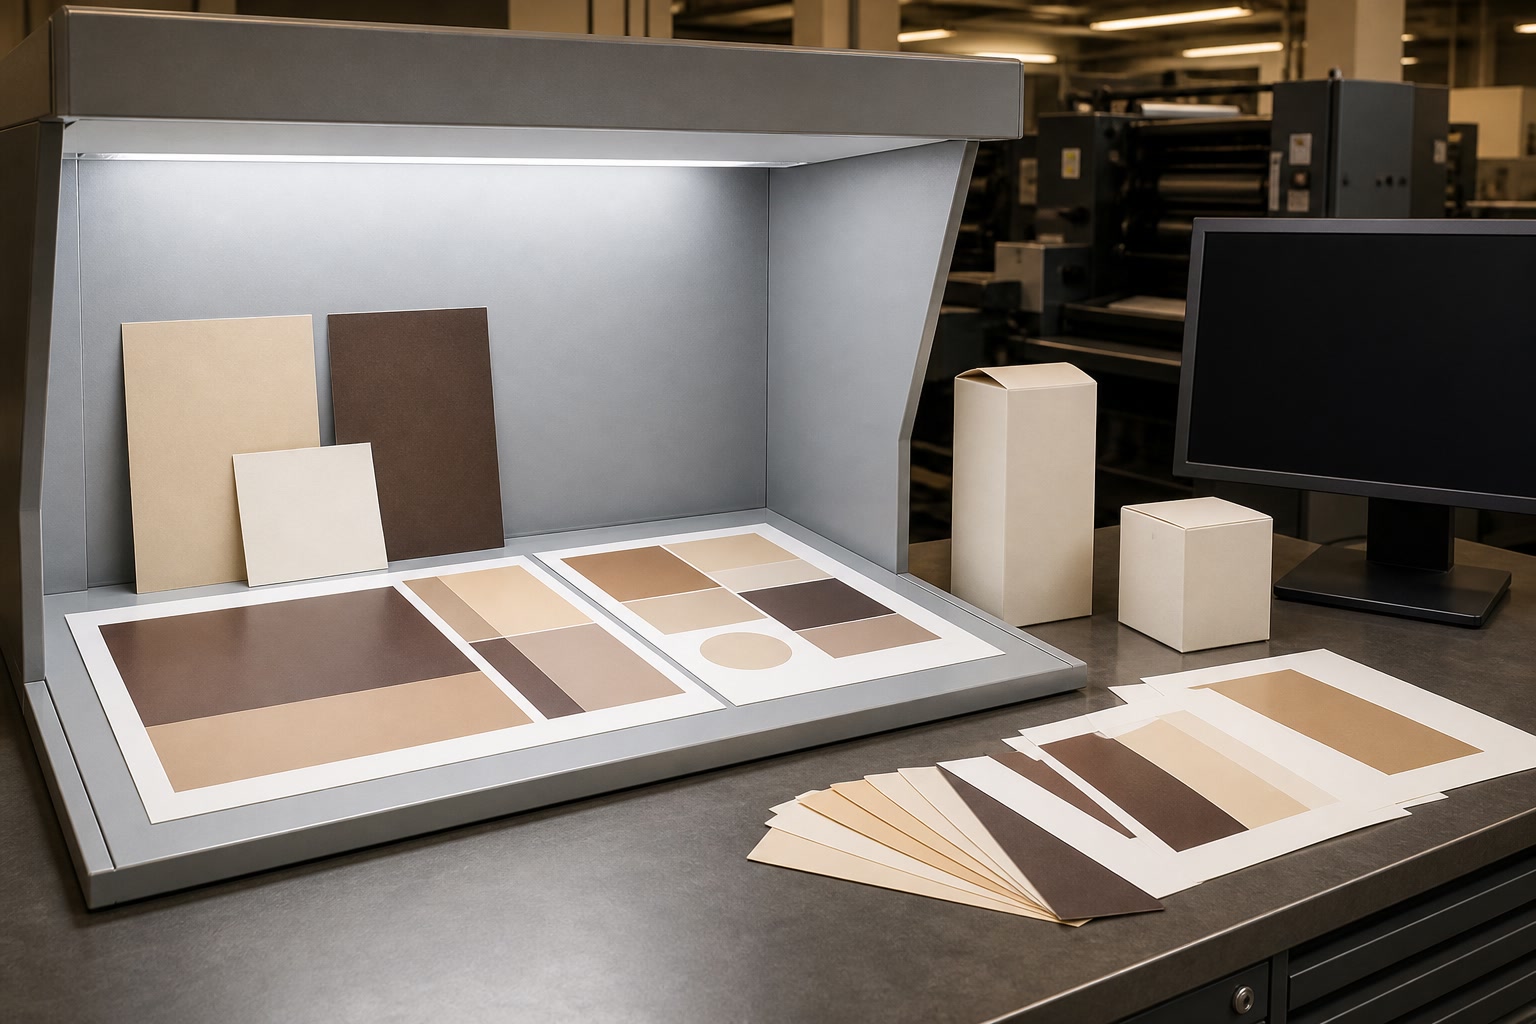
Packaging colour proofing is the process of agreeing what a printed pack should look like before full production begins. A reliable proof does not promise that every box will match a bright screen exactly; it creates a clear, realistic reference that accounts for the chosen artwork, ink system, board, finish and viewing conditions.
For custom printed packaging, the strongest approval is usually a physical sample made on, or closely representative of, the intended material and print process. Define the target colour early, assess proofs in suitable lighting, and document precisely what has been approved. This reduces avoidable disagreement when the finished packaging is delivered.
Define the colour reference
Colour approval can only work when everyone is referring to the same target. Saying that a blue should be “a little darker” or a red should be “more premium” leaves too much room for interpretation. Before asking for a proof, establish the colour reference for every critical element.
A colour reference might be:
- A named spot-colour swatch, such as a Pantone reference
- CMYK values supplied in print-ready artwork
- A previous production sample that is agreed as the target
- A signed physical proof
- A brand guideline with defined colour standards
- A measured colour target, where a technical specification is appropriate
For many packaging projects, a named spot-colour reference is useful for distinctive brand colours. It gives the printer a recognised target rather than relying on a screen display or an unlabelled image. However, a swatch book is not a guarantee that the same appearance can be achieved on every material. The result still depends on ink, substrate, finish, press settings and the viewing light.
Start with the right artwork values
Make sure the design file identifies colour intent correctly. This means checking whether elements are set up as:
- CMYK process colours, built from cyan, magenta, yellow and black
- Spot colours, specified as separate inks
- RGB colours, intended primarily for screens and needing conversion for print
- White ink, where printing on coloured, metallic, transparent or uncoated material
- Varnish, foil, embossing or other finishing layers, which should be supplied on clearly named separate layers where required
An RGB logo taken from a website may look unusually bright on screen but fall outside the practical range of CMYK printing. Converting it at the last minute can create an unexpected shift, especially in vivid blues, greens, oranges and fluorescent-looking tones. Ask for a print-focused colour conversion before approval if the on-screen version is central to the brand identity.
Identify which colours are critical
Not every colour requires the same degree of scrutiny. Flag the items where variation would be most noticeable or commercially significant:
- Logo and signature brand colours
- Skin tones and product photography
- Large solid backgrounds
- Colour-coded product ranges
- Colours that must match existing packaging, labels or retail displays
- Legal text, barcodes and small reversed-out lettering, where contrast matters
This allows time and budget to be spent where it makes a difference. A subtle shift in a small decorative leaf may be acceptable; a shift in a recognisable logo colour may not be.
Understand screen proof and physical proof limits
A proof is evidence, not an identical preview of every production outcome. Different proof types answer different questions, so it is important to know what each one can and cannot confirm.
| Proof type | Most useful for | Main limitations |
|---|---|---|
| PDF or on-screen proof | Checking layout, wording, dimensions, bleed, dielines and image placement | Screens vary widely; it is not reliable for final colour approval |
| Desktop printout | Reviewing general content and scale | Printer, paper and inks differ from packaging production |
| Contract-style colour proof | Assessing expected CMYK colour reproduction under controlled conditions | May not use the actual packaging board, ink coverage or finishing |
| Press proof or production sample | Assessing colour, material, registration and practical print result | May cost more and still requires agreed viewing conditions |
| Finished mock-up | Checking structure, feel, finish and shelf presentation | Colour can differ if it is not made using the final production method |
An electronic PDF is essential for approving copy, position, trim marks and structural artwork, but it should not be treated as a colour standard. Laptop and phone screens differ in brightness, colour settings, age and ambient light. Even two well-calibrated monitors can display a design differently.
A physical packaging colour proof is more meaningful because you can hold it, compare it with existing branded materials and see how the surface behaves. Yet even a physical proof has boundaries. If it is printed digitally but the order will be produced by another process, it may indicate direction rather than exact final output. Likewise, a proof on smooth white stock will not fully represent the result on natural kraft, textured board or metallised material.
Ask what the proof represents
Before approving, ask these practical questions:
- Is this proof produced by the same printing process as the final order?
- Is it printed on the final board, paper or film, or a substitute?
- Does it include the intended laminate, varnish, foil or other finish?
- Are all spot colours represented as separate inks, or simulated in CMYK?
- Does the proof show the actual size and placement of artwork?
- Does it include folds, seams or glue areas that may affect the design?
- What is the agreed reference if a minor variation occurs in production?
The answers help you decide whether a digital proof is sufficient or a more representative physical sample is sensible. This matters particularly for premium custom printed boxes with broad colour areas, exact branding or specialist finishes.
Treat a proof as an approval of priorities
It is rarely possible to optimise every feature independently. A proof may confirm strong photographic imagery but show a slight difference in a corporate colour. Or it may reproduce the brand colour closely while sacrificing a little detail in a dark image. Specify which result has priority before production.
For example, a cosmetics carton might prioritise a muted, precise logo shade and fine type. A food subscription box carrying large lifestyle photography may give greater importance to image balance and consistent tonal reproduction. Recording priorities avoids vague approval comments and gives production teams a usable decision.
Account for paper and finish effects
The same ink values can look noticeably different on different materials. Packaging colour proofing must consider the substrate as part of the colour system, not as a neutral background.
White coated board tends to provide a smooth, bright base, so printed colours can appear cleaner and more saturated. Uncoated stock absorbs more ink and may make colours look softer or less intense. Natural kraft board has an inherently brown or warm base that affects everything printed over it. Greyboard, recycled stocks and coloured papers each introduce their own cast and surface character.
The substrate changes the result
Consider these common effects when choosing materials:
- Gloss-coated board: often gives saturated colour and strong contrast, with noticeable reflections.
- Matt-coated board: can retain good colour while reducing glare, though dark areas may appear less intense than on gloss.
- Uncoated paper or board: lends a natural feel but may reduce sharpness and colour saturation.
- Kraft board: supports an organic aesthetic, but light inks and pale colours may need a white underprint or a different design approach.
- Coloured stock: affects printed inks unless an opaque white layer is used where the process allows.
- Textured paper: can create a tactile look but may alter fine detail, solid coverage and perceived colour.
A design approved on bright white paper should not automatically be expected to match on brown kraft. This is not necessarily a print fault; it is a predictable interaction between translucent inks and the surface beneath them.
Finishes can alter perceived colour
A finish is not merely decorative. It can change the way light reflects from the package and therefore how colour is perceived.
Gloss lamination often makes images and dark tones appear richer, but reflections can make colours harder to judge under direct lighting. Matt lamination gives a softer, more restrained appearance, although it may make dense black areas seem less deep. Soft-touch finishes, aqueous varnishes, UV coatings and foil effects all merit review on a physical sample where colour accuracy is important.
If your packaging includes foil, bear in mind that metallic surfaces are highly dependent on viewing angle and surrounding light. Printing transparent colours over metallic material can create striking effects, but it will not behave like printing the same colours onto white board.
For premium gift packaging, approve the combination of material, print and finish together. Approving each part separately leaves room for surprises.
Compare spot and process colour decisions
Choosing between spot colours and CMYK process printing is one of the most important colour-proofing decisions. Neither is automatically better; the right option depends on the artwork, colour expectations, print method, quantities and material.
Process colour: flexible for images and complex artwork
CMYK process printing creates colour by combining four inks in tiny dots. It is normally the practical choice for full-colour photography, gradients and designs containing many hues.
Advantages of CMYK:
- Suitable for photographic and detailed multi-colour artwork
- Avoids the need for a separate ink for every design colour
- Efficient where the design contains many colours
- Widely used across printed packaging applications
Points to check:
- Some bright brand colours cannot be reproduced exactly in CMYK
- Large solid areas can show variation more readily than small graphics
- Rich black, four-colour black and single-ink black can look very different
- The result is affected by board whiteness, finish and ink limits
Do not assume that a CMYK build will match a Pantone swatch just because it appears close on a monitor. Ask whether the intended colour is within the printable gamut for the selected process and material.
Spot colours: useful for controlled brand hues
A spot colour is a pre-mixed ink printed as its own colour rather than constructed from CMYK dots. It can be particularly useful for a logo colour that needs to be consistent across a packaging range.
Advantages of spot colours:
- Can provide a closer target for defined brand colours
- Often produce smoother, more consistent large solid areas
- Useful where a single colour is outside normal CMYK reproduction
- Can make colour management simpler for key branded elements
Points to check:
- A spot colour still changes in appearance across different substrates and finishes
- Each additional ink may affect cost, production planning or available print options
- A spot reference must be specified accurately, including the intended paper type where relevant
- Spot colours may need to be simulated rather than printed as separate inks in some workflows
Where the logo is the main brand identifier, a spot ink may be worth considering. Where the artwork is photographic, variable or contains numerous hues, CMYK may be the more sensible route. Some designs use both: CMYK images alongside one or more dedicated spot colours.
Do not overlook black and white
Black is not one universal print colour. A single black ink can be appropriate for fine text and barcodes, while a rich black build can create a deeper appearance for large backgrounds. However, rich black may be unsuitable for small type because registering multiple inks precisely is more demanding.
White also needs clear treatment. On standard white board it may simply be the unprinted substrate. On kraft, coloured stock, clear films or metallic surfaces, a printed white ink may be needed to make other colours appear as intended. Confirm whether white is part of the artwork and how it will be produced.
Review samples under consistent lighting
Lighting has a major influence on colour perception. A package can look warm and rich in a home or office with warm LED bulbs, then cooler or duller in daylight or a retail environment. This effect is especially evident with neutral greys, creams, blues and colours containing metallic or pearlescent effects.
Review a physical proof under lighting that is consistent and relevant to where the pack will be seen. Daylight-balanced viewing conditions are commonly used for controlled comparison, but you should also consider the real environment: shop shelving, a café counter, a warehouse, or a customer opening an e-commerce order at home.
Use a repeatable review method
For a more dependable approval session:
- View the proof beside the agreed colour reference, rather than relying on memory.
- Use clean, neutral surroundings where possible; vivid desks or walls can influence perception.
- Avoid judging colour under mixed light sources, such as daylight plus warm overhead bulbs.
- Look at the sample straight on and at the angles customers are likely to see.
- Compare more than one area, especially large solid fills and fine details.
- Check the sample after folding or assembling it where the structure changes reflections.
- Record specific feedback: “logo appears too purple against approved reference”, not simply “blue is wrong”.
If a colour looks different under two lighting conditions, it may be showing metamerism: two samples appear similar in one light but not another. This can occur because inks, coatings and materials reflect light differently. There may not be a single perfect match in every environment, so decide which viewing condition is most important.
Avoid reviewing a proof against an old faded box, a stained sample or an unverified online image. These are poor colour standards and can lead to a false rejection of an otherwise appropriate proof.
Record an achievable approved reference
A signed-off proof should be more than an email saying “approved”. The final approval should state what has been reviewed and what outcome is realistically expected in production.
Create an approval record that includes:
- Product name, SKU and artwork version
- Date of approval
- The named colour references or CMYK values
- The material and board specification used for the approved sample
- Print process used for the proof and intended production, where known
- Finish details, including laminate, varnish, foil or white underprint
- Images or scans of the approved sample for identification only
- The physical proof itself, labelled and retained where practical
- Any agreed priorities, tolerances or known limitations
- Confirmation of whether the approval covers colour, structure, copy and finish
Photographs are helpful for identifying a proof but are not a dependable colour reference on their own. Camera settings, screens and lighting can all alter the image. Keep the actual signed sample or a clearly identified production-standard reference whenever exact appearance matters.
Agree what “match” means before production
No print run is perfectly identical from sheet to sheet, batch to batch or material to material. A sensible approval sets an achievable expectation: the finished work should be consistent with the approved reference within the practical variation of the specified process, rather than matching a backlit screen pixel for pixel.
For repeat orders, retain the approved standard and note any changes. Switching from one board to another, changing from matt to gloss, revising a CMYK build or moving a logo from spot colour to process colour all justify a fresh proof. Do not assume that previous approval automatically carries over.
This is especially important for colour-coded product labels. When planning custom stickers and labels, verify the face stock, adhesive application, protective coating and intended surface alongside the print colour. A label viewed on a clear bottle, dark jar or kraft parcel can look different from the same label on its backing sheet.
Common packaging colour proofing mistakes
The most costly colour issues often begin before printing. Avoid these common mistakes:
- Approving colour from a phone or laptop screen. Use screens for design review, not final colour judgement.
- Providing only RGB artwork. Convert and review critical colours for the intended print workflow.
- Naming a brand colour without identifying the version. Be specific about the reference and intended substrate.
- Approving a proof on a different material. Treat it as indicative unless it closely represents final production.
- Ignoring finishes. Review lamination, varnish and foil effects with the print where possible.
- Using a previous pack without checking its condition. Fading, ageing and lot variation can make it unreliable.
- Failing to flag critical colours. Printers cannot prioritise what has not been identified.
- Giving subjective feedback only. Compare against a defined reference and state the required change clearly.
- Making artwork changes after colour approval. New images, altered ink builds or overprint settings can invalidate the proof.
A practical approval checklist for packaging buyers
Before giving final approval, check that you can answer “yes” to the following:
- Is the artwork version number correct?
- Are the important colours identified by an agreed reference?
- Have RGB elements been reviewed for print conversion?
- Does the proof represent the intended board, material and finish sufficiently well?
- Have spot colours and CMYK colours been deliberately chosen rather than assumed?
- Have large solids, gradients, photographs, fine text and barcodes been checked?
- Has the proof been assessed under suitable and consistent lighting?
- Are any acceptable limitations or compromises documented?
- Is there a retained physical reference for repeat work?
- Will a new proof be needed if material, finish or process changes?
FAQ
Is a PDF proof enough for packaging colour approval?
A PDF proof is usually enough to approve artwork content, layout, dimensions and dielines. It is not normally enough for critical colour approval because screen displays are not consistent physical colour references. Use a physical proof when material colour, brand matching or finish appearance matters.
Can CMYK match a Pantone colour exactly?
Sometimes it can appear close, but not every Pantone colour sits within the CMYK printable range. The result also varies with the substrate and finish. If a particular brand colour is essential, discuss whether a dedicated spot colour and representative physical proof are appropriate.
Why does the same printed colour look different on kraft board?
Kraft has a brown, absorbent base rather than a bright white surface. Inks interact with that base colour, so they often appear darker, warmer or less vivid. A white underprint, a revised palette or a different substrate may be needed depending on the desired effect.
Should I approve packaging in daylight?
Daylight or a controlled daylight-balanced light source is useful for consistent comparison. Also consider the main real-world environment in which customers will see the packaging. If those environments differ greatly, agree which one has priority.
Good packaging colour proofing is about defining a usable target, not pursuing an impossible screen-perfect match. Provide clear artwork, choose a proof that represents the final pack, assess it under consistent lighting and retain an approval record for future orders. When specifying a new packaging project with XGolden Print, share those references and priorities alongside the structural and finish requirements so the proofing route can be selected appropriately.
