
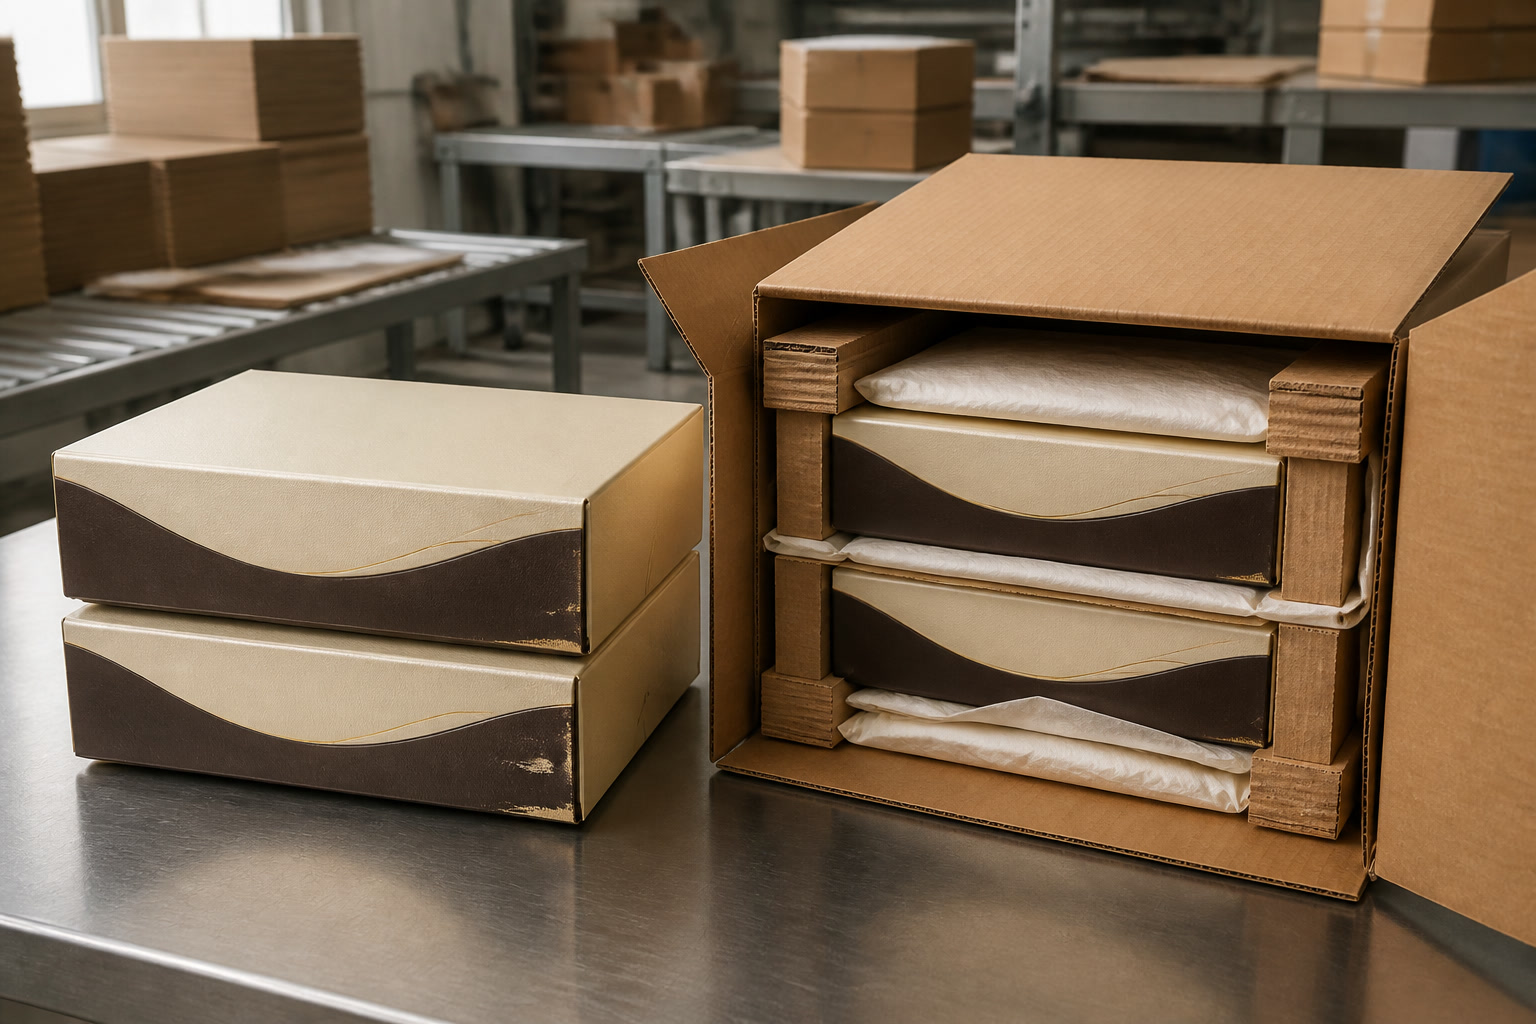
To prevent packaging scuffing and crushing, treat the finished pack as a system rather than relying on a tougher outer carton alone. The surface finish, box construction, inserts, packing method, pallet pattern and handling route all affect whether packaging reaches the customer looking as intended.
The most effective approach is to identify how damage occurs, protect vulnerable printed surfaces from rubbing, support load-bearing panels and corners, and trial the actual packed configuration before committing to volume production. A premium-looking box can still fail in transit if it is loosely packed, overfilled, stacked incorrectly or allowed to rub against adjacent packs.
Identify the likely damage mechanisms first
Scuffing and crushing have different causes, although they often appear together after storage or transport. Identifying the mechanism helps avoid spending money on the wrong solution.
Scuffing is usually a surface-contact problem. It occurs when printed packs slide, vibrate or rub against one another, against inserts, or against the inside of a shipping carton. Matt and dark-coloured packaging commonly makes abrasion more visible, particularly on broad solid-colour areas.
Crushing is primarily a structural and load-management problem. It happens when external pressure exceeds the box’s ability to hold its shape. Common causes include weak corners, oversized outer cartons, poor pallet stacking, heavy products resting on unsupported panels, and compression during warehousing.
Common signs and their probable causes
| Damage seen on arrival | Likely cause | First area to review |
|---|---|---|
| White marks or rubbed patches on dark print | Pack-to-pack friction or rough carton contact | Surface separation and coating choice |
| Scratches on lids or front panels | Movement inside the shipper | Dividers, tissue, sleeves or fit |
| Rounded, split or buckled corners | Compression or unsupported edges | Board strength, corner design and pallet load |
| Collapsed lid or bowed side panels | Product weight pressing against the box | Internal insert and panel reinforcement |
| Dented packs near the outer-carton edge | Insufficient void fill or a large shipper | Carton dimensions and fill level |
| Damage only on bottom layers of a pallet | Excessive stacking load or unstable pallet pattern | Pallet arrangement and storage height |
| Random scuffs on otherwise strong boxes | Handling friction during packing or fulfilment | Pack-out process and work surfaces |
Damage patterns are useful evidence. For example, uniform rub marks on every pack may point to the divider or tray material, while damage limited to carton-facing sides suggests the shipping case is too loose or too abrasive. Do not assume a thicker box will solve a problem created by friction.
Review coating and finish sensitivity
A finish affects both the appearance of packaging and its tolerance of contact during conversion, packing and transit. There is no universally scuff-proof coating; the right choice depends on the artwork, product position, packing density and distribution conditions.
Glossy finishes often make colours look deeper and may show certain rub marks less readily than an uncoated surface. However, fingerprints, fine scratches and glare can still be noticeable. Matt finishes create a refined, understated appearance, but dark matt areas can reveal handling marks more clearly. Soft-touch laminates can feel premium, yet their surface needs to be assessed carefully against the expected level of contact and abrasion.
Questions to ask when selecting a finish
Before approving a finish, check the following with the packaging supplier and your packing team:
- Which panels will face other boxes, dividers or outer-carton walls?
- Is the artwork dominated by dark solids, deep blacks, metallic effects or large areas of ink?
- Will boxes be hand-packed, machine-packed, stored for extended periods or sent through parcel networks?
- Does the product or insert press against the printed panel?
- Will labels, tape or protective film touch the finished surface?
- Is the box likely to experience temperature changes, humidity or warehouse dust?
- Can a physical sample be packed in the intended shipping configuration?
A coating should be selected alongside the design, not after structural decisions are complete. For instance, a dark matt lid packed face-to-face with another lid requires more separation than a lightly printed carton with limited contact areas.
Match the finish to the handling reality
Use the following broad principles when comparing options:
- High-contact packaging: Prioritise a finish and separation method that tolerate repeated rubbing. A protective sleeve, tissue wrap or divider may matter more than changing the coating alone.
- Gift boxes and presentation packs: Protect display-facing panels, lids and foil details before considering less visible base panels. Small scuffs can undermine the perceived value of a premium product.
- E-commerce packaging: Allow for vibration, multiple handling points and mixed carrier networks. A box that performs well on a retail shelf may need additional transit protection.
- High-ink coverage artwork: Request production-representative samples, because dense ink coverage can make abrasion more apparent.
- Uncoated or tactile stocks: Avoid direct friction wherever possible. Their visual and tactile character is often the reason for choosing them, but these surfaces should not be expected to behave like a heavily protected laminate.
Foil blocking, embossing, debossing and spot varnish also introduce local variations in the surface. Raised or recessed details can catch against neighbouring packs or concentrate pressure in a stack. Check that inserts and dividers do not scrape across these features when boxes are loaded or removed.
Strengthen corners, panels and inserts
A box’s visible design should not conceal its load path. In practical terms, the weight of the product and any boxes stacked above must transfer through reinforced areas rather than through unsupported lid panels or decorative features.
Corners are especially important because they stabilise the box shape and take a large share of compression forces. A well-designed rigid box, folding carton or corrugated shipper will use folds, walls, trays and inserts to direct pressure into stronger sections.
Build support into the structure
Depending on the pack type, useful strengthening measures include:
- Tighter-fitting lids and trays to reduce movement and help retain the box’s square shape.
- Double-wall or turned-in edge construction for presentation boxes where exposed board edges could dent.
- Internal fitments that hold the product in position rather than allowing it to strike the side panels.
- Corner blocks or folded supports where heavy contents create concentrated loads.
- Partitions or collars that transfer stacking pressure around a delicate product.
- Corrugated outer cartons sized for the actual packed weight and stack conditions.
- Reinforced bases for products that are heavy, tall or prone to shifting.
The internal insert is often the deciding factor. If a bottle, jar, electronic item or multi-part set can move, it gains momentum during transport and presses repeatedly against the finished package. A snug insert should restrain the product without forcing the box outwards or scratching the surface during assembly.
Avoid over-engineering the visible box
Using thicker material everywhere can increase cost, weight and fold resistance without addressing the underlying issue. It may also make a folding pack harder to form accurately. Instead, strengthen the areas that need it:
- Add support beneath heavy contents rather than simply thickening the lid.
- Use an insert to share the load across the base rather than allowing a product corner to bear on one point.
- Increase edge protection if corners are being damaged, rather than adding unnecessary layers to display panels.
- Resize the outer carton if packs have too much room to move.
For branded presentation packs, structure and finish must be developed together. Custom printed boxes can be specified with the board, construction and internal fitment suited to the product’s weight and handling route, rather than treating print and protection as separate decisions.
Separate finished surfaces in the carton
Finished packs should not be allowed to rub directly against each other during transport. Even a very small amount of movement can create visible abrasion over a long delivery route.
The right separation method depends on pack shape, surface sensitivity, packing speed and whether the protection will be removed before retail display.
Compare common separation options
| Method | Best for | Main benefit | Watch for |
|---|---|---|---|
| Corrugated divider | Multiple boxed products in one shipper | Keeps packs in defined cells | Divider edges can mark delicate finishes if movement remains |
| Tissue or glassine interleaving | Gift boxes, lids and sensitive printed faces | Soft barrier between surfaces | Can shift during packing if not folded or secured well |
| Paper or board sleeve | Individual premium boxes | Covers vulnerable faces and corners | Adds packing steps and material |
| Polybag or protective bag | Moisture and dust protection as well as scuff control | Isolates each item effectively | Consider the unboxing experience and disposal requirements |
| Foam or moulded insert | Heavy, fragile or unusually shaped goods | Controls product movement and absorbs impact | Must not abrade decorative surfaces |
| Void fill | Outer-carton gaps | Limits travel inside the shipper | It does not replace dividers or a correctly sized carton |
A divider works best when each compartment fits the pack closely enough to prevent lateral movement. If the cells are too large, boxes can still vibrate against the divider edge. If they are too tight, operators may scrape the printed surface while loading the carton.
For high-value presentation packaging, consider separating the box from the product and the box from adjacent boxes. A fitted internal insert controls the contents, while a sleeve, tissue layer or compartment protects the outer finished surface.
Keep rough materials away from display faces
Recycled corrugated materials and uncoated board can be practical shipping materials, but their texture may be unsuitable for direct contact with sensitive printed surfaces. This does not make them inappropriate; it means contact points must be designed deliberately.
Place smooth-facing protection against the printed box where needed, and ensure cut divider edges, exposed staples, tape ends and rough carton seams cannot touch visible panels. Also check packing benches, conveyor guides and storage racks: scuffs sometimes occur before the shipment even leaves the packing area.
Control carton fill and pallet arrangement
An outer carton should be neither underfilled nor overloaded. Underfilled cartons permit movement, while overloaded cartons transfer excessive pressure to the inner packs and can lose their own shape.
The best carton size is one that accommodates the planned orientation, divider system and modest protective material without leaving open voids. It should close without forcing down the contents.
Set a practical carton-fill standard
For each shipping case, define:
- Pack orientation: Which way must each box face to protect lids, corners and decorative panels?
- Number of units: How many packs fit without compression or excessive empty space?
- Separation material: Whether every pack, layer or row needs a divider or interleaf.
- Void-fill position: Where light fill is needed to prevent movement at the carton edges.
- Closure method: Whether tape or closure pressure causes the carton to bow or press on the contents.
- Maximum gross weight: A manageable weight for handlers and appropriate limit for the carton design.
- Stacking direction: Which panel should take the load when cases are palletised.
A frequent mistake is using the same shipping carton for several product variants with very different dimensions. This may simplify purchasing but can leave one variant loose enough to shift. Adjustable dividers or variant-specific shippers may be justified where the cost of damaged packaging is high.
Arrange pallets for stability, not just maximum quantity
Pallet damage is often caused by unstable loads rather than a weak individual case. Ensure cartons are aligned so their strongest faces support the load, with no significant overhang beyond the pallet edge. Overhanging cartons are exposed to knocks from handling equipment and can buckle at unsupported corners.
Keep the pallet load square and balanced. Avoid tall, narrow stacks, uneven layer heights and mixed carton sizes that create pressure points. Use layer pads, edge protection or restraint methods where appropriate for the route, but remember that external wrapping cannot correct a poorly filled or crushed carton underneath.
Storage conditions matter as well. Excessive compression time, damp conditions and repeated movement between warehouse locations can reduce the performance of paper-based packaging. If stock will be held before despatch, trial the likely storage duration and stacking arrangement rather than testing only a newly packed carton.
Trial the real pack-out and handling route
The most reliable way to prevent packaging scuffing and crushing is to test a production-representative pack through the route it will actually follow. A beautiful prototype checked only at a desk will not reveal rubbing during manual packing, vibration in a delivery vehicle or compression in a warehouse stack.
Start with a small trial using the intended finished box, product, insert, divider, outer carton and pallet arrangement. Use normal packing staff and procedures where possible, because assembly technique can affect both fit and surface damage.
A practical transit trial checklist
Inspect samples at these points:
- After box conversion and finishing
- After inserting the product and closing the pack
- After loading into the outer carton
- After carton sealing
- After stacking cartons for a realistic period
- After controlled movement, loading and unloading
- After delivery through the expected distribution method
- After unpacking in the same sequence a retailer or customer would use
Look for more than obvious breakage. Record fine scuffs under consistent lighting, corner softening, lid misalignment, insert movement, ink transfer, pressure marks and carton deformation. Photograph the location of any damage and note whether it occurs on the top, bottom, outside edge or contact face. This helps isolate the cause.
Where testing reveals a problem, change one variable at a time. For example, first add an interleaf, then retest before changing the coating, carton size and divider all at once. Controlled adjustments make it easier to find a cost-effective solution.
Include returns and fulfilment handling where relevant
For UK e-commerce, a pack may be handled through several stages: warehouse pick, packing bench, carrier collection, sorting, delivery and potentially a return journey. Retail-ready packs may face additional stacking and shelf replenishment handling. Build the protection level around the harshest realistic part of the route, not the most favourable one.
If packaging is intended as a gift or a key part of the product experience, unpacking should also be part of the trial. Protective materials must prevent damage without making the pack awkward to open, leaving residue or obscuring the branded presentation. Well-designed gift packaging balances this protection with the look and feel expected by the recipient.
Common mistakes that lead to transit damage
Avoid these recurring issues when specifying finished packaging:
- Choosing a finish solely from a visual swatch, without a packed sample.
- Assuming a premium rigid box needs no outer-carton protection.
- Packing printed faces directly against rough corrugated board.
- Leaving voids in a shipping carton and relying on tape to hold the load still.
- Using a divider that separates products but allows them to move within each cell.
- Designing an insert around product dimensions only, without allowing for assembly tolerances.
- Stacking cartons in a direction that puts compression onto lids or unsupported panels.
- Changing the product, insert or outer carton without repeating the pack-out trial.
- Ignoring scuffs created during packing, which can be mistaken for transit damage later.
FAQ
Is lamination the best way to stop packaging scuffs?
Not always. Lamination can improve resistance for some applications, but it does not prevent scuffing caused by direct friction, loose carton fill or poor handling. Surface separation and a stable pack-out are usually essential regardless of the finish.
Why are dark matt boxes more likely to show marks?
Dark matt surfaces often make changes in sheen, fine scratches and light-coloured abrasion more visible. They can still be used successfully, but require closer attention to contact points, dividers and handling.
Should every finished box be individually wrapped?
No. Individual wrapping can be valuable for highly sensitive, premium or e-commerce packs, but dividers, interleaves and correctly sized cartons may provide sufficient protection for many products. Choose the least complex method that performs reliably in a representative trial.
How can I reduce crushed corners without making the whole box thicker?
Review the load path first. Reinforce corners, improve the fit of the outer carton, use edge-supporting inserts and ensure cartons are stacked in the correct orientation. Targeted support is often more effective than increasing material thickness throughout.
The practical next step is to map your current pack-out from finished box to pallet, then trial it with the exact product, separation materials and shipping carton you intend to use. If you are developing a new specification, XGolden Print can help translate those handling requirements into a suitable custom box and presentation-pack structure.
