
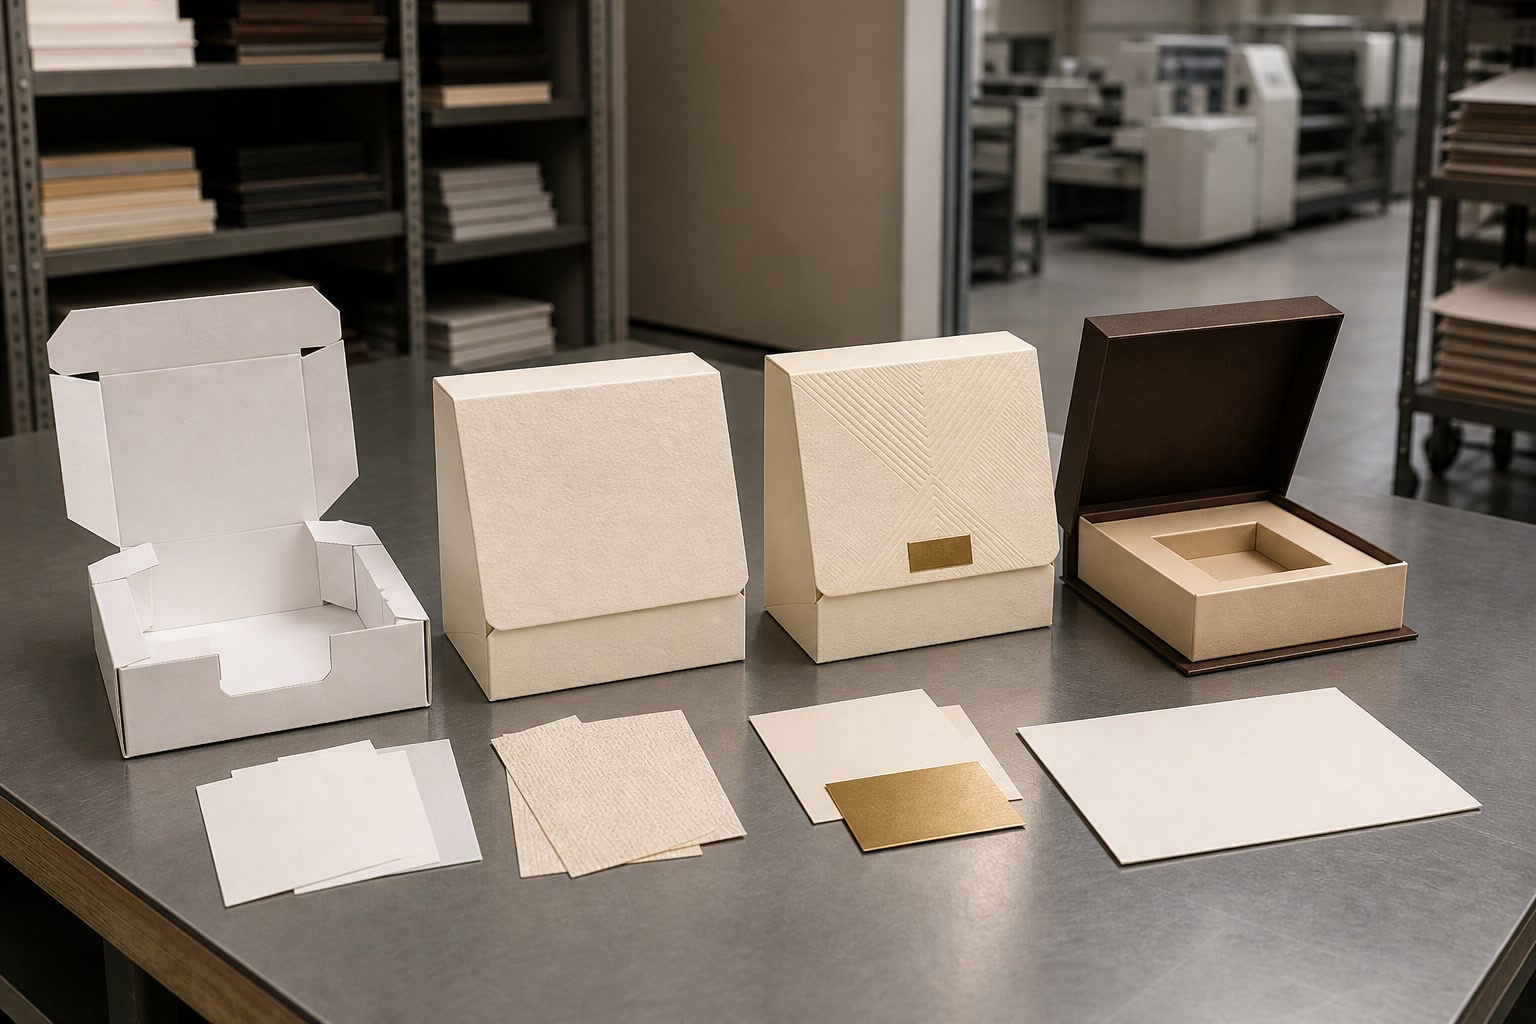
A packaging prototype and sample approval process reduces the risk of ordering boxes that look right on screen but fail to fit, protect or present the product properly in real use. The key is to approve the right evidence at the right stage: artwork, structure, materials, finishes and final production references each need different checks.
Do not treat a single sample as proof of everything. A plain structural model can confirm dimensions and assembly, while a printed sample can show artwork placement and a production sample is the closest reference for the finished order. Record exactly what has been approved, along with the file version, specifications and any accepted tolerances, before releasing production.
Choose digital, white and printed sample stages
The most efficient approach is to select sample stages according to the decisions still at risk. Ordering a fully finished prototype before confirming the dieline or product fit can waste both time and budget. Equally, approving only a PDF proof leaves important physical questions unanswered.
The terms used by packaging suppliers vary, so ask what is included in each sample and what method will be used to make it. The following comparison provides a practical basis for a packaging prototype sample approval plan.
| Sample stage | Best used to check | It cannot reliably prove |
|---|---|---|
| Digital artwork proof | Copy, barcodes, layout, logo placement, spelling, dieline alignment and variable data | Physical size, board stiffness, precise printed colour, foil effect or assembly |
| White sample or structural dummy | Box dimensions, product fit, opening method, inserts, folds, locking tabs and general pack-out | Printed graphics, final material colour, coating, foil, embossing or production colour consistency |
| Digitally printed prototype | General design appearance, graphic hierarchy, placement and a preliminary sense of colour | Exact match to another printing process, final sheen, production-run variation or all finishing effects |
| Press proof or production-made sample | Colour targets, print registration, selected material, chosen finish and closer production realism | Every unit in a larger run, especially where natural material and process variation occurs |
| Pre-production sample | Combined structure, artwork, materials, finishing and assembly in the agreed specification | Performance across all distribution conditions unless separately tested |
Start with a controlled artwork proof
A digital proof should be checked by the person responsible for the brand, the person who owns technical content and, where relevant, the buyer responsible for the specification. This prevents a visually attractive design from carrying the wrong product code, ingredient panel, variant name or barcode.
Check the proof at 100% scale where possible. A small text block that appears clear on a laptop may be hard to read when printed at its actual size. Confirm that:
- the approved dieline is being used;
- all required text is present, current and readable;
- graphics do not cross fold lines, glue areas or unsafe trim zones without intent;
- barcode quiet zones and orientation have been reviewed;
- linked images are high enough resolution for the intended print size;
- spot colours, white ink, varnish, foil or embossing layers are clearly named where applicable;
- no old logo, ingredient list, legal text or product photograph remains in hidden layers.
A digital proof is usually the fastest and least costly checkpoint, but it should not be used to sign off material feel or an exact printed colour.
Use a white sample before committing to a complex structure
A white sample is a physical, unprinted version of the pack, often cut and creased from a representative board or a comparable substitute. It is particularly valuable for magnetic rigid boxes, mailer boxes, cartons with inserts, sleeves, presentation packs and any design with unusual openings.
It shows whether the flat dieline converts into a workable pack. For a new custom box format, approve a white sample before investing in expensive finishing or committing to an order quantity. This is also the right point to establish whether a standard carton, a bespoke structure or a simpler alternative best meets the brief. See the options available for custom printed boxes when comparing common packaging formats.
Request a printed sample when appearance drives the buying decision
A printed sample matters when colour, imagery and shelf presentation are important. This is especially true for gift boxes, premium retail packs, seasonal launches and products sold through photography-led online channels.
However, ask whether the sample is digitally printed, press printed or made using the intended production method. A digitally printed prototype may be very useful for reviewing composition, but it can differ from a finished run in colour reproduction, ink coverage, texture, gloss and the appearance of metallic effects.
If a brand colour is critical, provide the agreed colour reference and state how closely it needs to be matched. A screen display is not a reliable colour standard. Paper shade, surface texture, ink process and coating can all alter the perceived result.
Check structure, product fit and the opening experience
A box has to work in the hands of the person packing it and the person receiving it. Assessing structure is more than placing the product inside once; it means recreating normal handling, opening and closing.
Use the real product, not only nominal dimensions from a specification sheet. Measure and trial the largest production-representative item, including caps, cords, protective wrapping, labels and any natural variation in the product itself. For a set, test every component together.
Check the internal dimensions, not just the outside of the box
The internal space is reduced by board thickness, folds, inserts, linings and closures. A pack with a stated external size can therefore be too tight even when the product dimensions seem to allow a margin.
For each sample, assess:
- Fit: Does the product enter without force, bending or scuffing?
- Clearance: Is there enough room for tissue, a leaflet, protective wrap or an insert?
- Retention: Does the product stay in place when the pack is lifted or turned?
- Removal: Can the customer remove the product without tearing the box or using excessive force?
- Closure: Do tuck flaps, tabs, magnets or sleeves engage consistently?
- Reclosure: If the pack is intended to be reused, does it close neatly after opening?
- Orientation: Is the product presented in the correct direction when the box is opened?
- Tolerance: Would modest variation in the product or packing method cause a problem?
For fitted inserts, test both the most compact and the largest likely product variation. Foam, paperboard, moulded pulp and folded card inserts each have different flexibility and recovery. An insert that holds a sample securely may become too loose or too tight if the supplied product changes by a few millimetres.
Assess the first-open experience
For retail and gift packaging, the opening experience is part of the product presentation. The sample should answer straightforward questions: Is it immediately clear where to open it? Does the lid lift cleanly? Does the sleeve slide at a controlled resistance? Are finger notches useful or visually distracting?
Look for practical points that are easy to overlook:
- Tabs that catch or tear after a few uses.
- Friction that makes a sleeve feel either loose or difficult to remove.
- A ribbon pull that is inaccessible once the product is packed.
- An insert that lifts with the product rather than staying in the box.
- A magnetic closure that snaps shut before the pack has been properly filled.
- A carton that needs two hands to close on a production packing line.
A visually minimal design can still need small functional features, such as a thumb notch, pull tab or opening indicator. Make those choices on a physical prototype, not on a flat artwork file.
Review material colour and finish limits
Material is not just a decorative choice. It affects printed colour, stiffness, scuff resistance, fold behaviour and the perceived quality of the pack. Before approval, identify the actual material and finish rather than describing the result only as “premium”, “natural” or “matte”.
Ask the supplier to state the board or paper type, nominal weight or thickness where relevant, print method, coating or lamination, and each finishing process. This gives your team a specification that can be checked later.
Expect colour to vary with the substrate and process
Uncoated, textured, recycled and coloured stocks absorb or reflect light differently from smooth white coated board. The same artwork can therefore appear warmer, duller or less saturated across materials. Black can appear deep and neutral on one stock but softer or brown-toned on another. Fine reversed-out type can also lose sharpness on absorbent surfaces.
Set expectations early:
- Specify whether a supplied colour reference is mandatory or whether a close visual match is acceptable.
- Review critical colours under sensible, consistent lighting rather than only under a phone camera or office screen.
- Check pale tints and large solid areas, which can reveal variation more readily than detailed graphics.
- Consider how a coating changes the appearance: gloss can enrich colour, while matt finishes can soften it.
- Avoid assuming that an on-screen metallic effect will reproduce as foil or metallic ink.
If a natural or recycled stock is selected for its character, slight variation in shade or fibre appearance may be part of that choice. Decide whether this is acceptable before approval, particularly when packaging from different production batches will sit together on a retail display.
Judge finishes by use, not appearance alone
Foil stamping, embossing, debossing, spot varnish, laminations and coatings can improve visual contrast and tactility. They also introduce practical limits. Fine foil details may not reproduce cleanly, deep embossing can affect nearby print, and some folds may crack or show whitening depending on the material and artwork coverage.
Review a finished sample for:
- sharpness of foil edges and registration to printed artwork;
- unwanted marks, dents or scratches on dark or heavily covered areas;
- legibility of small text over textured or finished surfaces;
- cracking along creases, especially where dark ink crosses a fold;
- the contrast between gloss, matt and uncoated areas;
- how the finish looks after ordinary handling and packing.
A sample gives a valuable reference, but it is not a promise that every sheet or every box will look identical. Packaging printing involves reasonable variation in colour, alignment and material characteristics. The buyer should agree in advance which features are critical and what variation is acceptable.
Test assembly and pack-out
A prototype that looks convincing on a desk can still be awkward to assemble at scale. Test the pack in the same sequence used for normal fulfilment: form the box, add the insert, place the product, include any leaflet or accessories, close it and apply outer protection.
This step is important for direct-to-consumer orders as well as retail distribution. The pack may need to work for an in-house team, a co-packer, a fulfilment provider or a retail packing operation. Their processes can differ, so document the intended method rather than relying on assumptions.
Run a realistic packing trial
Use representative components and repeat the process several times. Time is useful as an internal comparison, but consistency matters more: can different people assemble the pack correctly without special knowledge?
Observe whether:
- glue points or auto-lock bases form as intended;
- the pack remains square once filled;
- inserts can be placed without bending;
- the product orientation is obvious;
- printed surfaces rub against each other during assembly;
- seals, labels or tamper features have a suitable application area;
- the finished pack fits the chosen mailing carton or retail outer;
- void fill, tissue paper or protective wrap changes the closure performance.
For gift packaging, include the full presentation arrangement in the trial: tissue, ribbon, card, accessories and any reveal layer. These small additions can materially change the required internal dimensions.
Separate pack-out checks from transit testing
A normal assembly trial can reveal whether the packaging is practical to fill and close. It does not prove that the item will withstand every delivery, storage or handling condition. If protection is important, plan an appropriate separate test using the actual product, mailer and outer packaging.
Define the journey you need to assess. For example, a presentation box placed inside a protective postal carton has different risks from a retail carton that is stacked in an outer case. Do not assume a rigid-looking box alone provides sufficient product protection.
Common pack-out mistakes include designing the inner box before selecting the outer carton, approving an insert without the final wrapped product, and overlooking the thickness of leaflets or instruction booklets.
Record changes and approved references
An approval is only useful if everyone can identify exactly what was approved. Email comments such as “looks good” are risky when several artwork files, sample types and material options have been discussed.
Create a single approval record for each SKU, size and variant. It should connect the physical sample to controlled documents and give production teams an unambiguous instruction.
What to include in a packaging approval record
At minimum, record:
- Project and product identification — product name, SKU, pack size, market or language version where applicable.
- Artwork reference — file name, version number, revision date and final PDF or source-file reference.
- Dieline reference — dieline name and revision, with finished internal and external dimensions where specified.
- Materials — board or paper description, colour, weight or thickness if agreed, and insert material.
- Print specification — process, inks, spot colour references, white ink, varnish layers and any colour priorities.
- Finishing specification — lamination, coating, foil, embossing, debossing, window or other agreed features.
- Sample reference — date, sample type, photographs if helpful and any physical sample identification.
- Approved changes — a concise list of adjustments made after earlier samples.
- Accepted limitations — for example, expected stock variation, a non-critical colour difference or a known mark at a fold.
- Approver details — name, role, approval date and authority to release the design.
Photographs are useful supporting evidence, especially for pack-out and opening sequence, but they should not replace an identified physical sample or a controlled specification. Camera exposure and screen settings can change how colours and finishes appear.
Turn feedback into instructions
Good feedback is specific, measurable and traceable. Instead of “make the logo slightly bigger”, state “increase the front-panel logo width from 42 mm to 48 mm; retain centred alignment.” Instead of “use a warmer white”, identify the agreed stock or approved swatch.
Keep change requests grouped by version. A simple change log can include:
| Version | Change | Reason | Status |
|---|---|---|---|
| V01 | Initial artwork and dieline | First review | Superseded |
| V02 | Enlarged product name; amended insert aperture | Improve readability and fit | Approved subject to printed sample |
| V03 | Final print and finish specification | Production release | Approved |
This approach prevents an old artwork proof from being mistaken for the final instruction.
Release production with clear version control
Production should be released only after the approved sample, files and commercial specification agree with one another. If they conflict, resolve the difference before manufacture. The latest email attachment is not necessarily the latest approved artwork.
Use one clearly named production-release folder or system location. Restrict it to final documents, and retain earlier versions separately as superseded references. A practical naming format might include the product, pack component, revision and date, such as Brand-Product-Carton-V03-2025-03-08.pdf.
Before release, conduct a final cross-functional check with the people accountable for brand, product, purchasing and packing operations. Confirm:
- the correct version has been released for each product variant;
- the artwork, dieline and specification use matching revision numbers;
- the approved physical sample corresponds with the stated material and finish;
- all post-sample amendments have been incorporated;
- pack-out instructions reflect the final components;
- any critical colour, finish or structural points are highlighted;
- obsolete files have been marked as superseded and removed from the release set.
Avoid these common approval failures
The most costly issues often arise from gaps between stages rather than from a single obvious error.
- Approving artwork but not the structure: The printed design is correct, yet the product does not fit.
- Approving a digital print as if it were a production press proof: General appearance is accepted, but the final colour or finish differs.
- Changing the artwork after sample approval without a new reference: The physical sample no longer represents the released design.
- Using a verbal approval: No one can later confirm which dimensions, stock or finish were accepted.
- Approving one variant and assuming all variants match: Different ink coverage, copy length or product dimensions can alter results.
- Ignoring packing operations: A box works for a designer assembling one unit but not for routine fulfilment.
- Treating the sample as a perfect universal standard: Normal manufacturing and material variation has not been discussed or documented.
A disciplined approval process is not bureaucracy for its own sake. It helps protect the brand outcome while giving suppliers and internal teams a precise, workable brief.
FAQ
How many packaging samples do I need?
There is no fixed number. A simple repeat order with unchanged artwork may need only a controlled artwork proof and confirmation against a retained approved reference. A new structural design, premium finish or tightly fitted insert will normally benefit from a digital proof, a white structural sample and a printed or pre-production sample.
Can I approve packaging from a PDF proof alone?
A PDF proof is suitable for artwork content, layout and basic dieline positioning. It cannot confirm physical fit, assembly, board feel, opening performance or final colour and finishing. Use it as one stage in the process, not the entire approval.
What is the difference between an approved sample and a production specification?
The sample is a visual and physical reference. The production specification states the controlled details needed to reproduce it: artwork version, dieline, materials, print method and finishing. Both are needed because a sample on its own may not reveal every technical instruction.
Who should approve packaging before production?
Approval should involve the people responsible for the decisions being made. Brand or marketing teams typically check appearance and copy, product teams check fit and user experience, procurement checks the agreed specification, and operations or fulfilment teams check assembly and pack-out. Give one named person final approval authority.
A clear packaging prototype sample approval process makes the final order easier to specify, assess and repeat. If you are developing a new box format, begin with the product and pack-out requirements, then progress from artwork proof to structural sample and production-representative reference. For background on XGolden Print’s packaging capability and scale, see about XGolden Print.
