
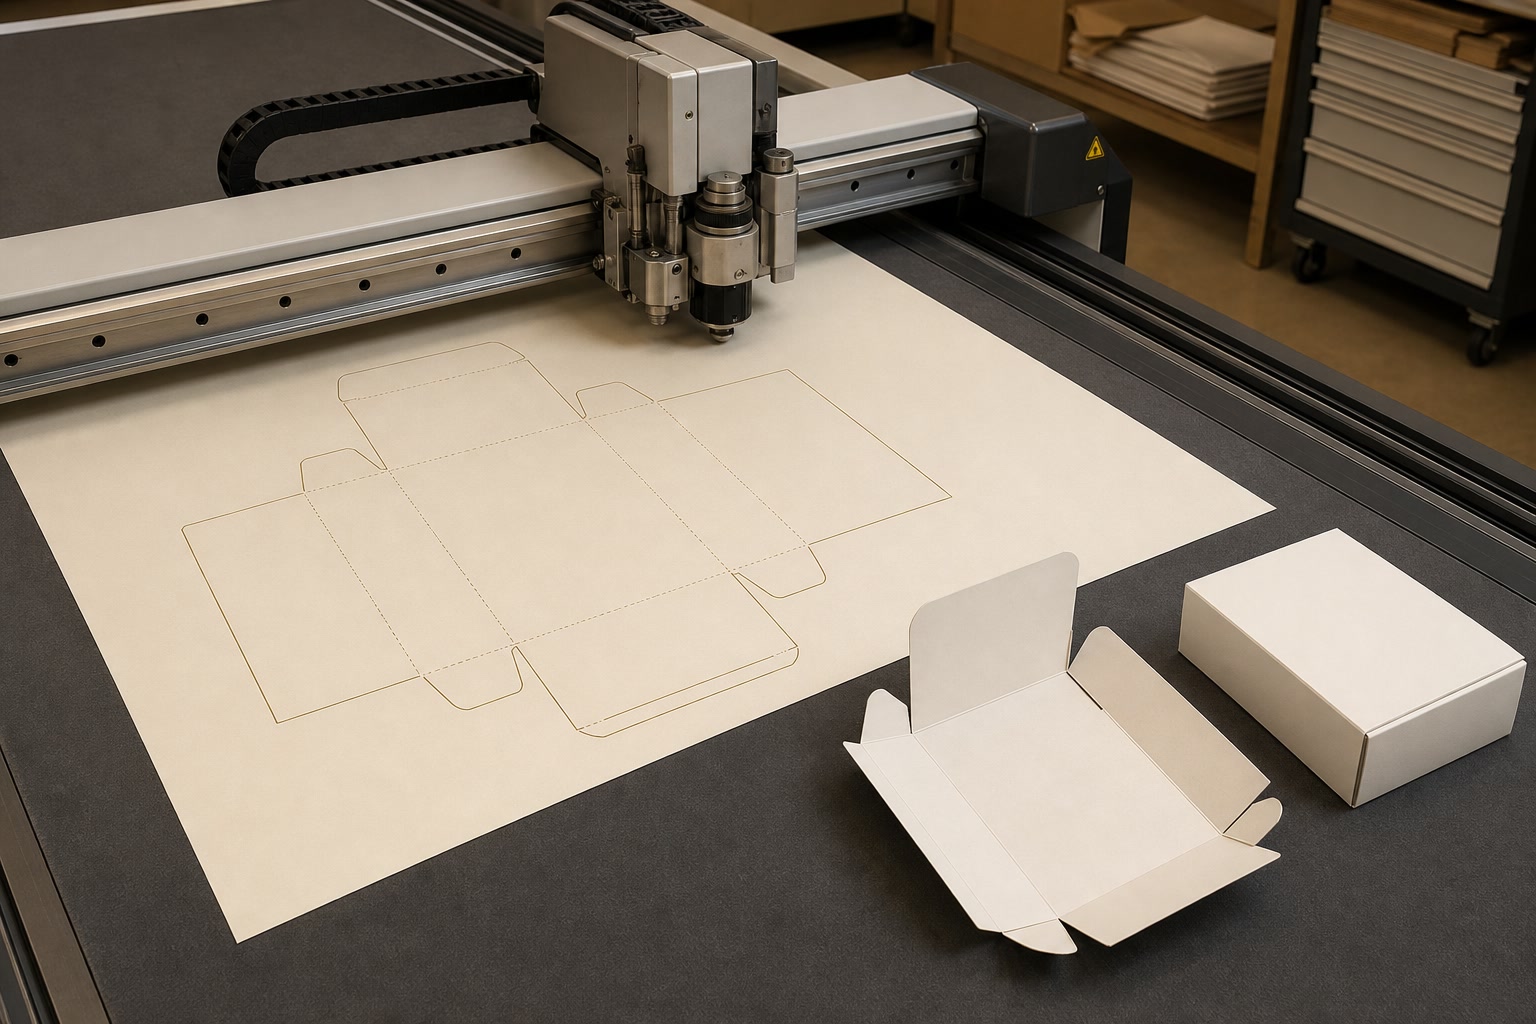
A packaging dieline is the flat technical drawing used to turn artwork into a finished box, sleeve, label or carton. It shows where the printed sheet will be cut, creased, folded, glued and, where applicable, fitted with a window or special finish.
For brand and artwork teams, the key rule is simple: treat the supplied dieline as a production template, not as decoration. Keep essential content inside safe areas, extend background artwork into bleed, and check every panel in its folded orientation before approving files.
Understand cut, crease and fold lines
A dieline normally contains several line types. Their colours, names and stroke styles vary between packaging suppliers, so always use the key supplied with the template rather than relying on colour alone.
| Dieline element | What it means | Artwork implication |
|---|---|---|
| Cut line | The outer edge or internal shape that will be cut out | Backgrounds and images should run beyond it into the bleed area |
| Crease or score line | A pressed line that helps board fold neatly | Avoid small text, fine borders and critical details close to it |
| Fold line | Indicates the direction or position of a fold | Check which panels become front, back, sides, base and closure |
| Perforation | A line designed to tear or detach | Keep copy clear and consider how the graphics look before and after opening |
| Glue area | A section that receives adhesive during conversion | Do not place key text, barcodes, metallic effects or detailed imagery here |
| Window cut-out | An opening revealing the product or inner pack | Keep important artwork outside the opening and account for any clear film |
A crease is not always a perfectly sharp dividing line. Depending on the board, coating, fold direction and box style, the fold may shift visually by a small amount. This is why borders placed tightly around a panel can look uneven after assembly, even if the flat artwork looked exact.
Do not alter the dieline’s cut or crease paths unless the packaging supplier has specifically approved the change. Moving a flap by a few millimetres can affect closure, glue application, board grain, packing performance and the finished size.
Keep production lines separate from printable artwork
Place cut, crease, perforation and glue-zone guides on their own locked layer. They should generally be set as non-printing technical information, following the supplier’s file instructions.
Before exporting the final PDF, confirm that:
- the dieline layer is present if the supplier requests it;
- the technical lines are not accidentally set to print;
- no white object is covering a cut, crease or glue instruction;
- the artwork version matches the latest approved structural template;
- the PDF page size has not been scaled or cropped unexpectedly.
A common avoidable error is designing on an old dieline after a size or closure change. Use a clear version name, such as Brand_Product_Box_Artwork_v4, and record the date or revision of the structural file it uses.
Map panels and orientation before designing
A flat dieline can be difficult to read because it shows all faces of the pack opened out. Before finalising copy or imagery, map the panels to the assembled item.
Start by identifying the main display panel: on a carton, this is usually the panel intended to face shoppers; on an e-commerce mailer, it may be the lid or outer top panel. Then identify the back panel, side panels, top and base flaps, tuck-in sections and glue flap.
Create a simple panel map
For each panel, note its purpose and the information it must carry.
| Panel | Typical use | Questions to ask |
|---|---|---|
| Front | Brand, product name, primary visual and key selling message | Is this the panel customers see first? |
| Back | Product description, instructions, ingredients or business details where relevant | Is there enough room for mandatory copy at a readable size? |
| Side panels | Variant name, supporting information, barcode or repeated branding | Will these remain visible when the pack is displayed or packed? |
| Top or lid | Short brand message, opening cue or product name | Will the message read correctly when the pack is closed? |
| Base | Batch, recycling, legal or technical information where required | Can printing and scanning remain practical in this position? |
| Glue flap | Usually no customer-facing content | Is all important artwork outside the adhesive area? |
Mark the reading direction as well. A logo that appears upright on the flat layout can be upside down once a tuck-end carton is closed. Rotate copy only when it will read naturally on the finished pack, rather than simply making the dieline look neat on screen.
If possible, make a low-cost paper mock-up at actual size. Print the dieline, cut it out, fold it and label each face. This quick check often identifies upside-down panels, copy hidden under flaps, or a barcode placed too close to a fold.
Check the inside as well as the outside
Many packaging structures include reverse-side printing, such as messages inside a lid, instructions beneath a flap or branded interior panels. Specify clearly whether each artwork element is outside print, inside print, or both.
Remember that the internal view may require separate orientation. A message intended to be read after opening needs to face the user correctly when the carton is assembled, not necessarily when the artwork is viewed flat.
Set bleed and safe areas
Bleed is extra artwork extending beyond the cut line. It prevents unprinted white slivers appearing at the edges after normal cutting variation. Safe area is the inset zone where important content should remain so it is less likely to be trimmed, creased or obscured.
Use the bleed and safe-area measurements specified by the packaging supplier. For many printed packaging jobs, a 3 mm bleed is a common starting point, but it is not a universal rule. Complex shapes, large formats, labels, windowed cartons and particular print processes may need different allowances.
What should extend into bleed?
Extend all edge-to-edge visual elements beyond the cut line, including:
- solid background colours;
- photographs and illustrations;
- patterns and textures;
- colour blocks;
- gradients;
- borders intended to reach the edge.
Do not simply enlarge the PDF page without extending the artwork. The bleed must contain a continuation of the design.
What belongs inside the safe area?
Keep critical items well inside the supplier’s indicated safe area, especially:
- logos and product names;
- small type;
- QR codes and barcodes;
- certification or recycling marks where used;
- ingredients, warnings and directions;
- contact details;
- fine decorative lines;
- faces, product shots and other key image details.
Safe areas matter most near cut lines, folds, perforations, windows and glue flaps. For example, a product name positioned close to a tuck flap might technically sit inside the trim edge but still become difficult to read once the carton is folded.
Avoid narrow borders around panels
A border close to a cut edge or fold can expose tiny production variations. On a folded box, one side of the border may appear thicker than the other, which can make an otherwise high-quality design look misaligned.
If the border is central to the design, make it visibly inset from the panel edge rather than attempting to follow the trim line exactly. Alternatively, use a full-bleed pattern or colour field that is more forgiving.
Handle windows, glue zones and finishes
Structural and finishing features affect both design placement and file preparation. Build them into artwork review from the beginning rather than treating them as last-minute additions.
Design around windows
A window is a cut-out in the board, sometimes backed with clear film, that lets buyers see the product. The visible area is not always identical to the cut shape in the flat dieline: folds, panel depth and product position can change what is seen from the front.
When working with a window:
- keep text and vital imagery away from the cut-out;
- consider what the customer will see through it when the product is packed;
- check whether the window needs a clear film and how it will be fixed;
- avoid relying on a product colour that may vary between batches as a core part of the printed design;
- request guidance if a finish, such as foil or raised varnish, approaches the window edge.
A window can also reduce the available strength of a panel. The structural design should be agreed before artwork approval, particularly for heavier products or packs that will be stacked.
Respect glue zones
Glue flaps and adhesive strips are functional areas, not spare design space. Ink coverage, coatings and certain finishes can affect adhesion, while text may be hidden after assembly.
Ask the supplier to show the exact glue zones and whether they need to remain free from print, varnish or lamination. This is particularly important for cartons with wide manufacturer’s joints, crash-lock bases, self-seal strips or complex folded constructions.
Plan finishes as separate technical elements
Finishes such as foil, embossing, debossing, spot UV, textured varnish and white ink usually need separate named layers, vector shapes or spot colours. Requirements vary by process, so do not assume one artwork setup works for every finish.
Before handover, confirm:
- whether the finish needs its own spot-colour swatch;
- the required naming convention for that swatch;
- minimum line widths and gaps;
- whether trapping or overlap is needed;
- any clearance required from cuts, creases and glue areas;
- whether the finish artwork should overprint.
Fine foil details, very small reversed text and close-register effects can have practical limitations. Simplifying a tiny decorative element is often safer than approving an effect that looks excellent on screen but is unsuitable for the production method.
For a packaging format with more substantial structural requirements, review the relevant custom printed box options before developing final artwork. The chosen box style determines the dieline, panel layout and closure constraints.
Check barcodes and required information
Barcodes must remain readable after printing, folding, packing and handling. A barcode that scans from a desktop proof is not automatically suitable for a finished carton.
Use the barcode format required by the retailer, marketplace, warehouse or internal stock system. For retail products in the UK, this commonly means confirming the appropriate GS1 barcode number and symbol specification with the organisation responsible for product identification.
Barcode placement checklist
Place the barcode on a reasonably flat, accessible panel and check that it is:
- away from creases, folds, perforations and glue seams;
- clear of windows, metallic foil and highly reflective finishes where possible;
- printed at the required size and orientation;
- surrounded by the required clear space, often called the quiet zone;
- not distorted, stretched, rotated without approval or placed over a busy image;
- readable once the product is inside the pack;
- tested to the requirement set by the retailer or distribution partner.
Dark bars on a light, matte background are generally the most dependable visual approach. Reversed barcodes, low-contrast colour combinations and codes printed across textured, glossy or metallic surfaces can create scanning problems. Confirm acceptability before committing to an unusual design treatment.
Treat legal and product copy as a content task, not a design afterthought
A dieline does not determine what information is legally required; it only defines where that information can fit. The required copy depends on the product category, how it is sold and the market in which it is placed.
Before artwork approval, the responsible brand or product team should check that the latest approved wording, quantities, warnings, traceability details, origin statements and disposal information are used where applicable. Leave adequate space early in the layout rather than reducing essential text to an impractical size at the end.
For products using labels rather than cartons, artwork still needs trim, bleed and safe-area checks. Explore custom printed stickers when a label is the primary information carrier or when it complements outer packaging.
Run a preflight before approval
Preflight is the final technical and content review before sending artwork into production. It is not just a PDF check: it should confirm that the file, dieline, structure and commercial information all agree.
Artwork preflight checklist
Use this checklist before approving a packaging file:
Dieline and structure
- Is this the latest approved dieline revision?
- Have cut, crease, perforation, window and glue areas been kept unchanged?
- Have all panels been checked in a folded mock-up or 3D visual?
- Are front, back, top, base and internal panels correctly oriented?
Layout and print readiness
- Does artwork extend to the specified bleed?
- Is essential copy inside the safe area?
- Are borders kept clear of trims and folds?
- Are images high enough in resolution for their placed size?
- Are fonts embedded or converted in line with the supplier’s instructions?
- Are spot colours, white ink and finishing layers clearly identified?
- Is overprint set intentionally, rather than accidentally?
Content accuracy
- Is the product name, variant, quantity and copy approved?
- Is the barcode correct, complete and positioned appropriately?
- Have required warnings, instructions and regulatory details been reviewed by the responsible team?
- Are URLs, contact details and product claims current?
- Does every language version use the correct panel and artwork version?
File handover
- Is the PDF exported at 100% scale?
- Does the file have the requested PDF standard and colour setup?
- Are supplied technical layers included or removed as requested?
- Is the filename clear enough to identify the product, format, version and date?
- Has the team recorded who approved the final content and artwork?
Common mistakes that delay approval
The most frequent issues are straightforward: missing bleed, text too close to a crease, a barcode on a glue flap, an outdated dieline, a finish layer omitted from the PDF, and copy facing the wrong way after folding.
Another common problem is approving a digital visual as if it were a physical proof. Screen mock-ups are useful for design review, but they may not reveal board thickness, fold movement, colour variation, finish texture or the practical visibility of a panel. Confirm what type of proof is being reviewed and what it can, and cannot, validate.
FAQs
What file format is best for packaging artwork?
A press-ready PDF is commonly requested, but the required PDF specification, colour profile, layers and bleed settings vary. Follow the individual supplier’s artwork guide and retain the editable working file separately.
Can I make my own packaging dieline?
You can create a visual concept, but the production dieline should be supplied or approved by the packaging manufacturer. It needs to match the board, structure, closure, cutting tool and conversion process.
Is a crease line the same as a cut line?
No. A cut line removes material; a crease or score line compresses the board to make folding easier. Treating a crease as a cut would result in a pack that cannot hold its shape.
How much bleed should packaging artwork have?
Use the amount stated in the supplied template. A 3 mm bleed is common for many jobs, but it is not suitable as a blanket assumption for every packaging format.
A well-prepared dieline saves time because it gives designers, product teams and printers one shared map of the finished pack. Start with the approved structural template, check the folded orientation, and use the preflight list before releasing artwork. If you are selecting a new format, compare the structure first, then build the design around its actual dieline rather than adapting it later.
