
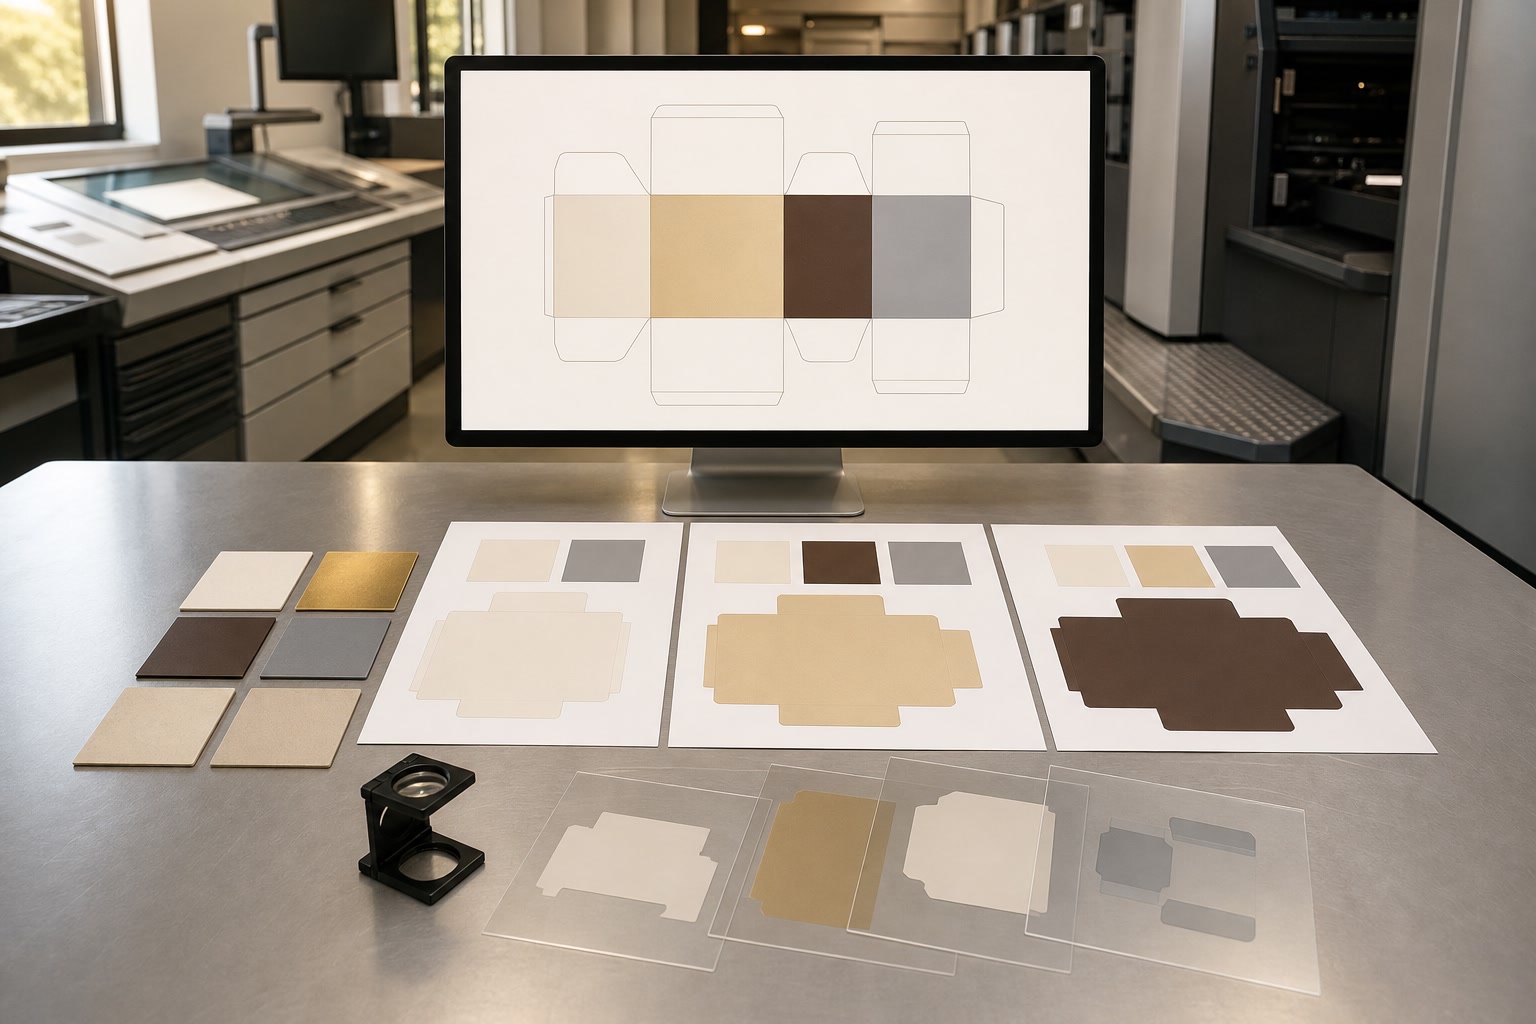
A packaging artwork preflight checklist is a final, structured review of every file setting that can affect how your printed packaging is made. It should happen after the design is signed off internally but before files are released for production.
Checking the dieline, artwork scale, linked assets, colour builds, overprint, finishing layers and version status can prevent costly rework, delayed approvals and packaging that does not assemble or read as intended. Use the checklist below for cartons, sleeves, gift boxes, labels and other custom printed packaging.
Confirm the approved dieline version
Start with the structural template. A dieline is not merely a visual guide: it tells the manufacturer where the packaging will be cut, creased, glued and, where applicable, perforated. Artwork can be technically perfect yet unusable if it sits on an old or altered dieline.
Before reviewing graphics, confirm that the design team is using the final approved structural file.
Check the template details
Review the following points:
- Version and issue date: Match the dieline filename, revision number or date against the version approved by the packaging buyer or production contact.
- Finished dimensions: Check the assembled length, width and depth rather than relying only on the flat artwork dimensions.
- Panel orientation: Make sure front, back, side panels, top and base are correctly identified. This is especially important for cartons with tuck ends or reverse-printing requirements.
- Bleed area: Extend backgrounds, photographs and edge-to-edge colours beyond the cut line. The required bleed can vary by product and production method, so use the allowance stated on the supplied dieline.
- Safe area: Keep essential text, logos, barcodes and fine decorative details inside the safe margin, away from cut and crease lines.
- Glue areas: Do not place important content in glue flaps. Avoid heavy ink coverage, foil, varnish or embossing in these areas unless the manufacturer has confirmed that it is suitable.
- Cut, crease and perforation lines: These must remain clearly identified and kept separate from printable artwork.
- Board grain or orientation notes: If shown on the template, do not rotate the artwork without checking the effect on folding, stiffness and finish.
Never redraw a dieline from a PDF screenshot or approximate its dimensions from an existing pack. Request the correct editable template if you need to alter the format.
Check artwork alignment on folds and joins
A visual check at 100% scale is useful, but it is not enough. Inspect how design elements behave across construction points:
- Keep borders away from folds unless slight movement will not be noticeable.
- Avoid running small type across a crease.
- Check whether patterns, stripes and images meet across adjoining panels.
- Ensure the design does not place a face, product image or key message over a fold or glue seam.
- Confirm that the opening panel still makes sense when the pack is displayed on shelf or opened by the customer.
For a box with edge-to-edge graphics, request or create a folded mock-up. It is one of the quickest ways to spot upside-down panels, interrupted copy and awkward joins.
Check linked images, fonts and resolution
The next stage is asset integrity. Missing links, substituted fonts and low-resolution images are common reasons why an artwork file looks correct on one computer but changes when opened elsewhere.
Link or embed every placed image
Where artwork has been built in Adobe Illustrator, InDesign or similar software, inspect the Links panel before exporting the production PDF. Every image should show as present and up to date.
For each image, confirm:
- It is linked to the current approved file, not an earlier retouched version.
- The visible crop is intentional.
- The image has not been scaled excessively within the layout.
- Its effective resolution is appropriate for the intended print process and viewing distance.
- Transparency, clipping paths and blending effects export correctly.
As general guidance, raster images for conventional close-view packaging print are commonly prepared around 300 ppi at final placed size. However, resolution needs can differ for large formats, line art, supplier requirements and the source material. Do not try to improve a small image by simply changing its ppi value in software: that does not add genuine image detail.
Use suitable image types
| Asset type | Usually most suitable format | Key preflight concern |
|---|---|---|
| Product photograph | TIFF, PSD or high-quality JPEG | Effective resolution and correct colour conversion |
| Logo, icons and line illustrations | Vector AI, EPS, PDF or SVG where accepted | Embedded or outlined fonts; clean paths |
| Barcode artwork | Vector artwork where possible | Correct size, contrast and quiet zones |
| Foil or emboss shape | Vector PDF, AI or EPS | Spot-colour naming and separate layer |
| Fine texture or tonal effect | High-resolution raster or tested vector effect | Avoiding banding, unexpected transparency or muddy detail |
A compressed image may be acceptable for an online mock-up but unsuitable for a finished retail carton. Look closely at fine detail, gradients, skin tones, product labels and any image that will be enlarged.
Handle fonts safely
Fonts can reflow, substitute or disappear when the receiving system does not have the same typeface installed. Before release:
- Proofread all live text at final size.
- Confirm the correct font family, weight and style are in use.
- Check for accidental faux bold, faux italic or missing glyphs.
- Decide whether to package fonts with native artwork or convert text to outlines.
- Retain an editable, live-text master file even if outlined artwork is supplied for production.
Outlining can prevent font-substitution issues, but it makes copy edits harder and may complicate accessibility or later reuse. For a final production PDF, follow the printer’s preferred workflow. If fonts remain live, ensure they are embedded in the exported PDF and licensed for the intended use.
Review colour and overprint settings
Colour errors can be subtle on screen and highly visible in print. A proper artwork preflight should identify whether each colour is intended as process CMYK, a named spot colour, white ink, metallic ink or a finishing mask.
Confirm the intended colour model
Most full-colour packaging artwork uses CMYK process printing, but a design may also require spot colours for brand consistency, fluorescent tones, metallic inks, white ink or special production effects.
Check that:
- Process artwork is supplied in the agreed CMYK profile or conversion workflow.
- Spot colours are consistently named across all files and swatches.
- Unused or duplicate colour swatches have been removed.
- RGB objects have been converted or deliberately retained only where the production workflow permits it.
- Rich black and standard black are used according to the printer’s specification.
- Small black text is set up to print sharply rather than as an unnecessarily complex multi-colour build.
There is no single CMYK value that guarantees a brand colour across every substrate, finish and print process. Uncoated board, coated cartonboard, corrugated material and textured papers can all change the appearance of ink. For colour-critical work, agree the target colour method and whether a contract proof, drawdown or physical sample is required before committing to the main run.
Inspect overprint and knockout
Overprint tells one object to print on top of another instead of knocking out the area beneath it. It is useful for some black text and trapping situations, but accidental overprint can make light-coloured type disappear or alter a colour dramatically.
Use an overprint preview in your design application or PDF viewer and inspect:
- White objects: these should almost never be set to overprint.
- Light text on a dark background: ensure it knocks out correctly.
- Small black text: check whether overprint is intended and appropriate.
- Spot-colour elements: confirm they are not unintentionally combining with process colours.
- Transparency effects: flattening or export settings can change the result if not handled correctly.
Do not rely on a normal screen preview. Enable overprint preview and use output separations where available. This reveals issues that standard display mode can hide.
Separate foil, emboss, varnish and cut layers
Special finishes need unambiguous production instructions. Foil, embossing, debossing, spot UV, raised varnish, white ink, laser cutting and similar effects are not simply decorative colours within the CMYK artwork.
Create each production element as clearly named vector artwork on its own layer or page, following the manufacturer’s requested file setup.
Build clear finishing layers
A typical approach is to create non-printing spot swatches with names such as:
FOIL_GOLDEMBOSSDEBOSSSPOT_UVRAISED_VARNISHWHITE_INKCUTCREASEPERF
The exact naming convention must be agreed with the production supplier. A name that works for one workflow may not be recognised by another.
For each finishing layer:
- Use a solid, easily identifiable spot colour.
- Keep the artwork as vector paths wherever possible.
- Set the layer to overprint only if required by the supplier’s workflow.
- Keep it separate from visual mock-up effects.
- Check its registration against the printed design.
- Avoid placing foil or varnish too close to a cut, fold or glue line without confirmation.
- Remove duplicate masks and hidden objects that could trigger unintended finishing.
Allow for process limitations
Fine finishes have physical tolerances. Very small details, narrow gaps, tiny reversed lettering and intricate patterns may not reproduce cleanly in foil or embossing. Registration between print and a separate finishing operation can also vary slightly.
Ask for minimum line widths, minimum type sizes, spacing requirements and edge clearances for the specific finish. A 0.25 pt decorative line that looks elegant on screen may be too fine for reliable production.
When a design combines several effects, such as foil plus embossing plus spot varnish, prepare a simple finishing map for internal review. It should show which effect applies to each feature and in what order it is expected to be made.
Inspect small text, codes and quiet zones
Small information areas are often the most important content on a pack. They include ingredients, warnings, recycling information, batch fields, web addresses, QR codes and barcodes. These should be checked at actual printed size, not only while zoomed in on screen.
Check type and reversed text
Review every small text block for:
- Legibility at final size.
- Adequate contrast against its background.
- Correct spelling, punctuation, weights and units.
- Sufficient spacing from cut, crease and fold lines.
- Consistent use of approved legal or product copy.
- No unintended trapping, overprint or registration risk.
- A font weight suitable for the substrate and printing method.
Avoid using very small reversed type, especially where it relies on several CMYK inks or sits over an image. Slight registration movement can close up letterforms. Where small text is unavoidable, simple type, a strong contrast and a single-colour background usually provide a safer result.
Validate barcodes and QR codes
Do not treat a barcode or QR code as a decorative graphic. It must remain scannable after printing, finishing and handling.
For barcodes, check:
- The code is the approved current number.
- The symbol is not stretched, condensed or distorted.
- Bar width, height and orientation meet the relevant specification for the code type.
- There is sufficient contrast between bars and background.
- The required quiet zone is clear of text, rules, artwork and varnish effects.
- The barcode is placed away from folds, seams, heavy texture and reflective disruption where possible.
For QR codes, retain an adequate clear zone around the code and test the final encoded destination before sign-off. A QR code may scan from a digital proof yet fail when reduced, printed on a textured substrate or interrupted by a varnish effect.
Where codes are operationally important, arrange validation from an appropriate verifier or test samples under realistic scan conditions. A smartphone scan is useful but is not the same as formal barcode verification.
Package and approve the final production files
The final stage is file hygiene and controlled approval. The aim is to provide one unmistakable production version, together with the information needed to identify it and prevent an outdated file being used.
Export a production-ready PDF
Unless another format has been requested, a high-quality press PDF is commonly used for print production. The appropriate PDF standard and settings vary, so always follow the supplier’s specification.
Before sending, check that the exported file:
- Uses the correct final page size and orientation.
- Includes the required bleed and crop marks only where requested.
- Preserves spot colours and finishing separations.
- Contains no unintended RGB objects, comments, guides or hidden layers.
- Embeds fonts or uses outlined text as agreed.
- Shows images at suitable effective resolution.
- Exports transparencies, gradients and overprint as intended.
- Contains the required number of pages, with each panel or version in the correct order.
Open the exported PDF independently rather than assuming the source file will export correctly. Inspect it in a preflight-capable PDF application, viewing normal output, overprint preview and separations if available.
Use disciplined file naming and version control
A clear naming convention reduces the risk of a superseded design entering production. Include enough information to identify the product, format, artwork version and release status.
For example:
Brand_Product_Carton_250ml_ARTWORK_v06_APPROVED.pdf
Avoid vague names such as final.pdf, final-final.pdf or new artwork.pdf. They quickly become unreliable when several people are involved.
Keep a simple approval record that confirms:
- Product and SKU or variant.
- Dieline revision.
- Artwork version and file name.
- Number of print colours and special finishes.
- Date of approval.
- Approver’s name or role.
- Any agreed exceptions or production notes.
A visual PDF proof is valuable for copy, layout and basic colour review, but it cannot always predict the final appearance on the chosen board or with a particular finish. Confirm whether a physical proof, sample, press approval or colour target is needed for work where exact appearance matters.
Final pre-production checklist
Use this condensed sign-off list before release:
- Correct approved dieline and final dimensions confirmed
- Bleed, safe areas, glue zones and folds checked
- Images linked or embedded, current and suitably resolved
- Fonts embedded or outlined according to the agreed workflow
- Copy, claims, product variants and contact details proofread
- CMYK, spot colours and black builds checked
- Overprint preview and separations reviewed
- Foil, emboss, varnish, white ink and cut files separated and named
- Small type, barcode, QR code and quiet zones inspected at final size
- Final PDF opened and checked after export
- Filename, revision status and approval record confirmed
Common preflight mistakes and how to avoid them
The most expensive artwork problems are often simple administrative or setup errors rather than design failures.
| Common mistake | Likely consequence | Better approach |
|---|---|---|
| Using an old dieline | Misaligned panels, incorrect folds or unusable artwork | Match the artwork to the latest approved template |
| Supplying RGB images | Unpredictable colour conversion | Use the agreed CMYK and spot-colour workflow |
| Forgetting bleed | Thin white edges after trimming | Extend edge artwork into the specified bleed area |
| Sending a mock-up instead of production artwork | Missing separations, low resolution or incorrect scale | Supply a production PDF plus clear finishing files |
| Applying foil as a visual gold effect only | Foil may be omitted or made incorrectly | Provide a distinct vector foil layer or spot colour |
| Leaving white set to overprint | White text or objects can vanish | Review in overprint preview before export |
| Using tiny reversed type | Poor legibility or filled-in letterforms | Increase size, weight, contrast or simplify the background |
| Approving files by email without a version record | Wrong artwork may be printed | Use unambiguous file names and a documented sign-off |
Choosing the right level of preflight support
A simple one-colour label with no special finishes may only need an internal file check and supplier preflight. A multi-SKU retail range, premium gift box or pack with variable information needs more control.
Consider additional review when the project includes:
- Several product flavours, sizes or language variants.
- Colour-critical branding.
- Foil, embossing, tactile varnishes or white ink.
- Complex structural packaging.
- Barcodes, QR codes, serialisation or batch-print areas.
- Regulatory, safety or product information that cannot be easily corrected after print.
- Multiple internal approvers or external agencies.
If you are specifying a new carton or presentation pack, reviewing the artwork against the intended structure at the same time as sourcing custom packaging boxes helps avoid artwork being developed around an unsuitable format. For product labels, the same controls apply, with particularly close attention to curved surfaces, code placement and finish layers for custom printed stickers.
FAQ
What is the difference between a proof and preflight?
Preflight is a technical inspection of the digital file for issues such as missing fonts, image resolution, colour spaces, bleed and overprint. A proof is a representation of the artwork for approval. It may be a PDF, a printed proof or a physical sample. A file can pass preflight but still need a proof for copy, colour or layout approval.
Should I outline all fonts in packaging artwork?
Not always. Outlining prevents font substitution but removes editability. Keep an editable source file with live text, then follow the supplier’s instructions for the production PDF. If using live fonts, make sure they embed correctly in the exported file.
Can I use a screen mock-up as packaging production artwork?
No. A mock-up is normally for presentation and may use low-resolution images, visual effects and simplified dielines. Production artwork needs correct dimensions, bleed, separations, finishing layers and technical output settings.
How much bleed should packaging artwork have?
There is no universal amount. Use the bleed specified on the approved dieline or by the manufacturer. Do not assume that a setting suitable for a leaflet, label or digital asset will be appropriate for a folding carton or rigid box.
Does a printer check every barcode and QR code?
Do not assume so. Suppliers may identify obvious technical issues, but the brand owner should verify that the data, size, placement and scannability meet the requirements of the intended supply chain and use case.
A disciplined preflight process is a practical safeguard, not an optional final polish. Complete the checklist, save an approved production PDF and retain the editable master with its supporting assets. When you are ready to obtain a packaging quotation, share the approved dieline, final artwork version and a concise list of materials and finishes so the specification can be reviewed accurately.
