
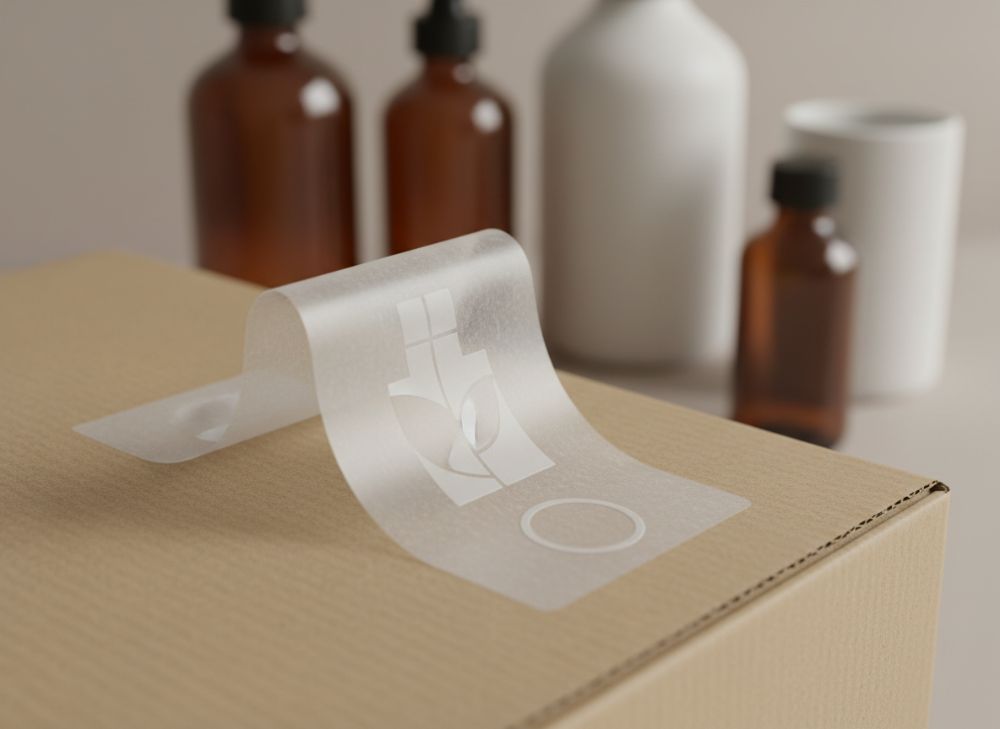
A strong label does more than carry a logo. It identifies the product, supports safe and informed buying decisions, protects brand recognition and needs to work with the box, bottle, jar or gift packaging it is applied to.
This label sticker design 101 guide explains the decisions that matter before artwork goes to print: what information belongs on the label, which material suits the application, how to choose a cut style and how to avoid common legibility and colour problems. Treat the final artwork and regulatory content as a specification to check carefully for your particular product and UK sales channel.
Essential Elements of a Product Label Sticker
Start with the information a customer needs to recognise, select and use the product. Then give the design room to communicate your brand without making the label feel crowded.
For most product labels, the essential content falls into four groups:
- Brand identification: logo, brand name and, where useful, a recognisable product range or collection name.
- Product identification: a clear product name, variant, scent, flavour, colour, size or other distinguishing feature.
- Practical product information: quantity, instructions, ingredients, materials, care guidance, warnings or storage details where applicable.
- Traceability and contact details: batch, date coding, barcode, web address, responsible business details or other information required for the product category.
The precise label content depends on the product. A candle, cosmetic item, food product, children’s product and cleaning product can each have different information requirements. Do not copy a competitor’s label as a compliance checklist: confirm the current requirements that apply to the product, its ingredients or materials, and the market in which it will be sold.
Build a clear reading hierarchy
A customer should be able to understand the product at a glance. Create a hierarchy before choosing decorative elements:
- First glance: brand and product type.
- Second glance: variant, main benefit or key differentiator.
- Close reading: size, use instructions, ingredients, warnings and required details.
- Scan or reference: barcode, QR code, batch code or web address.
Use contrast, scale and spacing to guide the eye. A large logo is not always the best use of space if it makes the actual product name difficult to find. Likewise, placing every claim at the same size leads to visual noise and can obscure mandatory information.
Leave a safe area and bleed
Label artwork should include two important production zones:
- Bleed: background artwork that extends beyond the intended cut line, helping to prevent an unwanted white edge after trimming.
- Safe area: an inset area that keeps text, logos and fine borders away from the cut edge.
Ask the printer for its artwork template, cut-line format and bleed requirement before finalising design files. Avoid hairline borders close to the edge; small registration variation can make them look uneven even when the label is correctly produced.
Keep claims specific and supportable
Product claims need careful wording. Phrases such as “natural”, “eco-friendly”, “premium”, “skin-friendly” or “recyclable” may create expectations that packaging alone cannot explain. If a claim needs qualification, provide it clearly rather than hiding important limitations in tiny text.
A useful rule is to make the product itself the focus. Use concise, accurate language and reserve decorative copy for areas where it will not compete with required information.
Choosing the Best Sticker Material: Vinyl, Paper or Kraft
Material selection should be based on the product environment, application surface, expected handling and visual direction. The most attractive label is not necessarily suitable for refrigeration, moisture, curved containers or repeated handling.
| Material | Best suited to | Main strengths | Checks before specifying |
|---|---|---|---|
| Paper | Dry, indoor products and cartons | Flexible print options; familiar retail appearance | Moisture exposure, scuffing, surface texture and adhesive suitability |
| Kraft paper | Rustic, handmade or natural-looking presentation | Warm tone and visible fibre texture | Ink contrast, colour shifts, fine-detail reproduction and whether the natural substrate suits the brand |
| Vinyl | Products exposed to handling, damp conditions or more demanding surfaces | Durable appearance and good resistance potential depending on construction | Whether the face material, adhesive and finish are suitable for the exact environment |
Paper labels
Paper is a practical choice for many boxed products, sleeves, jars and dry goods. It can support crisp typography and detailed graphics, but it is not automatically appropriate for damp or oily settings. A paper label on a chilled bottle, for example, may encounter condensation; a label on textured board may need a more suitable adhesive than one used on smooth coated card.
Paper can also vary significantly in finish. Uncoated stock creates a softer, tactile result, while coated options can make colours appear more vivid. Request physical material samples where appearance or handling is especially important.
Kraft labels
Kraft labels work well when a brand wants a simple, craft-led or understated look. The material’s natural colour is part of the final design, rather than a neutral white background. This affects every printed colour.
Dark inks often produce the clearest result on kraft. Pale colours, subtle gradients and very small reversed text may lose contrast. If exact brand colours matter, test the design on the actual kraft stock rather than approving it only on a screen or white proof.
Vinyl labels
Vinyl is often considered when labels need to cope with more demanding use. However, “vinyl” is not a complete specification. The performance of a finished label depends on the face stock, adhesive, coating, storage conditions and surface it is applied to.
Confirm whether the label will be applied to glass, plastic, metal, coated board, uncoated board or another material. Also consider whether the product will face moisture, friction, temperature changes, oils or cleaning products. If the application is critical, request samples and test them on the final packaging surface under realistic conditions.
Material selection checklist
Before approving a label material, answer these questions:
- What surface will receive the label: smooth, curved, textured, coated or recycled?
- Will the product be stored in a dry, chilled, humid or high-contact setting?
- Is the label applied by hand or by machine?
- Does the label need to be removable, permanent or tamper-evident?
- Will it be written on, stamped or overprinted later?
- Does the material need to coordinate with a paper box, tissue wrap or gift pack?
For a coordinated packaging project, reviewing custom sticker options alongside the intended packaging substrate helps prevent an unsuitable material choice.
Die-Cut vs. Kiss-Cut: Defining Your Sticker Shape
Die-cut and kiss-cut describe how stickers are cut, not merely what shape they are.
A die-cut sticker is cut all the way through the label material and its backing, leaving each sticker as an individual shape. It is a good option for standalone branded stickers, seals and inserts.
A kiss-cut sticker cuts through the printed label layer but leaves the backing sheet intact. The sticker can be a complex shape while the backing remains a simple rectangle, square or sheet. This often makes small or intricate stickers easier to handle.
When to choose die-cut
Choose die-cut labels when:
- the sticker itself is part of the presentation;
- individual distribution is useful;
- a simple circle, oval, rectangle or custom outline supports the brand;
- you want the backing shape to follow the sticker contour.
Remember that highly detailed outlines, narrow points and tiny internal cut-outs can be difficult to peel and may be more vulnerable to lifting at the edges. Simplify decorative contours where possible.
When to choose kiss-cut
Choose kiss-cut labels when:
- the design has a detailed silhouette;
- customers or packing teams need an easy edge to lift;
- several labels are supplied on a sheet;
- you want a conventional backing shape around an unusual sticker design.
For either option, keep important design features away from the cut line. If the label is intended as a seal across a lid or box opening, consider how the shape will bridge corners and folds. A circle may look elegant on a flat lid but wrinkle when wrapped over a sharp edge.
Colour Consistency Between Labels and Paper Boxes
A label and a paper box rarely look identical by accident. Different substrates absorb ink differently, and their surface texture, base colour and coating all influence the perceived result.
A bright colour printed on gloss-coated board can appear deeper or more reflective than the same ink on uncoated paper. On kraft, the brown base naturally alters lighter colours. Even two white materials can have different undertones, making a neutral grey, cream or pale pink look unexpectedly different.
Plan colours as a packaging system
Rather than designing the label in isolation, define a shared visual system for the label, box, tissue, sleeve and any other printed component. Identify:
- brand colours that need close control;
- colours that can vary slightly by substrate;
- black text and small type requirements;
- foil, embossing or special finishes that should appear only on particular components;
- the intended white or natural base colour of each material.
If brand colour accuracy is important, use specified colour references in the artwork and ask how they will be reproduced across different stocks. Digital displays are useful for design, but they do not reliably predict the colour on a finished package.
Approve against real materials
A proof on the same or comparable stock is more useful than a screen preview when evaluating subtle colours, fine type, metallic details and texture. Review labels beside a sample of the final carton, not separately.
Also assess the package under the lighting where customers are likely to see it. Gloss finishes can create reflections; warm retail lighting can change how neutrals and metallics appear. This is particularly relevant for printed custom boxes designed as part of a coordinated range.
Compliance and Regulatory Information on Labels
Compliance content is part of label design, not a last-minute addition. It can affect label size, panel layout, type size, contrast and even the choice between a front label and a wraparound format.
In the United Kingdom, requirements vary by product category and may cover areas such as product identity, quantity, ingredients or materials, instructions, warnings, business details, traceability and language. Products sold through retailers or online marketplaces may also have additional listing, barcode or packaging data expectations.
Design for required information early
Give compliance information a defined zone from the first layout. Do not design a finished front panel and then attempt to squeeze essential text into the remaining space.
Useful approaches include:
- a front-and-back label for jars, bottles and tubs;
- a wraparound label for cylindrical packs;
- a base label for supplementary details;
- a fold-out label where a small package has extensive information requirements;
- a box panel for information that does not need to be on the sticker itself, provided this is appropriate for the product.
Make the text readable against its background. Decorative textures, transparent areas and foil effects can reduce contrast. Tiny type, condensed fonts and light-coloured copy may look refined in artwork but be difficult to read on a physical product.
Verify before printing
Before placing an order, have the final information checked by the person responsible for the product and, where needed, an appropriately qualified compliance adviser. Check the current UK rules for the product category and any specific market, retailer or export destination.
Also confirm that:
- the label contains the correct product variant details;
- measurements and quantities are accurate;
- warnings match the finished formulation or product;
- barcode data is correct and placed with sufficient clear space;
- no required wording is obscured by folds, seams, closures or the box edge;
- artwork version control is clear, particularly where several variants share a layout.
The Impact of Finish: Matte, Gloss or UV Coating
A finish changes both the appearance and the practical handling of a label. It should reinforce the product’s positioning while fitting its environment.
| Finish | Visual effect | Practical considerations |
|---|---|---|
| Matte | Soft, understated, low-reflection look | Can suit premium or natural-led designs; check resistance to marking for high-contact uses |
| Gloss | Bright, reflective and colour-enhancing appearance | May make colours look more saturated; reflections can affect readability under strong light |
| UV coating | A coated protective or decorative layer, either overall or selective | Can draw attention to logos or patterns; confirm compatibility with material, folds and intended use |
Matte finishes can complement textured paper, kraft labels and restrained gift packaging. Gloss may suit bright graphics, food presentation or colourful consumer products. A selective UV effect can add contrast by highlighting a logo or image against a matte surface.
Do not choose a finish for appearance alone. Consider whether it will be handled frequently, whether customers need to write on it, and whether the label will sit near a fold, lid edge or seam. A sample is especially valuable for labels using small text, dark solid colours or detailed artwork.
Sticker Placement Strategy on Gift Packaging
Placement determines whether a sticker looks intentional, remains readable and supports the unboxing experience. The right position also depends on whether the label is an information panel, a decorative seal or a security feature.
For gift packaging, common placement choices include:
- Centre of the lid: strong visual focus for a logo or short message.
- Lower corner of the lid: keeps branding visible while leaving space for artwork.
- Side panel: useful for product details without disrupting the front presentation.
- Closing flap or tissue seal: creates a tactile opening moment, but needs a suitable shape and adhesive.
- Underside of the box: appropriate for supplementary information, barcodes or batch details that should not dominate the gift presentation.
Match the label to the opening journey
A seal placed across a lid and base should be designed to break cleanly when opened. A label that crosses an awkward fold can wrinkle, lift or tear unpredictably. If the box will be reused, a permanent seal may frustrate the recipient; a removable closure or separate information label may be better.
Consider the box construction before deciding size and placement. Magnetic closures, ribbon fastenings, sleeves and lift-off lids all create different label opportunities. Review the label against the actual structure of your gift packaging rather than a flat box drawing.
Avoid placing stickers over:
- folds and creases;
- textured joins;
- ribbon paths;
- opening tabs;
- areas likely to be touched repeatedly;
- important printed artwork or required text.
How to Ensure High-Resolution Printing for Small Text
Small text succeeds through sensible design as much as print resolution. Fine type may be technically present in the artwork but still be hard to read if the font is too thin, the contrast is low or the substrate is textured.
Prepare artwork properly
Use vector artwork for logos, icons, line art and text wherever possible. Vector elements remain sharp when scaled. For photographs or raster images, use files prepared at an appropriate effective resolution for their final printed size, following the printer’s file guidance.
Before export, check that:
- text has not become blurry through enlargement;
- logos are supplied in a suitable scalable format;
- black text is set up appropriately for small, sharp reproduction;
- thin strokes are not too delicate for the chosen process and material;
- images are not enlarged beyond their useful resolution;
- the final PDF retains the correct dimensions, bleed and cut-line requirements.
Design small text for real-world reading
Do not judge type size only on a large monitor. Print a test at actual size and read it at normal handling distance. If it is difficult to read in a calm office setting, it will be harder to read in a shop or at home.
For small text, choose a clean typeface with open letterforms. Avoid ultra-light weights, tight tracking and long blocks of reversed white text. Dark text on a light, plain background is usually the safest route to legibility.
A barcode also needs care. Keep it flat, unobstructed and away from curved edges, seams, foil effects and busy backgrounds. Confirm its size, orientation and clear space requirements with the party that will use or scan it.
A final label approval checklist
Before releasing label artwork, check the following:
- Product name and variant are immediately clear.
- Required information has been verified for the product and UK market.
- Material and adhesive suit the packaging surface and expected conditions.
- The cut style works for the intended shape, application and peeling method.
- Text, barcode and fine details are readable at actual size.
- Colours have been reviewed alongside the final box or packaging material.
- Bleed, safe area, cut lines and artwork format follow the printer’s specification.
- Sticker placement avoids folds, closures and key design features.
- A physical sample or proof has been reviewed where colour, finish or fit is important.
A considered label specification reduces late artwork changes and creates a more coherent product presentation. If labels form part of a wider packaging project, review the product box, sticker material, finish and placement together. XGolden Print can also be explored through its packaging and printing background when comparing options for a coordinated packaging brief.
