
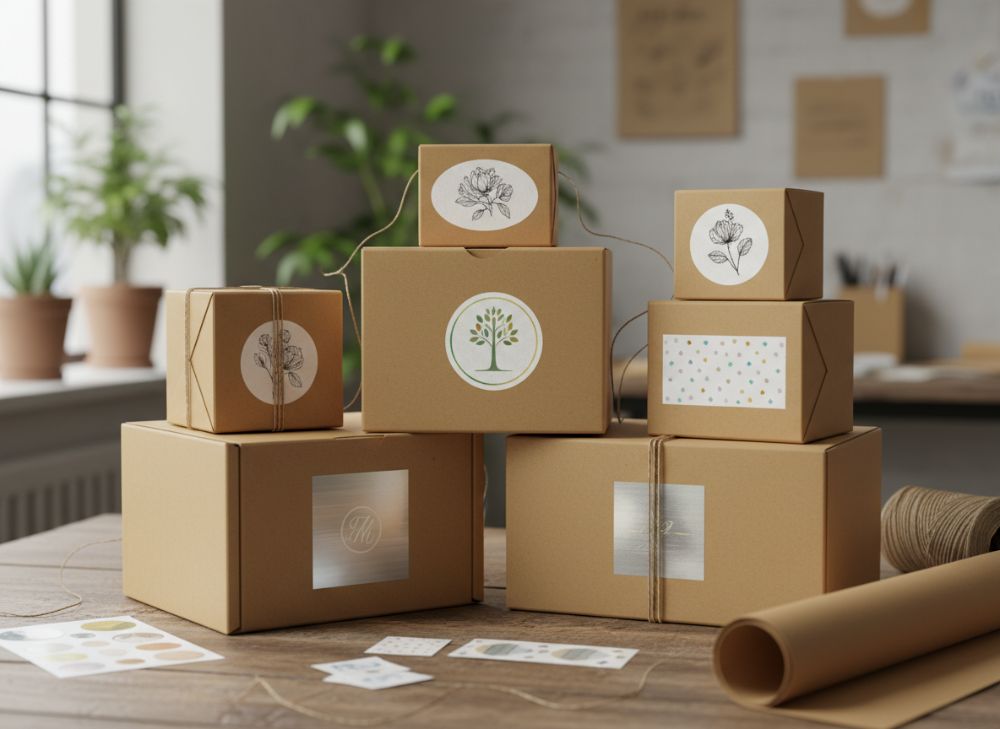
A well-chosen label sticker can turn an unprinted paper box into a considered branded gift without committing to a fully printed box for every product variation. Apply a label where it supports the opening experience, makes the product identifiable and reflects the finish of the item inside.
The most effective approach is to select the box first, then specify a label size, material, adhesive and placement that work with its surface and use. Test a small run on assembled boxes before ordering at volume: a label that looks right on a flat sample may wrinkle, lift or sit unevenly over a fold.
Cost-Effectively Branded Packaging with Stickers
Using labels on plain boxes separates the structural packaging decision from the branding decision. You can keep a consistent stock of plain kraft, white or coloured paperboard boxes, then use stickers to distinguish products, collections, flavours, sizes or gifting occasions.
This can be particularly practical when product ranges change regularly, order quantities vary, or only some items need gift-ready presentation. Rather than holding a different printed box for every variation, the box provides the base and the label carries the adaptable information.
A sticker-led packaging system works best when the label has a clear job. It might:
- display a logo and product name;
- show a variant, scent, colour or size;
- provide an ingredient, care or usage reference where applicable;
- seal tissue paper, a belly band or the box closure;
- direct the recipient to a digital product page; or
- add a seasonal message to a standard gift box.
There are limits. A label cannot hide a damaged, poorly sized or unsuitable box, and it should not carry so much small text that it becomes difficult to read. If the box needs full-panel graphics, complex instructions, premium edge-to-edge decoration or high-volume repeat production, printed packaging may be the more coherent specification. Explore custom packaging boxes when the box itself needs to become a central branded asset.
Choose the right label material for the box finish
The material should suit both the visual direction and the conditions the package may encounter. Paper labels often complement uncoated kraft and matte paper boxes, giving a natural, tactile appearance. Gloss, polypropylene or other film-based labels can create a smoother, more durable-looking finish, but their sheen may contrast with a rustic box.
Before approving a material, consider:
| Packaging condition | What to assess before ordering |
|---|---|
| Uncoated kraft or textured board | Whether the adhesive grips evenly and the printed design remains legible over the texture |
| Smooth coated box | Whether the label can be applied without trapped air or visible fingerprints |
| Chilled, humid or oily surroundings | Whether the adhesive and face material remain suitable for the expected environment |
| Recycled-content board | Surface variation, fibres and colour inconsistency that may affect adhesion and appearance |
| Hand-applied labels | Peelability, alignment tolerance and how easily corners can be pressed down |
| Machine application | Roll direction, label spacing, core size and equipment compatibility |
Ask the label supplier to confirm the material, adhesive, finish, supplied format and any intended-use limitations. Where packaging is used for regulated goods or needs mandatory information, verify the applicable requirements for the product and UK market independently before production.
Build a simple visual hierarchy
A plain box is a quiet background, so the label needs only a small number of priority elements. In many cases, the following order is enough:
- Brand or logo
- Product name or gift message
- Essential variant detail
- Optional supporting information, such as a QR code or web address
Avoid turning a front label into a miniature leaflet. Move operational details, batch information or longer copy to a side, underside or secondary label where appropriate. This preserves the gift-like appearance while keeping information accessible.
The Strategic Placement of a Logo Label
Logo placement affects the perceived quality of the package as much as the artwork itself. The most reliable position is usually the largest uninterrupted face of the closed box, centred only if the box shape, opening direction and design support it.
Start by deciding what the recipient sees first. For a lid-and-base box, that is often the lid. For a mailer-style box, it may be the front panel after opening, the exterior top panel, or a tissue seal inside. For a carton with a tuck flap, avoid placing a logo across the opening unless the label is deliberately designed as a seal.
Useful placement options
Centred on the lid
This gives a balanced, traditional gift-box appearance and suits a simple logo mark or a short message. It is strongest where the label has generous clear space around it.
Offset to one side
An offset label can feel more contemporary and makes room for a product name, a patterned sleeve or a handwritten gift note. Use a deliberate alignment grid rather than placing it approximately by eye.
On the side panel
A side label is practical for product identification on stacked boxes. It is useful when the top must remain clean or when retail-facing storage needs a visible product cue.
Across a closure
A strip, round seal or shaped sticker can bridge a lid and base, close wrapping paper, or secure tissue. This makes opening part of the experience, but the label must be positioned to tear predictably.
Inside the box
An interior label adds a quiet branded moment once the item is opened. It is best used as a complement to, rather than a replacement for, clear exterior identification where products may be stored or selected before gifting.
Avoid folds, seams and high-contact edges
Measure the usable panel after the box is assembled. A label that extends over a corner, score line or textured join is more likely to crease or lift. Leave a visible margin around the label and keep it clear of areas repeatedly handled, unless the label is made for that purpose.
For consistent hand application, give the packing team a positioning guide. This could be a light printed mark hidden by the label, a jig, or a set distance from two box edges. A few millimetres of variation can be noticeable on a small, centred label.
Using QR Codes on Stickers for Marketing
A QR code gives a printed package a route to changeable digital content. It can link to product use guidance, an unboxing message, gift registration, care instructions, a collection page or a campaign landing page. This is especially useful where box space is limited.
The destination must offer a clear benefit. A code that leads only to a generic homepage may feel unnecessary. Instead, match it to the reason a person is likely to scan it after receiving the package.
Possible destinations include:
- a page explaining how to use or care for the product;
- gift messages or personalised video content;
- complementary products or refill options;
- a seasonal recipe, tutorial or styling idea;
- feedback collection; or
- an authenticity or product-information page, where relevant.
QR code design checks
Do not distort a QR code to fit a decorative shape or place it over a busy pattern. Keep a clear, unprinted area around it, maintain sufficient contrast and choose a size that can be scanned comfortably in the real packaging context.
Test the final printed label, not just the on-screen artwork. Scan it under ordinary indoor lighting, on the curved or textured surface where it will be used, and after any protective finish has been applied. Check with more than one current phone if possible.
Use a short explanatory prompt such as “Scan for care guidance” or “Scan to see the gift message”. This tells the recipient what they will get in return for scanning. If the QR code collects information, uses tracking or directs users to terms, ensure the associated digital experience is appropriate for your intended audience and market.
Seasonal Updates with Changeable Labels
Seasonal labels let a standard box feel timely without making the core packaging obsolete after a campaign. A restrained permanent box design combined with removable or campaign-specific labels can work for Christmas gifting, spring launches, limited editions, corporate gifting or event packs.
Keep the changing element focused. Often, one seasonal colour, short message or illustrated motif is enough. Replacing the entire brand identity for each occasion can make a product range less recognisable and can complicate stock control.
Create a label system, not isolated designs
Build a repeatable template with stable elements, such as logo placement, type scale, barcode area where needed and minimum margins. Then reserve one defined zone for the changing campaign message or artwork.
This approach helps with:
- keeping product variants visually related;
- reducing artwork errors;
- making replenishment easier;
- allowing old and new stock to sit together more neatly; and
- preventing seasonal copy from covering essential information.
Plan how leftover labels will be handled. Dated labels, event references and short-term promotional offers can quickly become unusable. For a campaign that may run across multiple months, avoid printing unnecessarily narrow dates unless they are essential.
For gift-focused ranges, pair seasonal stickers with a neutral gift packaging option so the box still works outside the main seasonal window.
Sticker Shapes That Draw Attention
Shape can help a label stand out, but it should suit the box geometry and the message. A rectangular label provides the most efficient space for product details. A circle or oval feels compact and works well for seals. A custom contour shape can become a recognisable brand device, but needs careful production and application planning.
Choosing a shape by purpose
| Label shape | Best suited to | Points to watch |
|---|---|---|
| Rectangle or square | Product names, ingredient panels, addresses and QR codes | Sharp corners can lift if placed near edges or on heavily handled areas |
| Circle | Logo seals, tissue closures and short gift messages | Limited room for long copy or wide QR codes |
| Oval | Softer, premium-looking logo labels | May be harder to align consistently without a guide |
| Long strip | Closure seals, neck labels and tamper bands | Must be sized for the opening path and likely tear point |
| Die-cut custom shape | Brand icons, illustrations and promotional motifs | Intricate edges can slow hand application and complicate storage |
| Arch or badge shape | Artisan-style ranges and limited-edition gifts | Ensure the artwork retains clear hierarchy, not just decoration |
Complex cut lines are not automatically more memorable. A simple, distinctive colour, tactile material or well-proportioned logo can be more effective than an ornate outline. Choose the shape after deciding what information the label must carry.
Label as a Security Seal: Tamper-Evident Design
A label can be designed to show that a box has been opened, but a standard sticker is not automatically a tamper-evident solution. For a label to function as a seal, its construction, placement and opening behaviour must be considered together.
A basic approach is to place a label across the gap between a lid and base or across a tuck flap. When opened, the label should tear, split or visibly distort. However, the result depends on the board surface, adhesive, temperature, application pressure and the way the recipient opens the box.
Specify the intended evidence of opening
Before selecting the label, define what should happen when the box is opened:
- Destructive seal: the label tears and cannot be removed intact.
- Void or pattern-revealing label: an indicator may remain on the surface or label when lifted, depending on the material system.
- Perforated seal: a designed break line gives a controlled opening point.
- Split label: one part stays on the lid and one on the base after opening.
The appropriate solution varies by product, risk level and box construction. Test it on production-representative packaging, not merely on a loose paper sample. Examine whether the seal can be peeled away cleanly, whether it damages the box excessively, and whether normal handling causes unwanted lifting.
Do not rely on a decorative closure sticker as proof of product security. If packaging has safety, traceability, anti-counterfeit or legal obligations, obtain appropriate specialist advice and confirm all requirements for the intended product category.
Maximising Impact with Minimalist Sticker Art
Minimalist label design gives a plain box confidence rather than making it look unfinished. The aim is not to leave space empty for its own sake; it is to use space to make the most important brand and product signals easy to notice.
A strong minimalist label may use one logo, one typeface family, a restricted colour palette and a single finishing detail. For example, a black wordmark on a warm white paper label can suit a kraft box, while a single metallic accent may complement a darker gift box. Whether a finish is appropriate depends on the brand position, print method and practical handling needs.
Design principles that translate well to small labels
- Use one primary focal point rather than competing logo, illustration and headline elements.
- Set type large enough to read at arm’s length.
- Preserve whitespace around the logo and QR code.
- Use contrast, not decoration alone, to establish hierarchy.
- Consider how ink colours will appear against the actual box colour.
- Keep fine lines and tiny reverse text to a sensible level for the chosen print process.
- Check that a matte, gloss or textured finish supports the design rather than obscuring it.
Artwork should include bleed where required by the printer, safe margins for text and a clearly defined cut line for shaped labels. Request or prepare a proof that shows the label at its final size. Viewing artwork enlarged on a screen can hide cramped text and weak contrast.
For a more cohesive result, coordinate the sticker design with other printed pieces such as inserts, wraps or thank-you cards, rather than attempting to put every message on the box.
Bulk Ordering and Storage Tips for Labels
Bulk ordering can reduce the administrative effort of repeated small orders, but it only works if the label design will remain current and the stored labels remain usable. Begin with a realistic forecast across products, campaigns and expected artwork changes.
Order permanent branding elements in larger quantities only when the design, product information and box dimensions are unlikely to change. For time-sensitive campaigns, seasonal messages, QR destinations and variable product details, use shorter runs or plan a versioning system.
Questions to settle before placing a bulk order
- Is the design likely to change during the planned storage period?
- Are all listed product names, URLs, codes and claims approved?
- Will the label be applied to one box size or several?
- Is the label orientation right for the way it will be applied?
- Are labels supplied on sheets, rolls or individually cut, and does that suit the packing process?
- Does the order include enough allowance for setup, application errors and quality checks?
- Are different variants clearly identified on outer cartons or storage locations?
Store labels in their original protective packaging, in a clean, dry environment away from direct sunlight and significant temperature swings. Keep rolls upright where appropriate and avoid crushing sheet labels under heavy stock. Adhesives and papers can be affected by age and storage conditions, so confirm the supplier’s recommended storage guidance and expected shelf life for the chosen material.
Maintain application consistency
Before a larger packing run, inspect a sample of boxes and labels. Check print clarity, cut accuracy, colour consistency, adhesive performance and positioning. During packing, apply labels to clean, dry surfaces and press them down evenly, particularly around edges.
If labels are applied by different people or shifts, use a one-page work instruction with a photograph or diagram showing the exact position, orientation and acceptable tolerance. This small step can prevent a polished label design from looking inconsistent in the finished range.
A practical specification checklist
Before finalising labels for plain paper boxes, make sure you can answer the following:
- What is the label’s main purpose: branding, product identification, promotion, sealing or information?
- Which panel will recipients see first?
- What are the assembled box dimensions and usable flat areas?
- What board finish will the label be applied to?
- Is the chosen adhesive suitable for the expected handling and environment?
- Does the design remain legible at final size?
- Has the printed sample been tested on the actual box?
- Are seasonal, variable or regulated details separated from long-life branding?
- Is the label format suited to hand or machine application?
- Are labels stored in a way that protects their print surface and adhesive?
Plain boxes and labels offer a flexible route to branded gifting when both elements are specified as one system. Start with the opening experience, test the chosen label on the real box, and keep changeable information separate from long-life packaging components. For options on custom printed stickers, XGolden Print can be considered alongside your chosen box format and artwork requirements.
