
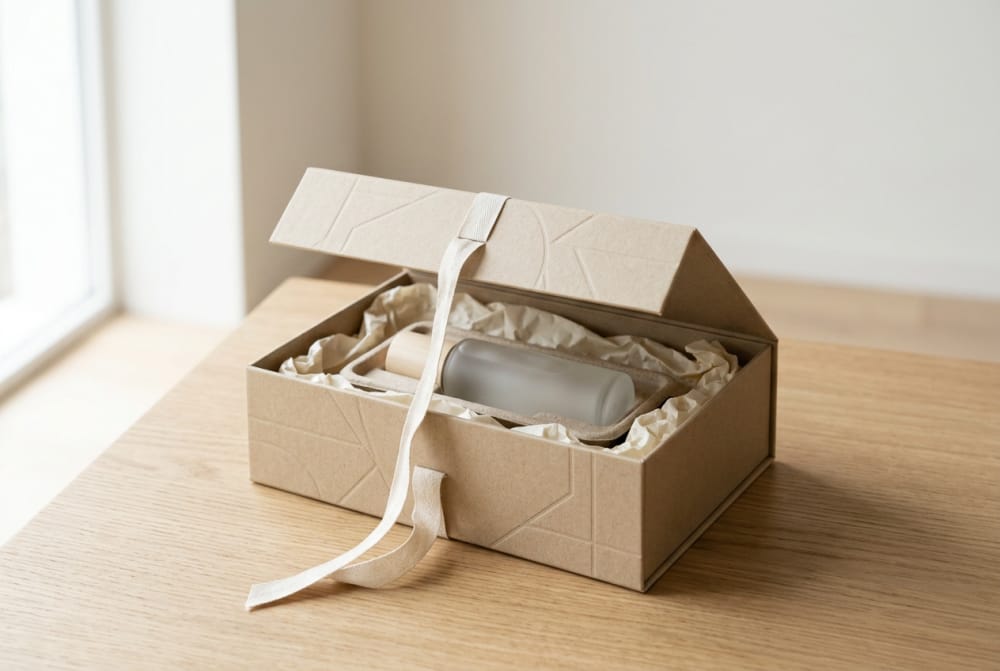
For direct-to-consumer brands, the best shipping packaging is not simply the most decorative box. It is a repeatable system that fits the product, survives the distribution journey, is straightforward for fulfilment teams to pack and still creates a recognisable arrival for the customer.
Start with the product’s real shipping risks, order profiles and fulfilment process. Then choose a small set of box sizes, protective components and printed elements that work together. This approach helps prevent damaged deliveries, excessive void fill and an unboxing experience that feels disconnected from the brand.
How ship-in-own-container thinking changes packaging development from day one
Ship-in-own-container (SIOC) thinking means designing the consumer-facing product pack to travel through distribution as the shipping container, rather than placing it inside a separate outer carton. It can reduce packaging layers, but it is only suitable when the box, closure and internal protection are capable of handling the likely journey.
For many DTC products, the practical alternative is a branded retail box inside a plain or lightly branded transit carton. This retains more control over presentation while giving the outer layer responsibility for knocks, compression and handling marks.
The right approach depends on the item rather than the brand’s visual preference alone.
| Approach | Best suited to | Main advantage | Key consideration |
|---|---|---|---|
| Product box shipped directly | Durable, low-risk products with secure closures | Fewer packaging layers | The branded box may show handling wear |
| Branded postal box | Small and medium orders needing a strong unboxing moment | Presentation and protection in one format | Must be sized carefully for product range |
| Retail box inside transit carton | Premium, fragile or presentation-led products | Protects the retail pack and product | Uses an additional packaging component |
| Flexible mailer with inner protection | Soft goods and non-fragile, low-profile products | Lightweight and space-efficient | Offers limited crush protection |
| Modular transit box with inserts | Multiple variants, bundles or delicate products | Can standardise fulfilment while controlling movement | Insert design must suit each item securely |
Build SIOC considerations into product development early. A box that looks excellent on a shelf may have unsuitable board strength, an exposed lid edge or a closure that comes open in transit. Changing these details after artwork, photography and stock planning are complete can be expensive and disruptive.
At the development stage, identify:
- the product’s weight, dimensions and pressure points;
- edges, corners, caps, glass components or other vulnerable areas;
- whether the item must remain upright;
- the likely single-item, multi-item and gift order combinations;
- the amount of handling the package may receive;
- whether the product box needs to stay pristine on arrival;
- any labels, barcodes or shipping information that need a clear placement area.
Where a product will be sold through more than one route, avoid assuming one box suits every channel. A marketplace order, a branded website order and a store replenishment order can have different handling, labelling and presentation needs. Confirm the relevant channel rules and packaging expectations before committing to a specification.
Box sizing decisions that reduce void fill and dimensional weight costs
Right-sizing is one of the most useful shipping-oriented packaging ideas for brands selling directly to consumers. A box should leave enough room for purposeful cushioning and easy packing, but not so much that the item can build momentum and strike the walls.
Oversized boxes create several problems at once:
- more void fill is needed to stop product movement;
- cartons can be less stable when stacked;
- customers may perceive unnecessary material as waste;
- larger external dimensions can increase shipping charges where volumetric or dimensional weight applies;
- fulfilment benches need more storage space for cartons and filler.
Measure the packed product, not just the product itself. Include inner wraps, instruction cards, accessories, caps, sleeves and any necessary protective components. Then establish the clearance needed on each side for the chosen protection method.
Use a simple sizing hierarchy
A practical starting point is to define three levels:
- Core pack – the item with its retail packaging and essential accessories.
- Protected pack – the core pack with the minimum protective layer needed for transit.
- Shipper – the outer packaging that contains the protected pack with limited, controlled space.
The goal is not zero empty space. The goal is controlled space. A delicate object may need a buffer around it, while a folded garment may need little more than a close-fitting mailer. Loose void fill should not be used to compensate for a badly chosen carton size.
Design a rational box range
Brands often begin with a separate carton for every SKU. That can lead to complex purchasing, crowded storage and packing mistakes. A smaller, modular range is usually easier to manage when products can share inserts, dividers or adjustable void-fill methods.
Review order data before deciding on a range. Group orders by their actual packed dimensions rather than product category. A useful range might include:
- a compact format for single small items;
- a standard format for the most common orders;
- a deeper format for sets and gift combinations;
- a longer or wider format only where the product genuinely requires it.
Test the dimensions with real order configurations. A box that fits one item neatly might be awkward for two units, a promotional insert and a seasonal gift message.
Choosing custom box formats for marketplace sales and branded DTC orders
Custom boxes should support the role each channel plays. Marketplace sales often require clarity, consistency and efficient handling. Branded DTC orders have more scope for a deliberate reveal, supporting print and a stronger visual identity. Neither route needs to be over-packaged.
A standard corrugated transit carton can be a sensible choice for heavier goods, larger bundles and products that need robust external protection. Its flat surfaces also provide room for necessary operational labels without obscuring customer-facing print.
Postal boxes with self-locking structures can work well for smaller DTC orders. They create a tidy opening sequence and can reduce the need for extra tape where the construction and product weight permit. Confirm that the closure remains reliable for the intended product and shipping method; a neat tuck-in flap is not automatically suitable for every item.
Mailer boxes are often useful where the unboxing moment is central to the purchase. They can carry exterior branding, interior messaging or a restrained colour treatment, but print should be planned around practical realities. Dark, all-over exterior designs may make applied labels less legible, while large logo panels can be obscured by address labels or tape.
For delicate products, consider a two-part approach:
- a presentable inner carton or gift box;
- a protective outer shipper;
- a correctly sized insert, tray or divider that holds the product in position.
This avoids asking a luxury-style presentation box to absorb all transit damage. It also lets the recipient open a clean inner pack even if the outer carton has collected scuffs along the way.
When developing custom printed boxes, ask the supplier to clarify the material options, box construction, print coverage, minimum order requirements and any design constraints that affect folding, closures or packing. These details vary by format and should be agreed before production.
Keep the branding purposeful
Branding does not need to cover every surface to be memorable. Choose the moments customers are most likely to notice:
- an exterior logo or recognisable colour block;
- an inside-lid message;
- a patterned internal print;
- a branded seal;
- a well-designed order card;
- a label that identifies a bundle or limited edition.
A restrained design often performs better operationally than a fully printed box with no obvious area for labels, batch information or handling instructions.
Sticker roles in bundle management, logistics, and promotional messaging
Stickers are one of the most flexible tools in a branded shipping system. They allow brands to change campaign messaging, identify order types or manage product variations without redesigning an entire carton.
Use stickers according to their job, rather than treating every label as decoration.
| Sticker role | Practical use | Important check |
|---|---|---|
| Bundle identification | Marks a set, multipack or selected combination | Match the label clearly to pick-and-pack instructions |
| Variant control | Identifies scent, colour, size or product version | Ensure the code remains readable after application |
| Tamper indication | Shows whether a closure has been opened | Check suitability for the box surface and closure design |
| Promotional message | Adds a seasonal note, offer or campaign detail | Avoid covering essential product or shipping information |
| Operational instruction | Identifies packing requirements or handling notes | Keep internal operational labels distinct from customer messaging |
| Branded closure seal | Reinforces identity and helps secure tissue or boxes | Confirm adhesive performance on the chosen substrate |
For fulfilment, stickers can distinguish similar-looking orders quickly. A simple colour, icon or short code can help teams recognise gift orders, subscription packs or multi-item bundles. The system must be documented and kept simple; too many label types create a new source of error.
Customer-facing stickers can add personality at low commitment. They are particularly useful for seasonal campaigns, new product launches or smaller batches where printing a dedicated box is not appropriate. However, consider how they behave on textured, coated or recycled-look board. Adhesion, legibility and removal can vary with the material and storage conditions.
Explore custom stickers for packaging and product labelling when a campaign, variant or bundle needs flexibility beyond the printed carton.
Balancing transit protection with a clean and frustration-free unboxing experience
Protection and presentation are not opposing goals. A good unboxing experience feels calm, intentional and easy to navigate because the product arrives stable, clean and undamaged.
Start by eliminating movement. The item should not rattle, slide from side to side or strike the carton walls when the package is handled. Choose a protective method based on the product’s vulnerabilities:
- Tissue paper: suitable for surface protection and a soft reveal; not a substitute for impact protection.
- Paper void fill: useful for filling gaps around durable products when packed firmly.
- Cardboard inserts: useful for positioning bottles, accessories, electronics or presentation-led products.
- Dividers: helpful when multiple items could touch or collide.
- Protective wraps: appropriate where surfaces, corners or breakable materials need separation.
- Moulded or engineered inserts: potentially suitable for products with consistent shapes and higher positioning needs.
Avoid adding layers merely to make the box feel fuller. Customers generally appreciate packaging that is easy to open and easy to understand. Excessive tape, tightly wound protective materials and numerous loose components can turn a premium moment into a frustrating task.
Make opening intuitive
A recipient should be able to see where to start without tearing through branded graphics or using unnecessary force. Consider:
- opening tabs or clearly defined flaps;
- a sensible tape placement that does not obstruct the product;
- pull ribbons only where they genuinely improve access;
- one clear reveal rather than several confusing layers;
- packing information positioned where it is useful, not buried underneath filler.
If an opening feature is added, check that it does not weaken the carton or provide an easy point of failure during transit. Convenience features need to work alongside the protective design.
Packaging adjustments that help fulfilment teams work faster at scale
The strongest branded packaging system is one that a fulfilment team can repeat correctly. A clever box format loses value if it takes too long to assemble, is easy to pack incorrectly or requires excessive judgement from the person preparing each order.
Design for the pack bench from the outset. Flat-packed cartons should be easy to identify. Inserts should have an obvious orientation. The packing sequence should be short enough to learn and clear enough to maintain across busy periods.
Helpful adjustments include:
- printing a discreet box size code on the internal flap;
- using distinct colours or short names for each carton format;
- creating dedicated inserts for common bundles;
- reducing the number of tape applications where the box design allows;
- setting a consistent location for customer cards and promotional materials;
- giving labels a designated blank or light-coloured panel;
- using a small number of approved void-fill options;
- preparing visual packing guides for complex orders.
Also consider storage and replenishment. A highly customised carton may look excellent but consume considerable shelf space if it cannot be stored flat or nested efficiently. Likewise, a broad range of unique inserts can complicate stock control. Balance differentiation against the operational load it introduces.
Before scaling, run a practical review with the people who will assemble orders. Ask them to identify where products snag, which components are easily confused and whether the packed result remains consistent. This is process feedback, not a substitute for appropriate transit evaluation, but it can expose preventable fulfilment issues early.
Common shipping failures that start with poor packaging decisions
Many delivery problems begin long before an order leaves the warehouse. They stem from a mismatch between the product, box, protective materials and operational method.
Using a presentation box as the only protective layer
Gift-style cartons and retail packs are not automatically transit-ready. If the product is premium or easily marked, a separate outer shipper is often the safer choice. Assess the entire pack construction rather than assuming visual quality equals shipping resilience.
Choosing a box by internal volume alone
A carton can have enough capacity yet still be wrong. Internal dimensions, product orientation, space around weak points and the behaviour of the chosen void fill all matter. Measure the actual packed arrangement.
Relying on loose filler to stop heavy products moving
Heavy items can compress, displace or push through loosely packed material. A fitted insert, divider or closer carton is usually more dependable than adding more loose filler.
Printing every external surface
All-over branding can leave no practical space for address labels, handling labels or returns information. It can also make scuffs more visible. Leave functional panels where they are likely to be needed.
Creating too many box variations
A different box for every product or campaign can cause picking errors, slow assembly and make stock management harder. Establish a core range and introduce exceptions only where the product or order value justifies them.
Forgetting returns and re-use
Where returns form part of the customer journey, consider whether the shipper can be resealed cleanly. A return-friendly feature should not compromise the initial closure. Verify the design against your actual returns process and any channel requirements.
Assuming materials are suitable without checking
Board type, coatings, adhesives, inks and labels must fit the product and conditions of use. If packaging will encounter moisture, cold storage, oily surfaces or substantial product weight, confirm compatibility with the supplier. If you have recycling, labelling or sector-specific obligations, verify current requirements for the intended UK market and product category.
How to move from generic mailers to a recognisable branded shipping system
You do not need to replace every packaging component at once. A staged system can improve the customer experience while keeping procurement and fulfilment manageable.
1. Audit the current delivery experience
Order your own product in the same way a customer would. Note where product movement occurs, what arrives visibly worn, how long opening takes and which elements do not reflect the brand. Review common order combinations rather than only the hero product.
2. Define the non-negotiables
List what the package must do before discussing colours or finishes. Typical priorities include product stability, an intact retail box, easy packing, a straightforward opening, readable labelling and a suitable place for returns information.
3. Build a core packaging architecture
Select a limited number of outer cartons or mailers, then assign inserts and void-fill methods to each. Standardise where possible. The aim is a system that can cover most orders without improvisation.
4. Add recognisable brand cues
Choose one or two elements that can be repeated across formats: a logo position, colour family, internal message, sticker style or tissue treatment. Consistency is more valuable than using a different visual idea on every carton.
5. Review samples in context
Inspect the assembled package with the actual product, inserts, labels and closure method. Check how the design looks after normal packing activity, not just as an unassembled sample. Confirm that operational information remains visible and that components fit together as intended.
6. Set clear specifications
Document dimensions, materials, print areas, closure method, insert orientation and packing instructions. This gives procurement and fulfilment teams a shared reference and makes future updates easier to control.
XGolden Print offers custom packaging boxes and printing solutions, with experience that can support brands developing a more coordinated packaging specification. The most useful starting point is still your own brief: product dimensions, typical order combinations, protection needs, desired presentation and operational constraints.
A practical next step is to map your five most frequent order types and identify where each currently has excess space, product movement or inconsistent branding. That shortlist will make it easier to select the box formats, inserts and labels that deserve priority.
