
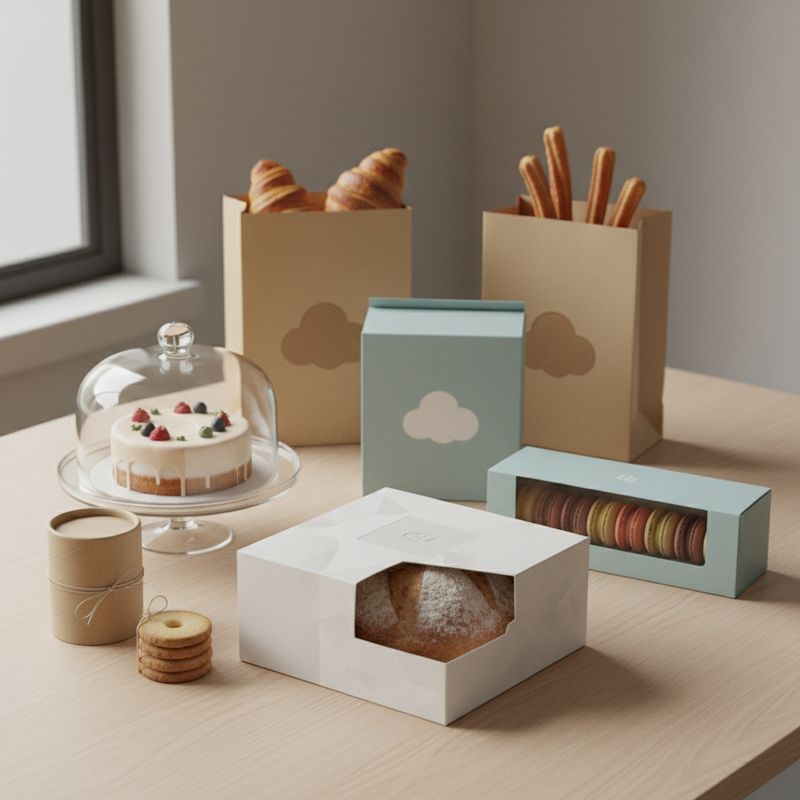
Custom packaging for bakery and confectionery products should protect the item, preserve its presentation and make handling straightforward from packing bench to customer. The right format depends less on decorative preference than on product weight, grease content, fragility, shelf life, display method and whether it is sold individually, in multipacks or as a gift.
Start by defining the product and its journey. A rigid cake box, a grease-resistant pastry carton and a premium chocolate gift box may all be printed packaging, but they require very different structures, materials and finishing choices. Confirm the intended food-contact use, packing process and storage conditions before approving artwork or ordering production.
Bakery Packaging
Bakery packaging needs to balance protection, freshness, speed of packing and visual appeal. It should hold the product securely without crushing toppings, smudging icing or allowing loose bakes to shift in transit.
Choose the box style around the product’s shape and selling format rather than trying to make one design suit every line.
| Product type | Common packaging approach | Key points to specify |
|---|---|---|
| Cupcakes and muffins | Folding carton with fitted insert | Cavity size, height clearance for frosting, number of portions |
| Doughnuts and pastries | Shallow carton, tray or sleeve | Grease resistance, ventilation needs, ease of opening |
| Cookies and brownies | Sleeve, carton or tray with outer box | Portion count, stacking strength, visibility of contents |
| Celebration cakes | Deeper box with base board | Internal dimensions, carryability, protection for decoration |
| Macarons and petit fours | Tray-and-sleeve or rigid gift box | Individual separation, tray fit, premium presentation |
| Chocolates and truffles | Rigid box, folding carton or sleeve | Insert layout, temperature sensitivity, scuff protection |
| Seasonal gift assortments | Rigid presentation box or multi-part set | Product arrangement, unboxing sequence, storage footprint |
Build in enough clearance, but not too much
Internal dimensions are one of the most important decisions in bespoke bakery boxes. A tight box can damage icing, chocolate decoration or delicate pastry. Excess empty space, however, allows movement and can make a product look undersized.
Measure the finished product at its widest, tallest and most fragile points. Include any board, liner, insert, wrap or label that will be inside the pack. For hand-finished goods, allow for normal variation between batches rather than measuring a single ideal sample.
Where products must stay in position, consider:
- Card inserts with individual cavities
- Raised platforms for smaller items
- Dividers for assorted flavours
- Food-contact liners where appropriate
- A separate base board for heavier cakes
- Tamper-evident closures or seals where the sales model requires them
Match the material to real handling conditions
Paperboard cartons work well for many dry bakery and confectionery lines, but the exact board grade, coating and construction must suit the weight and conditions of use. Products containing buttercream, oils, chocolate, syrups or other fats may need an appropriate barrier or liner. Moisture, condensation and refrigeration can also affect how a carton performs and looks.
If packs will be stacked, carried in a bag, placed in a chilled display or sent through an e-commerce fulfilment process, state this during specification. A box that looks excellent on a counter may not be suitable as the only layer of protection for a postal order.
For goods sold online, think in layers:
- Primary food-contact packaging holds the baked or confectionery item.
- Presentation packaging supports brand appearance and gifting.
- Transit packaging protects the order from knocks and compression.
Combining all three functions in one box is not always practical. A lighter presentation carton may need a separate protective outer pack for dispatch.
Consider packing speed before choosing a complex structure
A highly detailed box style can elevate a premium range, but it may create unnecessary delays for fresh products packed to order. Assess how the carton arrives, how it is erected, whether inserts must be fitted manually and whether staff can close it without touching the product.
Ask for a physical sample or structural prototype before committing to a production run, particularly if the pack has a locking base, unusual closure, fitted tray or multiple components. It is easier to identify a difficult fold, poor fit or slow packing sequence before artwork and volume production are approved.
Food Safe Packaging: What to Check
“Food safe” is not a visual feature or a generic material label. For bakery and confectionery packaging, it means checking whether the complete packaging arrangement is suitable for its intended food-contact application.
The required specification can differ depending on whether a box touches dry biscuits, greasy pastries, wrapped chocolates or unwrapped confectionery. A printed outer carton may not directly contact the product, while an inner tray, liner or wrapper may do so. Treat each component separately.
Define the food-contact arrangement
When briefing a packaging supplier, set out:
- Whether the food is wrapped, unwrapped or partly wrapped
- Which surfaces, if any, will touch the food directly
- The food type, including fat, moisture or acidity considerations
- Expected storage conditions, such as ambient, chilled or frozen
- The expected period of contact
- Whether the product may be warm when packed
- Any use of liners, pouches, trays, boards or inserts
- Whether printing, coatings, adhesives or foils sit on the food-contact side
This information allows the supplier to assess the requested construction properly. Do not assume that a material appropriate for one product is automatically suitable for every bakery or confectionery application.
Check documentation and finish compatibility
Request relevant declarations and technical information for the proposed food-contact materials and components, then verify that they suit the intended United Kingdom market and product use. Where food-contact compliance, migration performance or material composition is important to your business, review the documentation with the appropriate internal specialist or adviser.
Also consider practical compatibility:
- Grease and oil: Can marks show through the board or weaken the appearance of the pack?
- Moisture: Could condensation soften a carton or affect printed surfaces?
- Heat: Will warm products cause softening, marking or trapped steam?
- Odour transfer: Could inks, coatings or adjacent materials affect sensitive products?
- Abrasion: Will chocolate trays, loose biscuits or metalised wraps rub against the printed surface?
- Recycling requirements: Is the pack easy for customers to separate into its material components?
A common mistake is to select a premium finish first, then discover it is unsuitable for the contact arrangement or production environment. Establish material suitability early and treat decorative finishes as a second-stage choice.
Avoid overclaiming sustainability or safety
Terms such as “eco-friendly”, “compostable”, “plastic-free” and “food safe” need to be specific and supportable. The pack’s composition, coatings, adhesives, inserts and intended disposal route all affect what can reasonably be claimed.
If you want disposal guidance or environmental messaging on pack, confirm the final material specification before printing it. Avoid broad claims that cannot be substantiated for the complete pack.
Window Boxes for Bakery Displays and Gifts
Window boxes let buyers see colours, toppings, portions and assortment layouts before opening the pack. They can be particularly useful for cupcakes, cookies, pastries, macarons, brownies and seasonal confectionery gifts.
A window is not automatically the best choice, though. It adds another material element, can affect the box’s stiffness and may expose products to light or handling. Consider it a product-display tool rather than a default feature.
When a window box works well
A window is most useful when visual appearance drives the purchase decision. It can help customers assess:
- Product quantity and size
- Flavour or colour assortment
- Decoration and finishing detail
- Gifting suitability
- Freshly made appearance
For retailers, a window can reduce the need to open packaging for inspection. For direct-to-consumer gifting, it can make the product feel more considered while retaining the protection of a closed carton.
Window options and trade-offs
| Window approach | Best suited to | Consider before choosing |
|---|---|---|
| Die-cut opening without film | Wrapped products or protected inner trays | Product exposure, dust and handling |
| Clear film window | Unwrapped display items | Material compatibility, recyclability, condensation |
| Small viewing aperture | Premium confectionery and gift boxes | Limited product visibility but stronger structure |
| Full-panel window | Assorted pastries or decorated cupcakes | Reduced print area and potential loss of rigidity |
| Internal clear tray | Chocolate assortments and delicate pieces | Tray fit, product placement and overall pack depth |
The window shape should follow the product arrangement. A long narrow aperture may suit cookies in a row, whereas a central window can display an assortment. Ensure there is enough unprinted board around the opening to retain the box’s strength and provide room for essential product information.
Design for real display conditions
Window packaging is especially vulnerable to fingerprints, scuffs, glare and condensation. If the product will be stored chilled, test the complete pack in conditions that reflect its intended use. If it will be handled frequently in a shop environment, choose a design that still looks tidy after normal handling.
Remember that a window reduces printable surface area. Keep key brand elements, product names and legally required information away from folds, seams and window edges. A tidy layout is more effective than trying to fill every available panel.
B2B Printing for Bakery and Confectionery Ranges
Business-to-business packaging printing is most effective when the specification is clear before design approval. Procurement teams, product developers and brand owners should align the structural, material and artwork requirements rather than treating them as separate decisions.
A useful packaging brief gives suppliers enough information to quote and produce consistently while reducing the risk of late changes.
Include these details in your print brief
- Product name, range and pack formats
- Internal box dimensions and tolerances required
- Product weight and number of items per pack
- Whether the goods are loose, wrapped or tray-packed
- Proposed material, liner and insert requirements
- Food-contact arrangement and conditions of use
- Print coverage, number of colours and brand colour references
- Finishes such as embossing, foil, spot effects or matt coating
- Barcode placement and any mandatory product information
- Quantity by design, size and version
- Whether packs are supplied flat or assembled
- Storage, display and fulfilment requirements
- Approval process for samples, artwork and final production files
Clear version control matters when a range includes multiple flavours, weights or seasonal designs. Build a logical artwork system from the start: shared master layout, defined flavour colour areas, consistent product naming and carefully allocated barcode positions. This reduces the chance of a correct box structure being printed with the wrong variant artwork.
Choose printing based on design and order profile
The most appropriate printing route depends on artwork complexity, colour expectations, substrate, quantity and future repeat ordering. Discuss these factors with the printer rather than selecting a method solely by its name.
For instance, a single-colour bakery carton may need a different approach from a chocolate gift box with dense imagery, metallic details and a tactile finish. The desired outcome should guide the specification:
- Simple branded packs: Prioritise legibility, consistent logo use and efficient production.
- Multi-variant ranges: Prioritise colour distinction and disciplined artwork management.
- Premium gifting: Prioritise structure, surface quality, precise finishing and insert presentation.
- Short seasonal runs: Prioritise proportionate setup, adaptable artwork and sensible stock planning.
- E-commerce packs: Prioritise fit, closure security and protection alongside printed appearance.
Plan the artwork for folding cartons
Artwork must work on a dieline, not just on a flat visual mock-up. Folds, glue areas, tuck flaps and panel joins can interrupt text, patterns and photographic images. Keep important information away from trim lines and avoid placing critical design features across folds unless the printer confirms the expected result.
Before approving artwork, check:
- All panels read in the intended opening direction
- Product name is visible from the main display face
- Type remains legible at the final printed size
- Barcodes have suitable quiet space and orientation
- Ingredients, allergen statements and other required information are supplied and checked by the responsible business
- Colour references, images and finishes are clearly identified
- The dieline version matches the approved structure
For brands developing a new carton format, reviewing custom printed box options alongside the product specification can help separate structural requirements from decorative choices.
Branding That Works on Bakery Packaging
The strongest bakery and confectionery packaging makes the product easy to identify, easy to choose and appealing to give or share. Branding should support these jobs rather than compete with the food itself.
Use hierarchy: establish what shoppers should notice first, second and third. For many packs, that order is product type, brand, flavour or variety, then supporting details. A small artisan biscuit box and a large celebration cake carton may use the same visual identity but need different information priorities.
Make the product category immediately clear
Packaging should not make a customer guess what is inside. Use clear naming and product imagery only where it genuinely aids recognition. For flavour-led confectionery, a distinctive colour system may help shoppers navigate a range. For premium pastries, restrained design and a carefully positioned window may communicate more than a crowded label.
Keep the identity consistent across formats by defining:
- Logo position and minimum clear space
- Core brand colours and their print references
- Typefaces and readable substitutes
- Product photography or illustration style
- Flavour and seasonal colour rules
- Icon use and messaging tone
- Placement for dates, batch details and variable information
Select finishes with purpose
Finishes can add tactile or visual contrast, but each should have a clear role. A matt surface may support a calm, premium appearance; a gloss accent may highlight a logo or image; embossing can create texture; foil can draw attention to a gift range.
However, finishes can introduce cost, production complexity and limitations for certain handling conditions. They may also be unsuitable for every recycling objective or food-contact arrangement. Confirm how the finished pack will be packed, stored and displayed before finalising them.
Keep brand claims specific
Bakery and confectionery buyers often value provenance, ingredients, dietary suitability and craftsmanship. These are useful messages only when they are accurate, up to date and substantiated by the responsible business.
Avoid vague statements that create uncertainty. Instead, give clear, verified information in the appropriate place and leave sufficient room for mandatory content. Design flexibility is valuable because recipes, allergens, claims and product information can change over time.
Common Packaging Mistakes to Avoid
- Choosing external dimensions without measuring the product and internal components
- Using one universal box size for products with very different protection needs
- Adding a window without considering strength, condensation or material separation
- Treating “food safe” as a blanket claim instead of specifying the use case
- Approving a screen visual without checking the structural dieline
- Placing critical text over folds, glue flaps or window edges
- Selecting decorative finishes before confirming product and storage compatibility
- Forgetting how a box will be erected, packed, stacked and transported
- Creating too many small artwork variations without a version-control process
- Printing environmental or product claims before the final specification is confirmed
Frequently Asked Questions
What is the best material for bakery packaging?
There is no single best material. The suitable choice depends on whether the product is dry, greasy, chilled, fragile, wrapped or unwrapped, as well as the required shelf presentation and transport conditions. Specify the actual use case and verify material suitability with the supplier.
Do bakery boxes need inserts?
Inserts are useful when products need to remain separated, upright or protected from movement. They are commonly considered for cupcakes, truffles, macarons, cookies, slices and gift assortments. A simple box may be enough for more robust goods, provided the internal fit is appropriate.
Are window boxes suitable for cakes?
They can be, particularly for smaller cakes, cupcakes and decorated items, but the structure needs adequate depth and rigidity. For heavier celebration cakes, prioritise the strength of the base, side walls and closure before adding a window.
What should be included on confectionery packaging?
The responsible business should ensure the pack includes all product information required for its sales channel and market. From a design standpoint, reserve space early for product names, ingredients, allergen information, weights, dates, batch details, barcodes and any verified claims.
How can I make seasonal packaging more efficient?
Use a proven core structure and adapt surface artwork, sleeves, labels or inserts for seasonal editions. This can preserve fit and packing familiarity while allowing the range to feel timely and distinctive.
A practical next step is to create a one-page packaging brief with product dimensions, food-contact arrangement, packing method, artwork requirements and expected order profile. This gives your design, buying and production teams a clear basis for comparing custom packaging options.
