
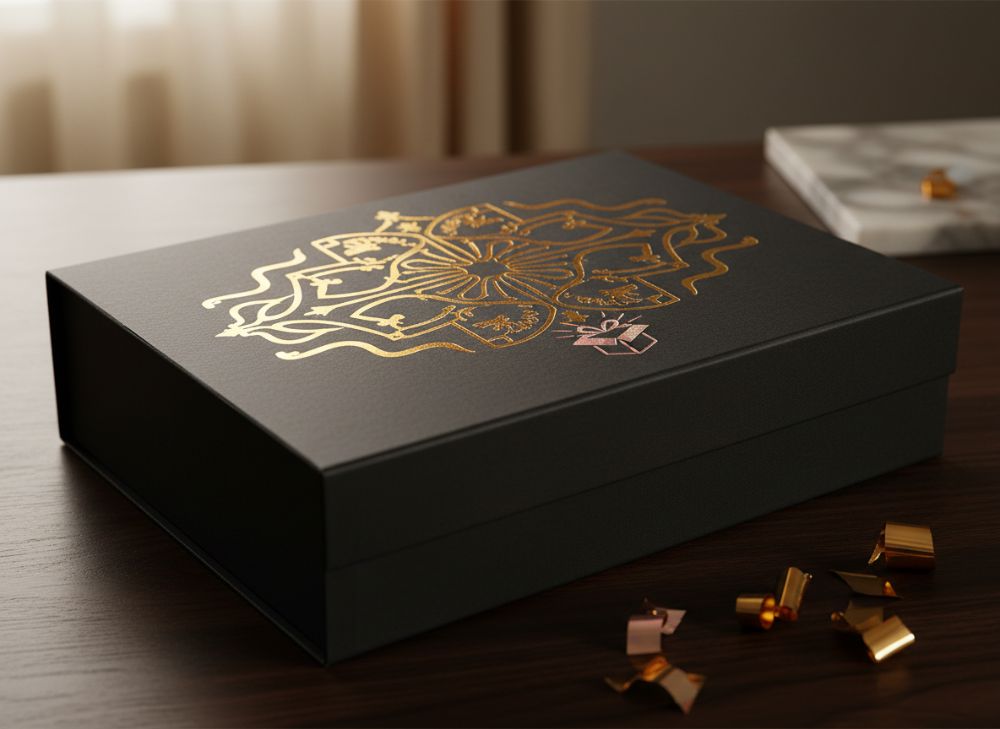
The best finish for a custom paper box is the one that reinforces your brand while remaining practical for the product, packing process and retail environment. Foil, texture, varnish and lamination can make a simple printed box feel considered and distinctive, but each brings different visual, tactile and durability trade-offs.
When planning beyond the box: innovative finishes for custom paper box design, start with the impression you want customers to take away: refined, natural, bold, playful, technical or gift-worthy. Then check how the finish will work with the chosen board, artwork, folds, handling and any required product information. A well-specified finish should support the design rather than compete with it.
The Luxurious Effect of Hot Foil Stamping
Hot foil stamping applies a thin metallic or coloured foil to selected areas of a box using heat and pressure. It is usually chosen for logos, borders, patterns, short messages and small decorative details rather than large solid panels.
Gold and silver foil are familiar choices, but foil is not limited to metallic shades. Depending on the available range, designs may use coloured, pearlescent, holographic or subtly textured foils. The right option depends on whether the pack needs to look traditional, contemporary, celebratory or deliberately unconventional.
Hot foil works especially well when it is used selectively. A restrained foil logo on a dark uncoated box can feel premium and confident; a fine foil pattern can make a gift box more memorable without requiring a fully illustrated design.
Where foil stamping works best
Consider hot foil for:
- Brand marks and monograms
- Product names on premium lines
- Fine borders and decorative frames
- Seasonal or limited-edition packaging
- Invitation-style gift boxes
- Small icons or quality cues that need visual emphasis
Design and production considerations
Very fine type, intricate linework and large areas of foil need careful assessment before production. Small details may lose definition if they are too close together, while broad solid foil areas can show variations that are more visible than in smaller elements.
Foil is also affected by the substrate beneath it. Smooth, well-prepared surfaces typically give a crisper result than heavily textured boards. If you want foil on uncoated or tactile paper, ask for a physical sample or proof approach that reflects the intended stock.
A common mistake is adding foil to every available element. Foil is most effective when it creates hierarchy: use it to guide the eye towards the brand, product name or key moment of discovery.
Spot UV Coating for Texture and Contrast
Spot UV is a clear gloss coating applied only to selected parts of printed packaging. It creates contrast through shine and texture rather than colour. On a matt surface, the difference can be particularly striking: the base remains calm and understated while chosen details catch the light.
It is often used on logos, illustrations, photographic elements, product names or patterns. In addition to making these features more visible, the raised or smooth gloss effect can invite touch at the point of sale or during unboxing.
Best uses for Spot UV
Spot UV is a strong choice when your artwork contains:
- A simple logo that needs emphasis
- Line illustrations or graphic patterns
- Dark, saturated printed backgrounds
- Product photography with a feature worth highlighting
- Repeated motifs that benefit from a tactile layer
- A contrast between matt and gloss as part of the brand aesthetic
The effect is generally more noticeable on matt laminated packaging than on already glossy surfaces. On a gloss laminate, the difference between the background and Spot UV may be less pronounced.
Limitations to plan for
Spot UV is not always suitable for very small text or extremely fine detail. It can also be vulnerable to visible scuffing or cracking at sharply folded areas, particularly if it crosses creases. Avoid placing it across fold lines unless the packaging supplier confirms that the construction and coating approach are appropriate.
As with foil, restraint improves the result. A large block of Spot UV can become visually flat; a targeted gloss pattern often has more impact and better supports the artwork.
Embossing and Debossing for Tactile Appeal
Embossing raises a design element above the surface of the board. Debossing presses it into the surface. Both techniques add physical depth, making them useful when touch is central to the packaging experience.
Embossed logos are popular on gift boxes, fragrance-style packaging, stationery, premium food presentation and other products where customers may spend time examining the pack. Debossing can feel more subtle and crafted, particularly on heavier uncoated stocks.
Choosing between embossing and debossing
| Finish | Visual effect | Tactile effect | Suitable design uses |
|---|---|---|---|
| Embossing | Raised details create highlights and shadow | Noticeably elevated surface | Logos, emblems, bold patterns, short titles |
| Debossing | Recessed details create a quieter, pressed-in look | Indented surface | Minimal branding, letterforms, textured paper designs |
| Blind embossing or debossing | No ink or foil is used | Relies entirely on shape and touch | Natural, understated and premium packaging |
| Foil with embossing | Metallic detail with added dimension | Highly noticeable focal point | Brand marks and selected luxury details |
Embossing and debossing require enough space around artwork to show the intended relief cleanly. Fine details, thin board and heavily inked areas can affect the result. The construction also matters: a deep emboss may not be appropriate near a fold, glued panel or area that must sit completely flat.
Blind embossing and debossing are particularly useful for brands with a minimal visual identity. Rather than adding another colour, they let the paper, light and texture do the work.
Metallic Inks: When to Use Them for Packaging
Metallic inks contain reflective pigments that give printed areas a metallic appearance. Unlike foil, they are printed as ink and can be used for broader fields of colour, gradients and detailed illustrations, subject to the printing method and material selected.
They are useful when a design needs a metallic character over a larger area, or where a foil application would be too restrictive for the artwork. A bronze background, silver illustration or copper-toned pattern may all be better suited to metallic ink than foil.
Metallic ink versus hot foil
Choose metallic ink when you need:
- Larger printed metallic areas
- Detailed imagery or tonal variations
- A softer, less mirror-like metallic look
- Metallic colour integrated into the illustration
- A finish that sits within the printed artwork rather than above it
Choose hot foil when you need:
- A brighter, more reflective highlight
- A crisp focal point such as a logo
- A strong contrast against a matt or uncoated surface
- Small, deliberately placed metallic accents
Metallic inks can look different under varying lighting conditions and on different paper stocks. Their reflectivity is usually more restrained than foil, which can be an advantage for brands aiming for sophistication without a high-shine effect. Always review the artwork on the intended board or a representative sample before finalising colour expectations.
Lamination Choices: Soft Touch vs. Anti-Scratch
Lamination is a protective film applied over printed packaging. It can change how a box feels, how colours appear and how well the surface stands up to everyday handling. Two commonly requested choices are soft-touch lamination and anti-scratch lamination.
Soft touch has a velvety, almost rubberised feel. It is often used to make dark, minimal or premium packaging feel more tactile. Anti-scratch lamination is intended to reduce the visibility of surface marking during handling, making it worth considering for packs that will be stacked, transported, displayed or frequently picked up.
| Consideration | Soft-touch lamination | Anti-scratch lamination |
|---|---|---|
| Feel | Smooth, velvety and tactile | Usually smoother and more practical than tactile |
| Appearance | Often gives a muted, matt finish | Commonly designed to maintain a clean-looking surface |
| Best suited to | Premium presentation, gift boxes, tactile brand identities | Dark backgrounds, high-contact boxes and retail handling |
| Design pairing | Spot UV, foil and embossing can provide contrast | Clean graphics, foil details and practical retail packs |
| Points to confirm | Mark resistance, fold performance and suitability for the intended board | Exact scratch resistance, gloss level and compatibility with added finishes |
Neither option should be selected on appearance alone. Dark solid colours can show fingerprints and rub marks more readily than lighter or patterned designs, even with a protective finish. Box construction, storage conditions and frequency of handling all influence how a surface performs in practice.
Ask for the exact laminate finish available for your project and confirm whether it is suitable for subsequent processes such as foil stamping, Spot UV, embossing, gluing or labelling.
The Paper Box Finish That Matches Your Brand Aesthetic
An innovative finish should make your packaging more recognisable, not merely more elaborate. The most coherent designs start by matching surface treatments to the brand’s personality and the buyer’s expected experience.
A practical finish-to-brand guide
Minimal and contemporary brands often suit uncoated board, blind debossing, a single foil detail or a matt laminate with restrained Spot UV. The aim is clarity and intentionality rather than decoration.
Luxury and gifting brands may combine soft-touch lamination, foil stamping and embossing. Use one dominant feature and one supporting detail to prevent the pack from looking crowded.
Natural and craft-led brands can benefit from textured or uncoated stocks, blind embossing, simple varnish protection and limited ink coverage. If using metallic elements, warmer, subdued tones may feel more in keeping with the material-led look.
Bold, youthful or graphic brands may use high-gloss varnish, metallic ink, holographic foil or Spot UV patterns. Strong finishes work best when the typography and layout remain easy to read.
Technical or product-led brands often need a balance between visual refinement and clear information. A durable laminate or varnish may be more valuable than several decorative finishes, particularly where labels, instructions, batch details or barcodes must remain legible.
Before choosing, create a short hierarchy:
- What must the customer notice first?
- Which element should reward closer inspection?
- Which details are legally required or operationally necessary?
- Where will the box be handled, folded, opened and displayed?
- Which finish is essential, and which is optional?
This hierarchy helps avoid the common mistake of treating every logo, image and phrase as equally important.
For structural formats and board-led presentation, explore custom box options alongside the finish plan. The box style affects what can be applied successfully and where decorative details will be seen.
Custom Varnish and Protective Coatings
Varnishes and coatings provide a way to alter sheen and add surface protection without necessarily using a full laminate. They may be applied across the whole sheet or in selected areas, depending on the design and printing process.
A gloss varnish can increase colour vibrancy and create a polished look. A matt varnish can reduce reflectivity and make a surface feel calmer. Satin finishes sit between the two. Some projects use a combination, such as a matt overall coating with gloss varnish on selected graphic elements.
Questions to ask before specifying a coating
Confirm the following with the packaging manufacturer:
- Whether the coating is available on the chosen board and box format
- How it behaves around creases, scored areas and glue panels
- Whether it is compatible with foil, embossing, Spot UV or applied labels
- Whether the surface needs resistance to rubbing, moisture or other expected handling conditions
- Whether it affects the readability or scan performance of barcodes
- Whether the chosen materials and inks are appropriate for the intended product category and market requirements
Protective coatings are not a substitute for good structural design. A box that is frequently compressed, dragged against other packs or exposed to challenging conditions may need changes to board choice, construction or outer packing as well as a surface treatment.
If your pack includes an applied label, test the label adhesive against the finished surface. A label that works well on uncoated board may behave differently on a soft-touch laminate, varnish or textured stock. Relevant custom stickers and labels should be considered as part of the complete packaging specification, not as an afterthought.
Showcasing Premium Design on Gift Packaging
Gift packaging has a particular job: it must make the product feel worth giving before the recipient sees what is inside. Finishes can turn opening a box into a more deliberate experience, but they should still support the practical needs of closing, storing and transporting the pack.
A strong gift box concept often combines two or three elements:
- A sturdy, well-proportioned box structure
- A base finish, such as uncoated board, matt lamination or soft touch
- One focal detail, such as foil, embossing or a Spot UV pattern
- An interior colour, printed message or contrasting insert where appropriate
- A clear opening experience that does not damage decorative areas
For example, a rigid-style gift presentation may use a matt surface with a small embossed foil logo, while a more playful seasonal pack may use colourful print with a selective gloss pattern. The right choice depends on the item, shelf context and whether the packaging is likely to be retained after opening.
When specifying gift packaging, think about the full customer journey:
- At first glance: Does the finish make the brand and product easy to identify?
- In the hand: Does the material feel consistent with the product’s positioning?
- At opening: Are key decorative elements placed away from stress points and folds?
- After gifting: Will the box still look presentable if it is kept or reused?
Common finish mistakes to avoid
- Combining foil, metallic ink, Spot UV, embossing and multiple laminates without a clear visual purpose
- Applying delicate effects across fold lines, glue flaps or areas subject to repeated friction
- Choosing a dark, solid design without considering fingerprints and surface marks
- Specifying fine details before confirming the board and print process
- Forgetting that interiors, inserts and labels can alter the overall impression
- Assuming a digital artwork preview will accurately show shine, texture or tactile depth
- Failing to check that required information remains legible after coatings and finishes are added
The most effective custom paper box finishes are chosen early, tested on the intended materials and integrated with the box structure. Start with one clear brand objective, select the finish that best delivers it, then add only the details that improve the customer’s experience.
For a broader view of materials, formats and decoration possibilities, review XGolden Print’s packaging box range or learn more about XGolden Print before preparing a production-ready packaging brief.
